Humidity can wreck a concrete coating before the floor even looks wet. If moisture is in the slab or the air, it can lead to peeling, blisters, soft spots, cloudy finish, and bond failure.
Here’s the short version:
- Concrete absorbs water from soil, rain, snowmelt, and humid air.
- Coatings trap that moisture if the slab is not dry enough.
- That trapped moisture creates vapor pressure, which can push the coating loose.
- Air humidity can hurt curing in hours or days.
- Slab moisture can cause failure weeks or months later.
- The main fix is simple: test concrete moisture first, coat second.
If I were coating a garage, basement, or shop in North Idaho or Eastern Washington, I’d check these things before spending a dollar:
- damp spots that keep coming back
- white powder on the slab
- old peeling or blistering
- indoor RH that stays high
- slab test results like ASTM F2170 and ASTM F1869
A few numbers matter here. Many coating systems want in-slab moisture around 75% to 80% RH or lower before a standard install. During application, many floors also do better around 65°F to 80°F and below 60% indoor RH. In basements, keeping indoor humidity around 45% to 55% RH can help limit moisture trouble.
Bottom line: if you skip moisture testing, you risk paying for a floor that can bubble, peel, or fail early. The smart order is inspect, test, fix the moisture source, then choose the coating system.
How to Test for Moisture in Concrete + The Best Fix
sbb-itb-a0e5ae3
How Moisture Gets Into Concrete and Stays There
Those warning signs mean moisture is already moving through the slab. Concrete has tiny pores and capillaries that let water travel below the surface and hang around even after the top looks dry.
Concrete Pulls in Water From the Ground and the Air
Concrete takes in moisture from damp soil, rain, snow, and humid air. In slab-on-grade garages, water can wick up from wet soil below the slab. That risk is higher when there’s no vapor barrier, or when the barrier is torn or worn out. In basements, moisture can come through foundation walls, rise from groundwater, and stick around because cool spaces with low airflow don’t dry fast.
Once that moisture gets into the slab, heat and trapped vapor begin pushing it toward the coating.
Vapor Pressure Pushes Moisture Up Against the Coating
As the slab warms up, water turns into vapor and moves upward. If a surface coating seals the slab and blocks that escape route, pressure starts to build where the slab meets the coating. When that pressure gets past the bond strength, the coating can bubble, blister, and peel.
That’s how hidden moisture turns into damage you can actually see.
Ambient Humidity and Slab Moisture Cause Different Problems
Ambient humidity and slab moisture don’t damage coatings in the same way. Humidity in the air usually affects the finish. Moisture inside the slab goes after the bond.
High humidity during installation can cause condensation on the slab before application. It can also disrupt curing and leave behind a cloudy, tacky, or uneven finish. Problems like that usually show up within hours or days.
Internal slab moisture is a slower-moving problem. It weakens the bond line between the concrete and the coating, which can lead to blistering, delamination, and peeling. In many cases, that damage doesn’t show up until weeks or months after the job is done.
| Moisture Source | Where It Causes Problems | When Damage Appears |
|---|---|---|
| High ambient humidity | Coating surface (finish, cure quality) | Hours to days after installation |
| Internal slab moisture | Bond line (adhesion, delamination) | Weeks to months after installation |
That difference helps you figure out where the issue starts: on the surface or inside the slab. Once you know the source, you can follow a moisture control guide to test before coating.
What Humid Conditions Do to Concrete Coatings
When moisture gets into the slab, the damage tends to show up fast: peeling, blisters, or a weak cure. Those are the three big failure paths, and each one points back to water where it shouldn’t be.
Peeling and Bond Loss Start at the Slab-Coating Interface
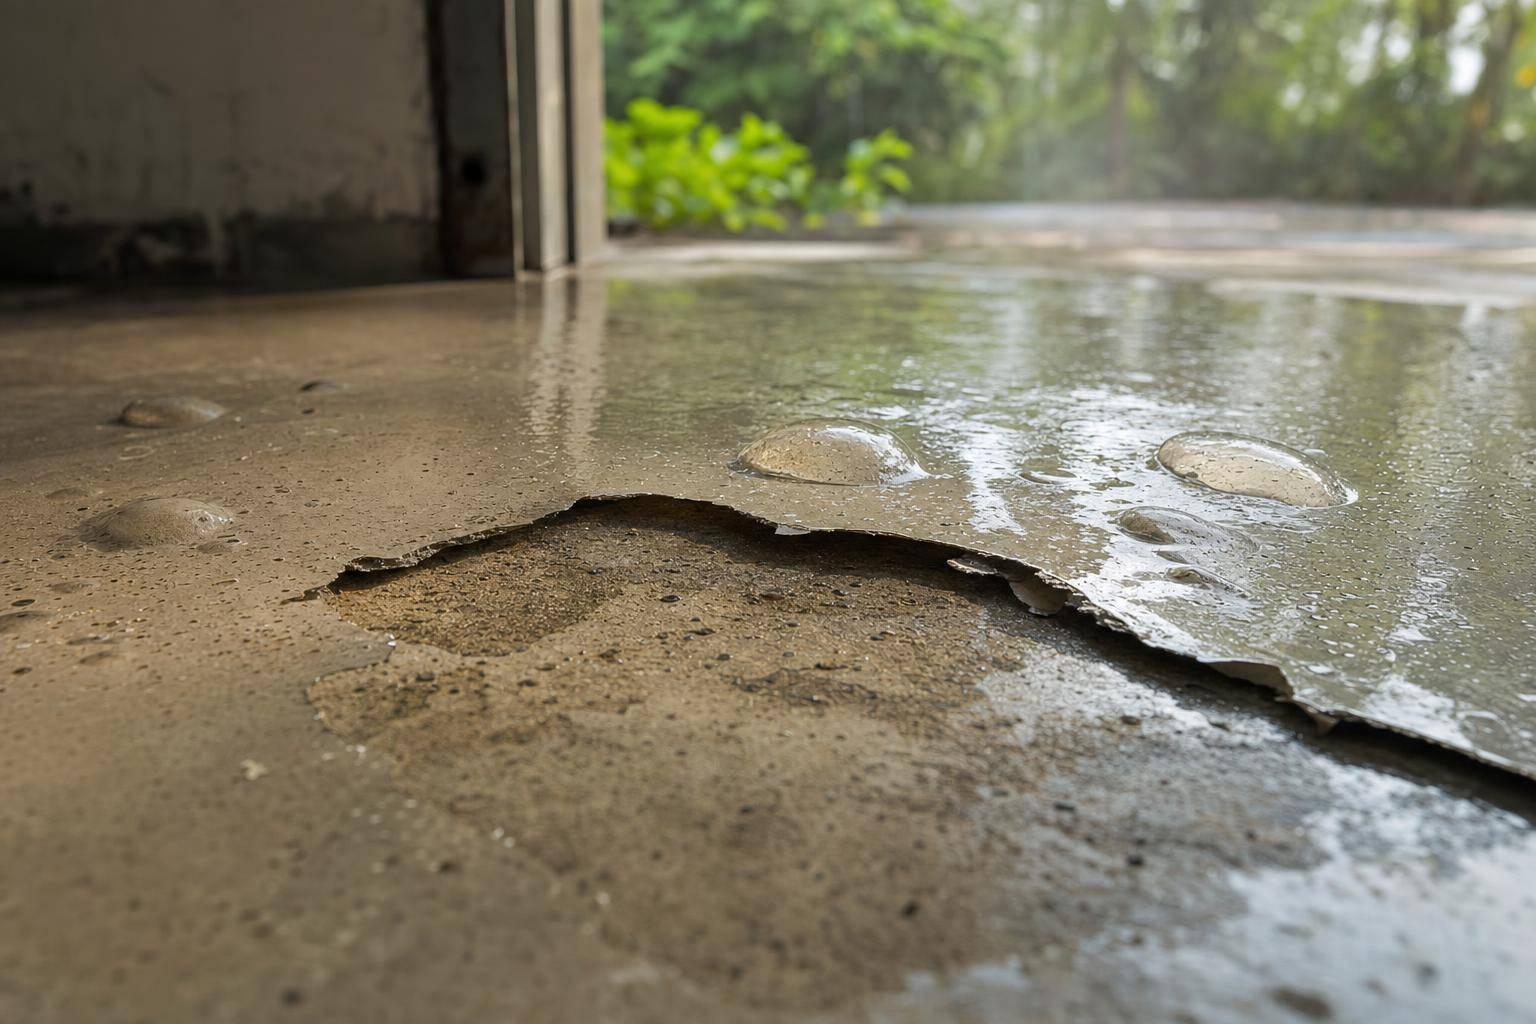
Peeling means the bond has failed. Moisture pressure breaks the bond between the slab and coating, and the film starts letting go in flakes, sheets, or patches. It often begins at hairline cracks, dirty areas, or parts of the slab with higher moisture emission, then spreads as stress builds.
Sometimes the coating doesn’t come off in big sheets at first. It lifts in smaller spots. That’s often the next sign that moisture is working its way up from below.
Bubbles and Blisters Form When Moisture Gets Trapped
Blisters form when trapped moisture pushes upward through the coating. In garages, they often show up in hot-tire lanes or near sun-warmed entries. In basements, damp air and higher slab moisture can create that same pressure from below. Recoating over blisters without fixing the moisture source usually brings the same issue right back, making it essential to focus on preventing moisture-related coating failures from the start.
That’s the frustrating part: the surface may look fixed for a while, but the root problem is still there.
Cloudy, Soft, or Uneven Finishes Can Result From High Humidity During Cure
High ambient humidity can interfere with the coating’s hardening. The result may be haze, soft spots, or an uneven sheen. Many coatings need humidity to stay within the manufacturer’s limit, and the slab must be above the dew point during application.
In enclosed garages or shops with limited airflow, those conditions are easy to miss. And when the cure turns soft or cloudy, the coating doesn’t just look off. It can also lose chemical resistance, wear resistance, and bond strength.
How to Check for Moisture Problems Before Coating
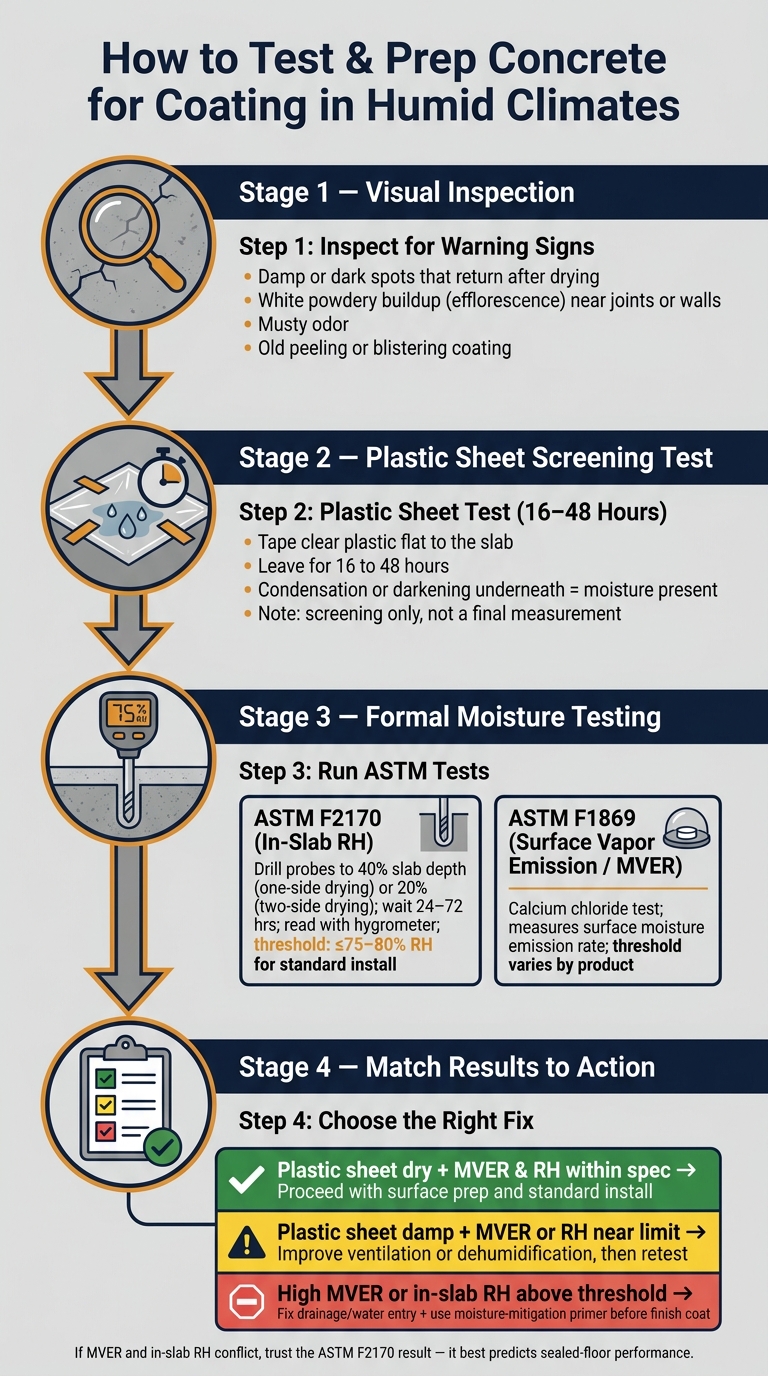
How to Test & Prep Concrete for Coating in Humid Climates
Test for moisture before you pick a product or book the install. The point is simple: catch water in the slab before it turns into vapor pressure under the coating. If that moisture gets trapped, it can lift the coating, cause blisters, or weaken the bond.
Start With Visible Warning Signs and a Basic Plastic Sheet Test
A quick walk through the space can tell you a lot. Watch for concrete that stays dark or looks damp long after rain or snowmelt. Also check for white, powdery buildup near joints or walls. That’s efflorescence, or salt left behind as water moves through the slab. A musty odor or signs that an older coating peeled or blistered are red flags too.
Next, do a clear plastic sheet test. Tape a clear plastic sheet flat to the slab and leave it in place for 16 to 48 hours. If you see condensation underneath, or the concrete darkens, that points to upward moisture movement. This is a screening step, not a final answer.
Use Moisture Tests That Measure Slab Conditions More Accurately
If you need hard numbers, use two standard tests: ASTM F1869 for surface vapor emission and ASTM F2170 for in-slab relative humidity.
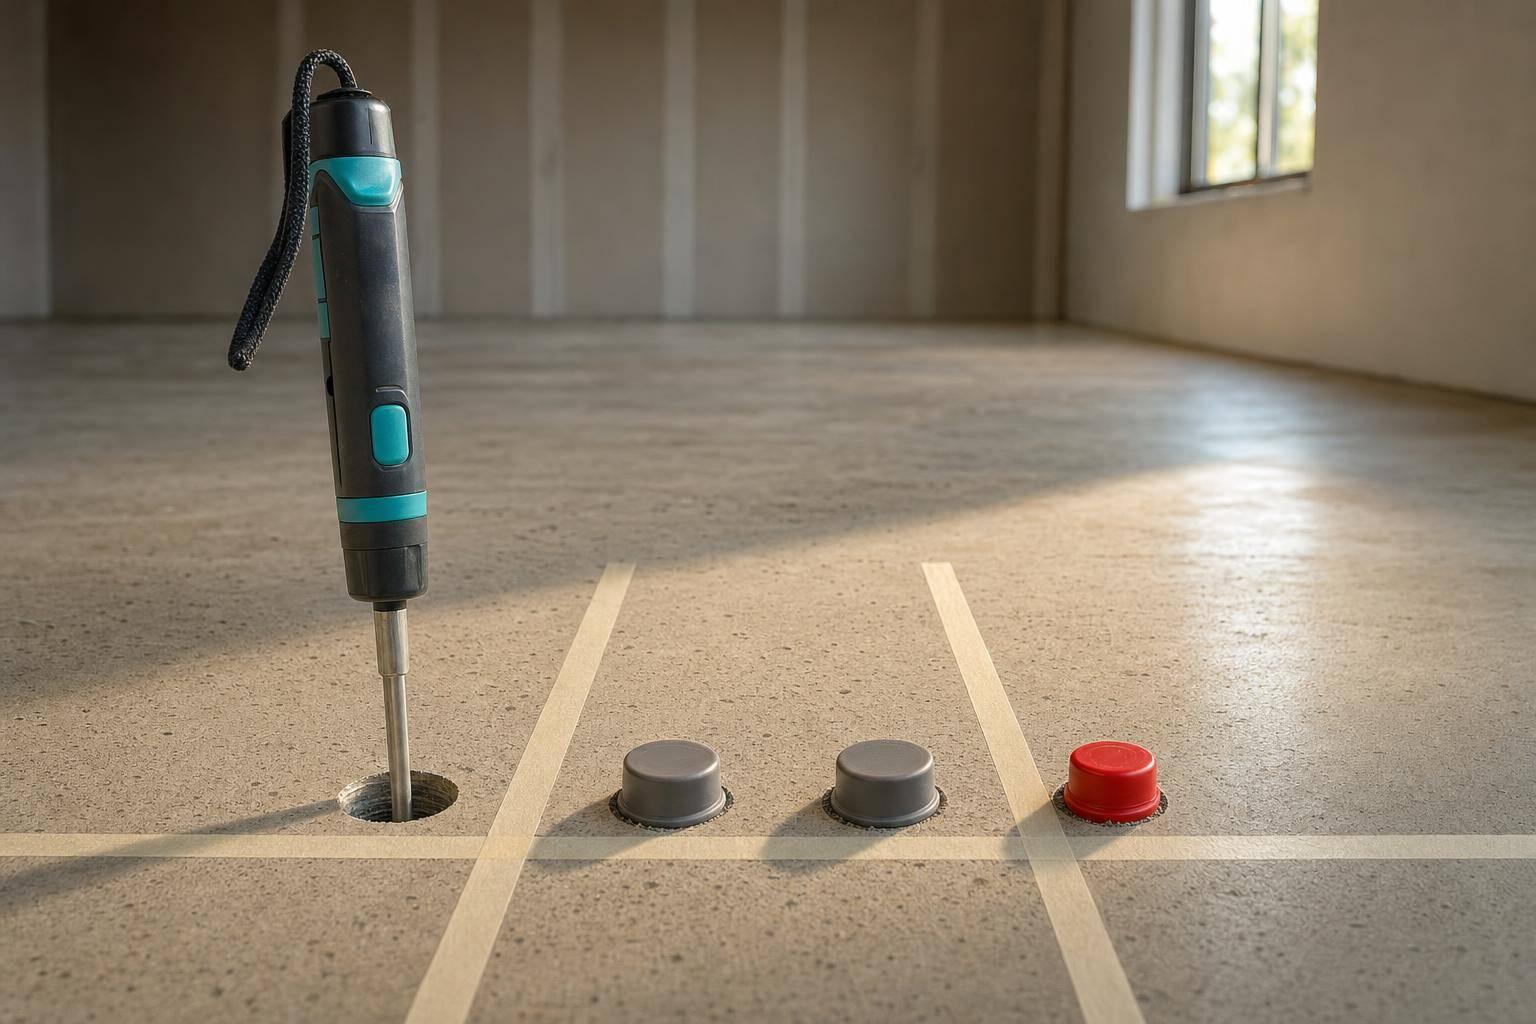
For ASTM F2170, probes are drilled into the slab at 40% of its thickness if the slab dries from one side, or 20% if it dries from two sides. The probes then sit for 24 to 72 hours before readings are taken with a hygrometer. This test measures in-slab RH, which does a better job of predicting sealed-floor performance than a surface reading. As a general benchmark, many coating systems set the maximum internal slab RH at about 75% to 80% before standard installation can move ahead.
Match the Results to the Right Fix
| Moisture Reading | What It Means | Recommended Next Step |
|---|---|---|
| Plastic sheet: dry; MVER and RH within spec | Low moisture risk | Proceed with surface prep and standard installation |
| Plastic sheet: damp; MVER or RH near the limit | Moderate concern | Improve ventilation or dehumidification, then retest |
| High MVER or in-slab RH above product threshold | High moisture | Fix drainage or water entry, then use a moisture-mitigation primer or system before the finish coat |
If the readings don’t line up – for example, low MVER but high in-slab RH – trust the ASTM F2170 result. It reflects what the slab is likely to do once sealed, and that’s the condition that matters most for long-term bond performance.
Those results show whether the slab needs more drying time, drainage fixes, or a moisture-mitigation system before coating.
How to Prevent Humidity Damage in Garages, Basements, and Shops
Once testing shows where the moisture is coming from, use the fix that fits the source. That part matters. Outside water, indoor humidity, and slab vapor are different problems, so they need different solutions.
Use drainage fixes for exterior water, dehumidification for damp indoor air, and mitigation layers for slabs that still test wet.
Garages: Control Outside Moisture, Slab Conditions, and Cure Environment
Start outside. Slope soil away from the garage, extend downspouts, and keep snow piles away from the perimeter. Stop exterior water first, because moisture trapped in the slab can still turn into vapor pressure under the coating.
After washdowns or snow exposure, let the slab dry all the way before testing or coating. Don’t coat a slab if you see condensation or active moisture movement. That’s asking for trouble.
During prep and cure, use dehumidification and keep the space between 65°F and 80°F and below 60% RH. Gentle airflow helps. Strong drafts don’t, especially if they pull humid outdoor air back inside.
If the slab still shows moisture after exterior water is under control, the source is likely below grade and needs a different fix.
Basements: Fix Water Entry First, Then Lower Indoor Humidity
Basements are often the first place coatings fail when slab moisture and wall seepage stay active. Fix water entry before coating. Seal cracks, correct exterior grading, and repair or add sump drainage. Coating over an active moisture problem almost always ends in failure.
Once water entry is handled, run a dehumidifier sized for the space and set it to hold 45% to 55% RH. If the slab is still above the manufacturer’s moisture limits, use a moisture-mitigation primer or barrier before the finish coat.
In shops, those same moisture controls have to stand up to traffic, washdowns, and temperature swings.
Shops: Combine Testing, Moisture-Mitigation Layers, and Durable Coating Systems
Shops deal with water, chemicals, heat, and humidity swings. Add traffic and frequent cleaning, and small moisture issues can turn into coating failure fast. That’s why formal moisture testing is required before coating.
When tests show elevated moisture, use a high-build epoxy vapor barrier, followed by a moisture-tolerant primer, and then the finish coat. Modern moisture-mitigation products can handle MVER readings up to 15–25+ lbs/1,000 sq ft/24 hr when installed the right way, bringing emissions down to levels that finish coatings can tolerate.
For shops in North Idaho and Eastern Washington, Croc Coatings installs the Penntek Evolution industrial coating system, built for heavy traffic, impact, and chemical exposure. When a floor has to hold up under day-to-day commercial use, it makes sense to hire installers who can explain test results, lay out a mitigation plan, and back the system with a warranty.
Conclusion: Moisture Control Is the Key to Long-Lasting Coatings
Humidity can ruin concrete coatings from two directions: moisture in the air and moisture inside the slab. Those two forces work together to build vapor pressure under the surface. Then that pressure pushes up from below.
If the slab can’t dry out, the trapped moisture looks for a way out through the coating. That’s when problems start: bubbles and blisters, bond loss where the slab meets the coating, and later, peeling or flaking. Different symptom, same root issue. Trapped moisture weakens adhesion and cuts the life of the coating short. So the next move is pretty clear: find the moisture source before you coat.
The order matters. Inspect first, test next, correct the source, and then pick the coating system that fits the job—this is why surface prep matters for long-term success. A Coeur d’Alene garage dealing with snowmelt doesn’t need the same prep as a Lewiston basement with seasonal dampness. And neither one matches a Spokane shop that gets washed down on a regular basis. Different moisture problems call for different fixes.
When a slab still tests wet, that’s the point where expert evaluation matters most. Professional moisture testing, including ASTM F2170 in-slab relative humidity probes and ASTM F1869 calcium chloride tests, gives you measured data instead of guesswork. Croc Coatings can pair moisture testing, surface prep, and system selection in one installation process. That kind of planning helps cut down early failure.
After the coating goes in, the job isn’t over. Moisture control still matters. Keep gutters clear, maintain grading, run a dehumidifier indoors, and fix new cracks or damp spots fast. Prevention costs less than repair.
FAQs
How do I know if my concrete slab is too wet to coat?
A concrete slab may look dry and still hold enough moisture to cause peeling, blistering, or bond failure. That’s the catch with concrete: it’s porous, so a quick visual check doesn’t tell you much.
Use professional moisture testing, then compare the results with your coating system’s technical data sheet. Common methods include in-situ RH testing, the calcium chloride test, and the plastic sheet test.
What’s the difference between high air humidity and moisture inside the slab?
High air humidity means there’s a lot of moisture in the air around the slab. That can slow curing, lead to surface issues like amine blush, and create condensation when the slab temperature gets close to the dew point.
Moisture inside the slab is different. It’s water trapped within the concrete itself. As that moisture moves upward as vapor, it can build pressure beneath the coating and lead to bubbling, peeling, and bond failure.
Can a moisture-mitigation primer stop peeling and blistering?
Yes. A moisture-mitigation primer can help stop peeling and blistering because it creates a water-resistant barrier in the concrete.
It’s especially useful for slabs with high relative humidity or high moisture vapor emission. By reducing porosity and forming a strong chemical bond, it helps keep trapped moisture from building vapor pressure that leads to bubbling or bond failure.
For the best results, use it along with professional moisture testing and proper surface prep.