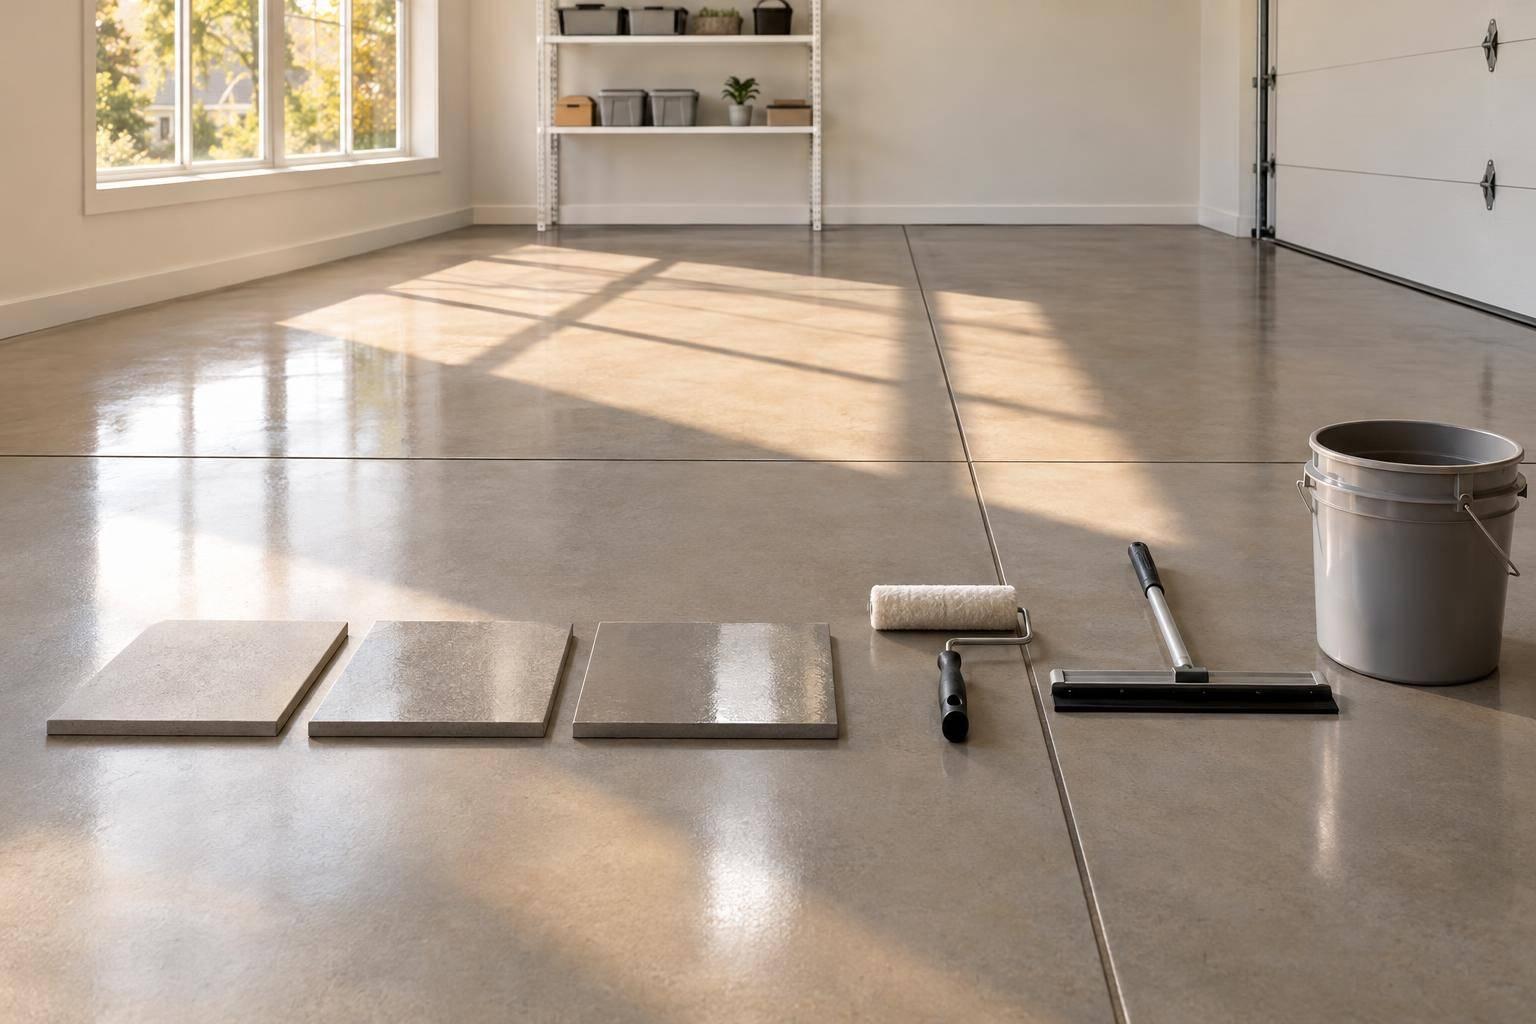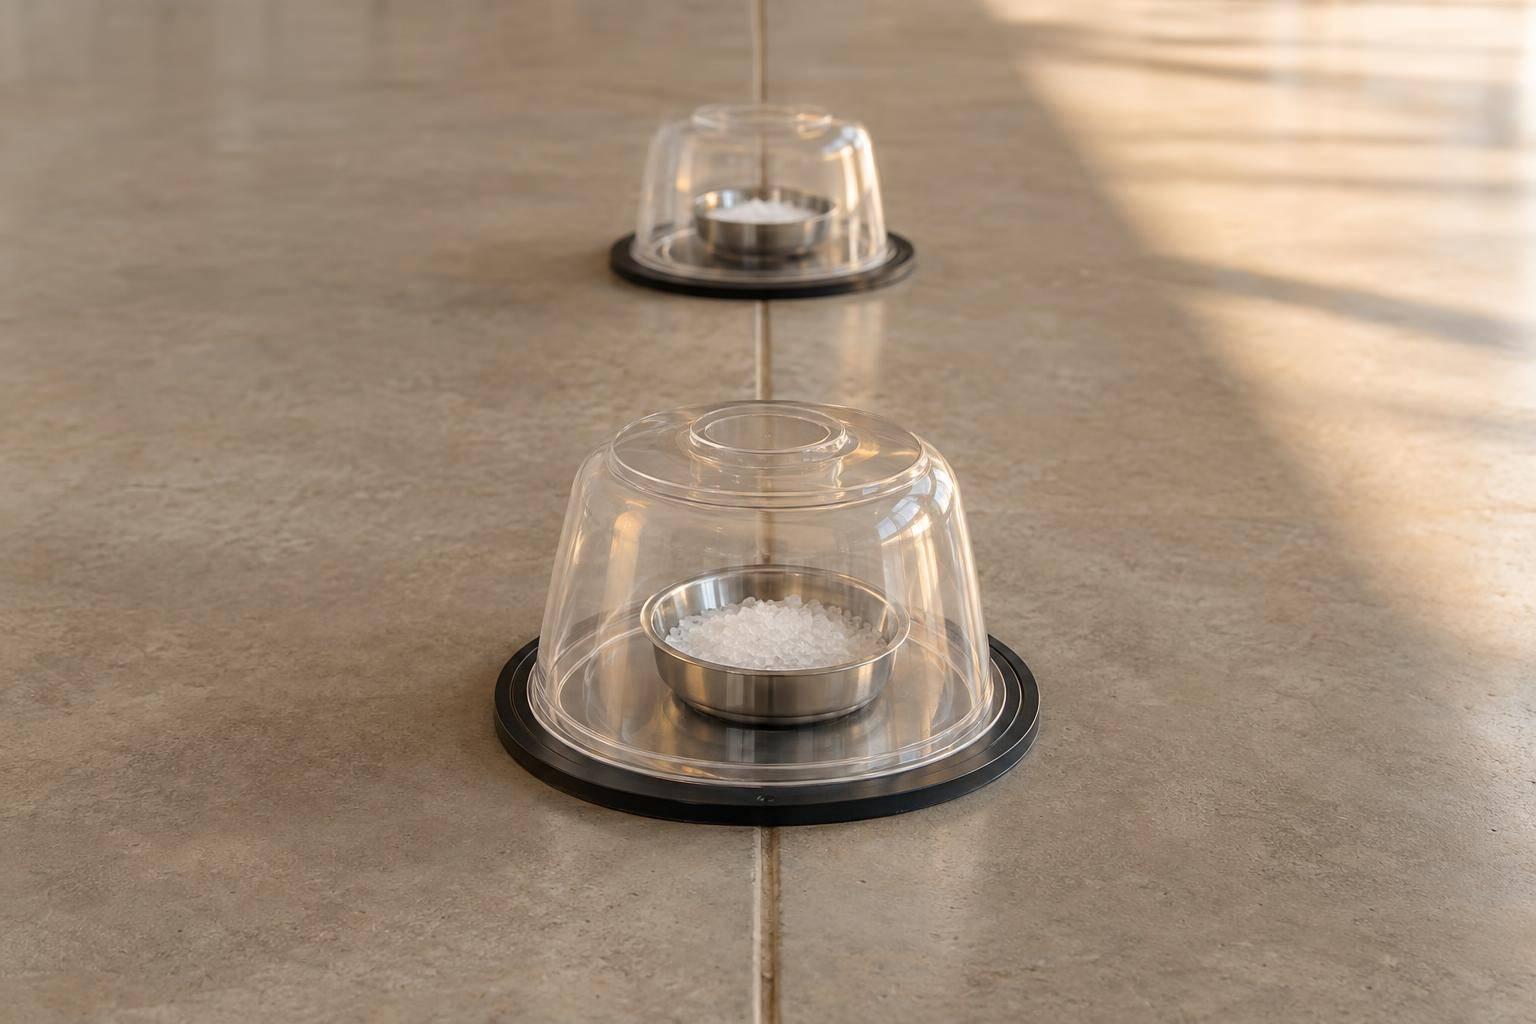
I don’t approve concrete for coating unless every valid moisture reading meets the coating manufacturer’s written limit. For calcium chloride testing, I plan for 60–72 hours of exposure – and repeat tests with broken seals, missing records, or conditions that make results unreliable to avoid coating failures.
Here’s the checklist I use before coating concrete in North Idaho and Eastern Washington:
- Confirm the method: Check ASTM F1869, kit instructions, project requirements, and the coating’s moisture limit. Use ASTM F2170 when internal relative humidity testing is required.
- Prepare and condition: Expose clean concrete, follow asbestos and silica safety rules, and maintain required room conditions for at least 48 hours before testing and throughout exposure.
- Check and place kits: Verify equipment and seals, map locations, and provide three tests for the first 1,000 square feet, plus one for each additional 1,000 square feet or fraction.
- Review results: Record weights, times, conditions, and calculations. Compare each valid result with the limit – not just the average.
- Clear the floor for coating: Correct failures, retest when needed, keep records, and recheck slab and application conditions.
My rule is simple: <u>Pass, correct, or retest – then coat only after unresolved items are closed.</u>
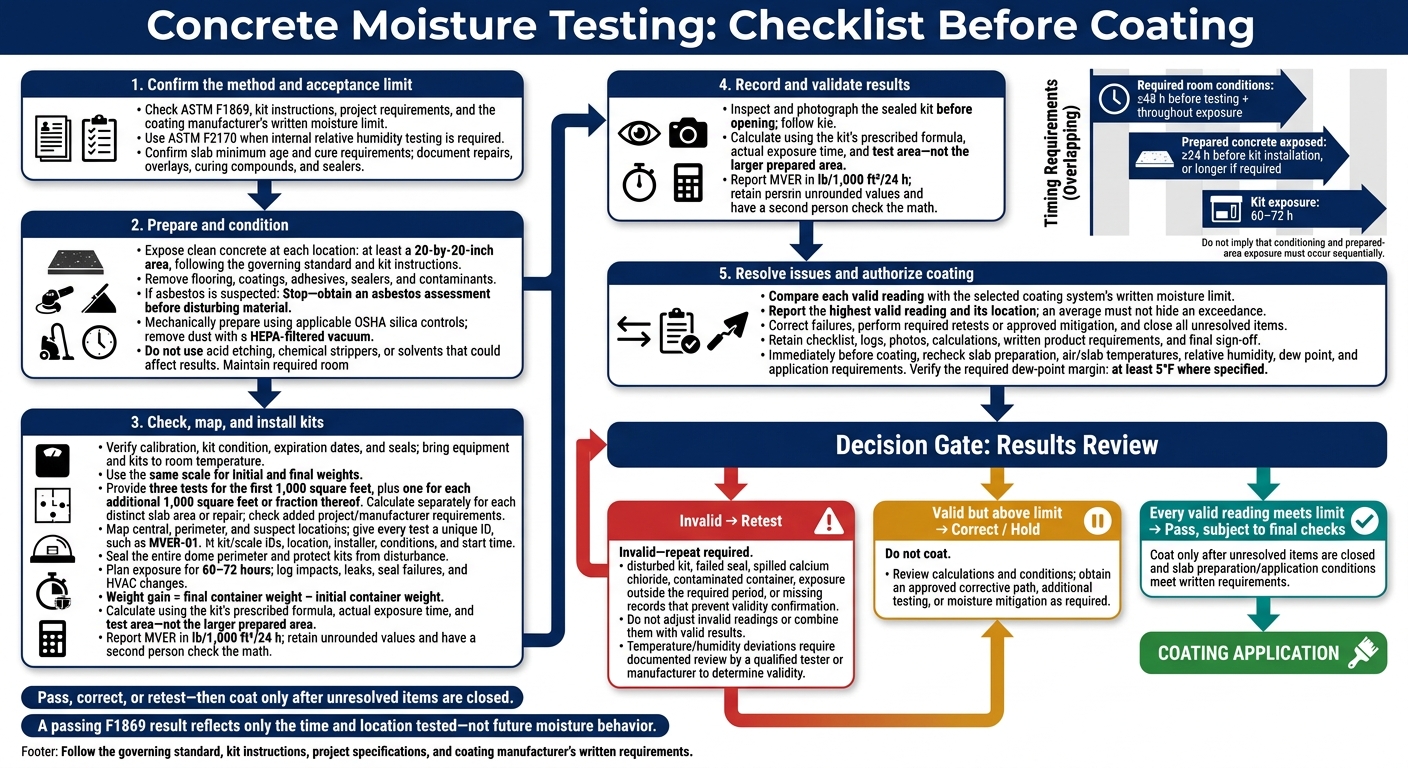
Concrete Moisture Testing: Checklist Before Coating
Calcium Chloride Test ASTM f1869 – Testing For MVER – Orange County Calcium Chloride Test
sbb-itb-a0e5ae3
Step 1: Prepare the Slab and Stabilize Room Conditions
Start with a clean, stable slab and controlled room conditions.
Confirm that the slab meets the coating manufacturer’s minimum age and cure requirements. Record the pour date, repairs, overlays, and any curing compounds or sealers. Address active leaks, delamination, weak concrete, and major surface damage before testing.
Expose Clean Concrete at Each Test Location
Prepare at least a 20-by-20-inch area at each test location, following the governing standard and kit instructions. Remove flooring, paint, coatings, adhesives, sealers, curing compounds, oil, dirt, and other contaminants.
If flooring, backing, or mastic may contain asbestos, stop and obtain an asbestos assessment before disturbing it. Appearance alone cannot rule out asbestos.
Mechanically prepare the concrete, then remove dust with a HEPA-filtered vacuum. Follow applicable OSHA silica controls during grinding, and avoid uncontrolled dry sweeping.
Do not use acid etching vs. grinding comparisons to justify chemical methods; avoid chemical strippers or solvents that could affect test results. Check for remaining residue, visible standing water, cracks, spalls, and weak concrete. Document unresolved conditions and notify the project authority before proceeding.
Maintain Required Room Temperature and Humidity
Enclose the building and use the permanent HVAC system to maintain normal-use conditions for at least 48 hours before testing and throughout the test period. Follow the temperature and humidity range required by the governing standard or project specification.
Leave prepared areas exposed for at least 24 hours before installing kits, or longer if required.
Record the preparation date and time, air temperature, slab temperature when required, relative humidity, measurement locations, and HVAC status. Use verified instruments, and keep them away from vents, doors, heaters, and sunlight.
Log shutdowns, water events, and other disruptions. Before installing kits, restore the required conditions or obtain written direction.
Step 2: Check Equipment and Install Test Kits
Verify Instruments, Temperatures, and Test Kits
Before weighing or installing kits, make sure the scale, thermometer, and relative-humidity meter are clean, working, and in calibration. Let all equipment and kits reach room temperature. Record instrument IDs and calibration status, and use the same scale for initial and final weights, following the kit’s weighing procedure.
Check expiration dates, storage history, packaging, dishes, domes, and seals. Reject kits with damage, broken seals, improper storage, or calcium chloride that is clumped, wet, or contaminated. Keep kits sealed until installation. Record each container’s initial weight and the scale ID. If calcium chloride spills, replace the kit.
Map Test Locations and Confirm the Required Count
ASTM F1869 generally requires three tests for the first 1,000 square feet, plus one for each additional 1,000 square feet or fraction thereof. Calculate the count separately for each distinct slab area or repair, then check for added project or coating-manufacturer requirements.
Spread tests across central, perimeter, and suspect areas – not just spots that are easy to reach. Note separate slab areas, repairs, and differing conditions. Test near cracks or joints only where the method permits.
Give each test its own ID and mark it on a floor plan showing walls, doors, drains, and the area that test represents.
Example test ID: MVER-01
Photograph each prepared location and sealed kit. Keep labels outside the sealing surface. Document inaccessible or excluded areas so gaps in coverage are clear.
Seal Test Kits and Record Start Times
Following the prescribed procedure, place the opened dish directly on clean, exposed concrete to test concrete moisture before coating. Keep the calcium chloride level, promptly cover it with the vapor-impermeable dome, and press the entire perimeter firmly to create a continuous seal. Check for gaps or lifted edges.
Label each test with its ID, location, installer, date, and time. Record conditions at installation with the kit data, including the kit ID and initial weight. Plan removal at the required 60–72-hour mark.
Barricade the kits without changing room conditions, and leave them undisturbed. During exposure, log any impacts, leaks, seal failures, or HVAC changes.
When the exposure period ends, record final weights and review each test for validity.
Step 3: Record Results and Check Test Validity
Once the exposure period ends, remove each kit and complete its record before comparing the results with the coating limit.
Complete Test Records and Calculate Emission Rates
Confirm each test record includes the project name and address, test ID, room or slab area, prepared-area dimensions, surface condition, and nearby cracks, joints, drains, or repairs. Check the kit and scale IDs, initial weight, and installation time. Then add the final weight, removal time, exposure duration, room and slab temperatures, relative humidity, and calculation area. Attach the field sheet, photos, and disruption notes. Use the completed record to decide whether the reading is valid or the test needs to be repeated.
Before opening the kit, inspect and photograph the dome, seal, gasket, tape, and container. Note any gaps, lifting, punctures, condensation, or movement of the dish. Follow the prescribed procedure: promptly replace the dish lid and reseal it with the retained tape before weighing. Record the final weight immediately, to the nearest 0.1 gram.
Subtract the initial container weight from the final weight to calculate weight gain. Use the kit’s prescribed formula, actual exposure time, and test area – not the larger prepared area. Report MVER in lb/1,000 ft²/24 h. Keep the unrounded values and have a second person check the math.
Repeat Invalid Tests and Review High Readings
If the kit was disturbed or its seal failed, treat the reading as invalid before calculating MVER. Apply the same status to tests with spilled calcium chloride, contaminated containers, or exposure outside the required period. Mark each as:
invalid – repeat required
Do not adjust invalid readings or combine them with valid results. Document the cause, correction, replacement-test identifier, and retest date. For temperature or humidity deviations, record the start and stop times, affected locations, corrective action, and retest date. Have a qualified tester or the manufacturer decide whether the data is valid.
Compare every valid reading with the selected coating system’s written moisture limit. Report the highest valid reading and its location. An average must not hide a result that exceeds the limit. If any valid reading exceeds that limit, do not proceed with coating. Doing so is one of the most common epoxy floor mistakes that leads to delamination.
For high or uneven readings, check the calculations and condition logs. Inspect the slab for cracks, joints, wet spots, drainage problems, or contamination. Confirm whether the next step requires additional MVER testing, in-slab relative-humidity testing, pH testing, or a moisture-mitigation system. Keep coating work paused until the corrective path is approved. A passing F1869 result reflects conditions only at the time and location tested – not future moisture behavior.
Conclusion: Confirm the Slab Is Ready for Coating
After the final retest, mark each item Pass, Correct, or Retest. Do not move forward until all unresolved items are closed. Keep the completed checklist, logs, labeled photographs, calculations, written product requirements, and final sign-off in the project file.
Review the pre-installation checklist and check site conditions again immediately before coating. Slab preparation and application conditions must meet the coating system’s requirements. Record air temperature, slab temperature, relative humidity, and dew point. Verify the required dew-point margin – at least 5°F where specified – and get written approval before coating.
Start installation only after conditioning, testing, corrective work, and any required moisture mitigation are complete.
FAQs
When should I use MVER versus in-slab RH testing?
Use both tests to get a complete moisture profile. ASTM F1869 (MVER) measures vapor escaping from the slab’s top 1/4 to 1/2 inch, providing a surface-level assessment. Today, it’s used mainly in forensic investigations, and curing compounds can affect the results.
ASTM F2170 (in-slab RH) is generally considered more reliable for pre-installation assessments. It measures moisture at 40% of the slab’s depth, detecting internal moisture that surface tests may miss.
How soon should I retest after a high moisture reading?
Address the excess moisture by allowing more drying time or using a moisture-control method, such as a vapor barrier or a specialized moisture-mitigating coating. Then retest at the same locations. Wait to apply the coating until those tests confirm acceptable moisture levels to help prevent coating failure.
Record both the initial high reading and the successful retest. This provides a clear record of site conditions for warranty coverage.
Can seasonal changes affect my slab’s moisture results?
Yes. Heavy snow, seasonal humidity, and high water tables in North Idaho and Eastern Washington can change how much moisture moves through and beneath concrete. Cooler temperatures can increase moisture movement toward the surface, while heating and cooling cycles change indoor conditions.
Tests show the slab’s condition only at the time of testing. Keep testing conditions stable and record readings to track moisture trends before coating work begins.