Testing for moisture in concrete floors is essential to avoid moisture-related coating failures like bubbling and peeling. Even if a concrete floor looks dry, hidden moisture can cause serious issues. Here’s a quick breakdown of the key methods to test for moisture:
- Plastic Sheet Test (ASTM D4263): A simple, low-cost method to check for surface moisture. Look for water droplets or discoloration under the sheet after 16–24 hours.
- Calcium Chloride Test (ASTM F1869): Measures the rate of moisture vapor emission from the surface. Safe levels are typically below 3 lbs/1,000 sq. ft. over 24 hours.
- Relative Humidity (RH) Test (ASTM F2170): The most accurate method for internal moisture. Probes measure RH inside the slab, with acceptable levels usually between 75% and 85%.
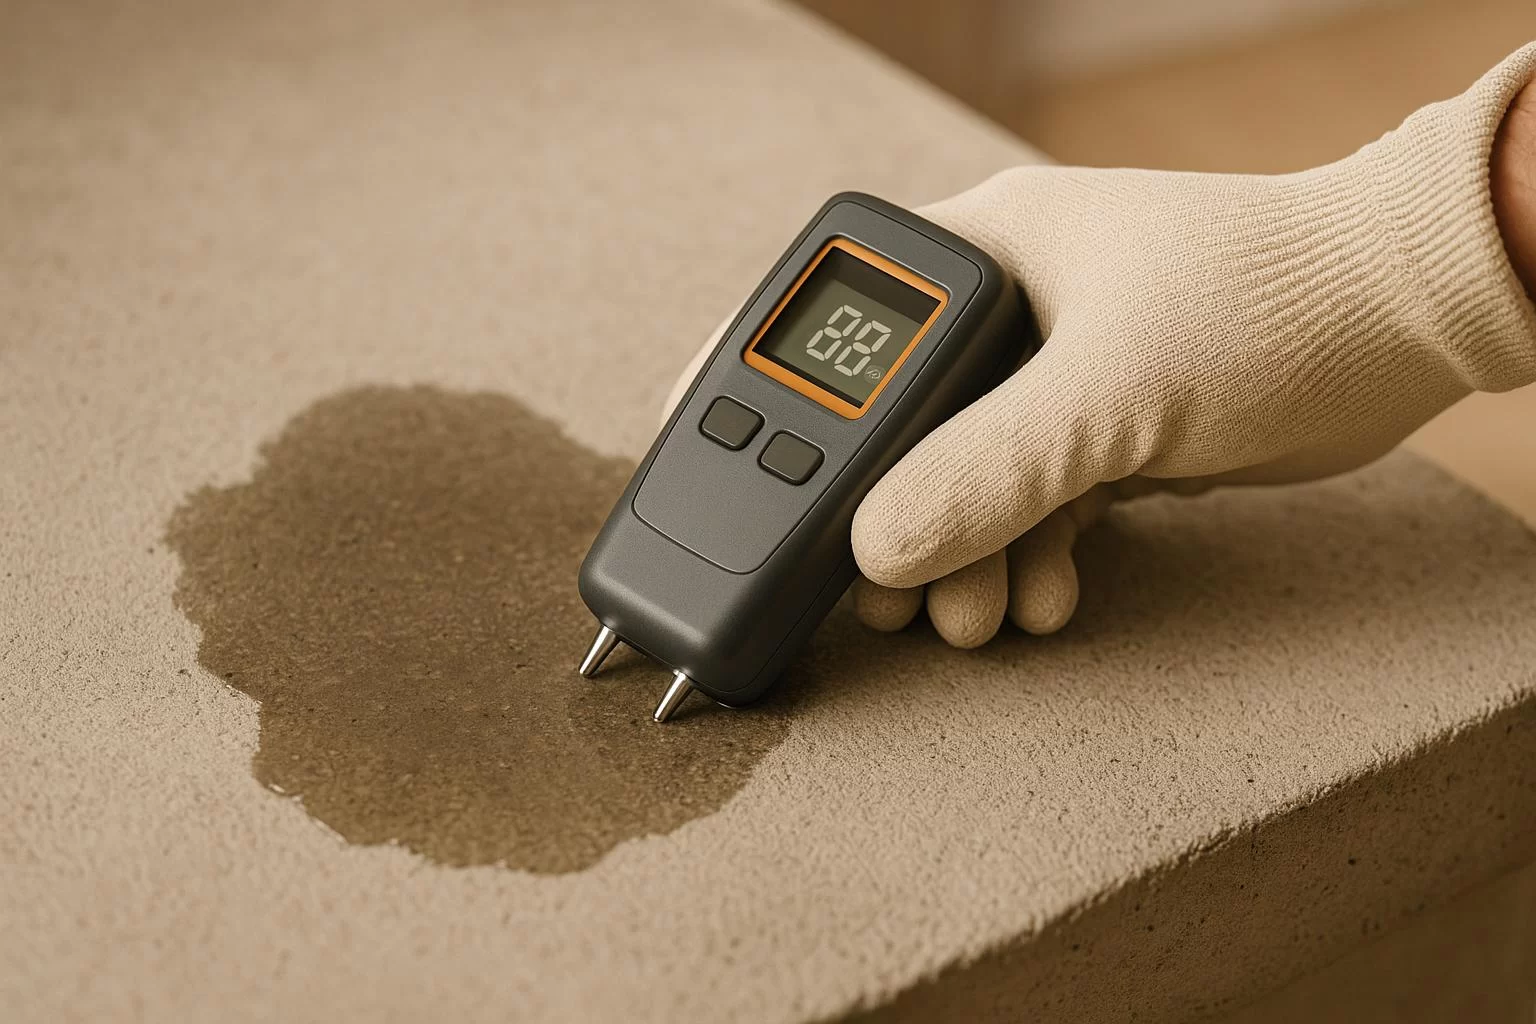
- Moisture Meters (ASTM F2659): Quick, non-invasive tools to scan for surface moisture. Useful for identifying problem areas.
Each test serves a specific purpose, and results must align with your coating manufacturer’s moisture limits to ensure proper adhesion and avoid voiding warranties. If moisture levels are too high, mitigation steps like dehumidification or vapor barriers may be required. Always verify results with professional-grade tools or consult an expert before applying coatings.

Concrete Moisture Testing Methods Comparison Chart
Measuring Relative Humidity using the In Situ Test Method
sbb-itb-a0e5ae3
Plastic Sheet Method: A Simple and Affordable Test
The plastic sheet method, officially referred to as ASTM D4263, is an easy and low-cost way to check for moisture in concrete. With materials costing between $2 and $20, you can perform this basic "pass/fail" test using items from your local hardware store. While it’s useful for an initial check, keep in mind that this method only evaluates the top half-inch of the concrete and doesn’t provide exact moisture levels. Here’s how to conduct it step by step.
How to Do the Plastic Sheet Test
Start by cutting a 4-mil thick clear polyethylene sheet into a size of either 18×18 inches or 24×24 inches. Tape the sheet securely to a visually dry section of your concrete using duct tape, making sure all four edges are sealed tightly. Use your fingernail to press down along the taped edges to ensure there are no gaps. Leave the sheet in place for 16–24 hours, though some professionals suggest waiting up to 48 hours for more reliable results. For accuracy, run your HVAC system for 48 hours beforehand to simulate normal conditions. You can also place an incandescent lamp near the sheet to encourage moisture to move toward the surface.
Reading the Test Results
After the waiting period, carefully check the underside of the plastic sheet. If you find water droplets or fog, it means the slab is releasing moisture, and you’ll need further testing to test concrete moisture before coating. Similarly, darkened or discolored concrete under the plastic is another sign of moisture. If droplets appear on the top of the plastic, that points to high room humidity rather than slab moisture – use a dehumidifier and repeat the test. If there are no visible changes, the concrete might be suitable for basic floor coatings, but a secondary test is still advised for high-performance systems.
"If you peel up the plastic and find it is damp beneath, you might have a moisture problem in your concrete." – Mizuki Hisaka, Contributing Writer, Angi
It’s important to note that this test only confirms whether moisture is present – it doesn’t quantify it. If the plastic sheet test suggests moisture, you’ll need to follow up with a Calcium Chloride or Relative Humidity test to get the precise data required by coating manufacturers.
Calcium Chloride Test: Measuring Moisture Emission Rates
The calcium chloride test, also known as the Moisture Vapor Emission Rate (MVER) test, goes beyond the basic pass/fail results of the plastic sheet test to provide a precise measurement of moisture emission. This test calculates the volume of water vapor escaping from your concrete slab, focusing on the top half-inch where nearly 90% of moisture vapor emission occurs. Conducted according to ASTM F1869 standards, it’s especially valuable when applying thin-film coatings or adhesives that require strong surface bonding.
How to Perform the Calcium Chloride Test
To get started, you’ll need a standardized test kit, which typically costs between $20 and $35. These kits include everything you’ll need: a pre-weighed dish of anhydrous calcium chloride, a transparent plastic dome, and a pressure-sensitive seal. Before starting, ensure your HVAC system has been running for at least 48 hours to stabilize the environment. Maintain temperatures between 65°F and 75°F, with a relative humidity of 40%–60%.
Prepare a 20-inch by 20-inch section of the concrete by grinding it to achieve a surface profile of ICRI CSP‑1 to CSP‑2. Avoid using water, acid etching, or chemical strippers, as these methods can interfere with the test results. Next, weigh the calcium chloride dish (with its lid) using a digital scale accurate to 0.1 grams, confirming it matches the factory weight listed on the label.
Place the dish on the prepared concrete surface and seal it under the plastic dome, pressing firmly to ensure an airtight seal. Run your fingernail along the edges of the dome and press the lid gently to double-check the seal. Leave the test in place for 60–72 hours. Once the time has elapsed, carefully remove the dome with a razor blade, re-weigh the dish, and calculate the weight gain. This measurement is then converted into a moisture emission rate, expressed as pounds per 1,000 square feet per 24 hours.
Safe Moisture Levels for Coatings
For most coatings, the moisture emission rate must not exceed 3.0 lbs per 1,000 square feet per 24 hours. High-performance systems, such as the Penntek Evolution coating used by Croc Coatings, require moisture levels within this range to ensure proper adhesion and to avoid common coating failures like bubbling, delamination, or discoloration. Always check the specific requirements of your coating manufacturer, as acceptable moisture levels can differ. If your test results show higher emission rates, it’s crucial to address the moisture issue with appropriate mitigation systems before proceeding with any coatings.
"This test gives a snapshot of surface-level moisture emissions. It’s a good option for evaluating conditions when installing thin coatings or adhesives that rely on surface bonding." – Tom Dassie, CustomCrete
Relative Humidity Test: Accurate Internal Moisture Measurement
The relative humidity (RH) test is the go-to method for assessing internal moisture levels in concrete slabs. While surface tests only scratch the surface – literally – RH probes dive deep, measuring humidity within the slab itself. This approach provides a comprehensive view of the slab’s moisture condition. Following ASTM F2170 standards, it’s widely regarded as the best practice in the industry for monitoring internal moisture. Considering that over $1 billion is spent annually on fixing moisture-related flooring failures, this kind of accurate testing is crucial.
How to Perform an RH Test
To get started, you’ll need a 3/4-inch carbide-tipped drill bit to drill into the concrete. The depth of the holes depends on the slab type: for ground-level slabs, drill to 40% of the total thickness, while suspended slabs require drilling to 20% of the thickness. This ensures the readings reflect internal moisture rather than just surface conditions. After drilling, it’s important to vacuum out all dust and debris – any leftover particles can interfere with the accuracy of your readings.
Next, insert the probes into the cleaned holes and seal them properly. Before drilling, make sure the HVAC system has been running for at least 48 hours, and allow the probes to equilibrate for 24 hours after installation. Tools like the Rapid RH L6 (starting at $890) or the Tramex Hygro-i2 (3-pack for $385) deliver ASTM-compliant results with an accuracy of ±2% RH. Once the probes have stabilized, you can interpret the readings to determine whether the slab is ready for coating.
Understanding RH Test Results
Most coating manufacturers specify acceptable RH levels between 75% and 85%. Hardwood flooring has the strictest requirements, usually needing RH levels at or below 75%. On the other hand, standard epoxy coatings can handle levels as high as 85%. For high-performance systems like the Penntek Evolution coating used by Croc Coatings, staying within these ranges is essential to avoid issues like poor adhesion, bubbling, or delamination by using the best coatings for preventing moisture.
Some industrial epoxy systems equipped with moisture mitigation primers can handle RH levels up to 99%, but it’s critical to consult the technical data sheet for your specific product. Using a general threshold instead of the manufacturer’s guidelines could void your warranty. Most manufacturers recommend RH levels between 75% and 85%, or equivalent moisture content benchmarks like 3.5%–4.5%. Always double-check the product specifications to ensure proper application and long-term performance.
Moisture Meter Testing: Quick Surface Checks
After conducting in-depth methods like the Calcium Chloride and RH tests, moisture meters provide a fast way to screen large floor areas for surface moisture. These electronic tools scan concrete floors quickly, focusing on the top 0.5 inches. While they don’t replace deeper RH tests, they’re perfect for identifying "hot spots" across expansive areas in just minutes.
Using a Moisture Meter for First Checks
There are two primary types of moisture meters. Pin-type meters measure electrical conductivity using spring electrodes pressed directly onto the concrete surface. In contrast, pinless meters rely on high-frequency signals and rest flat on the surface without causing any damage. Pinless meters are particularly handy for scanning large areas quickly, as they detect elevated moisture levels without leaving marks.
For accurate readings, ensure the HVAC system has been running for at least 48 hours before testing. Clean both the concrete surface and the meter’s electrodes thoroughly. While scanning, use the "Hold" button to lock readings in hard-to-see spots like corners or under low obstructions. Professional-grade tools such as the Tramex Concrete Moisture Encounter CME5 (priced at $645) or Wagner Meters C555 (priced at $545) are reliable choices. For basic home inspections, entry-level options range from $14 to $55. If high readings are detected, follow up with an RH test for a more precise internal moisture measurement and follow concrete moisture testing standards to ensure accuracy.
When to Use Moisture Meters
Moisture meters are ideal for initial inspections and broad area scans. They’re also a great follow-up tool if a plastic sheet test has already revealed subsurface dampness. Elevated readings from a moisture meter indicate areas that may require further investigation with RH tests before proceeding with any floor coating applications. As Wagner Meters explains:
"When placed on the smooth, flat surface of the slab, the C555 provides fast, non-destructive ‘wet/dry’ qualitative moisture measurements. These measurements show where potential problem areas are, giving you a good indication of where to install the Rapid RH L6 Smart Sensors."
Acceptable moisture levels typically fall between 3.5% and 4.5%, though this can vary depending on the flooring manufacturer. If your meter detects high moisture levels, try running a dehumidifier for 24 hours and then re-test. Keep in mind that moisture meters are screening tools and should not be used as the final measure. Always confirm results with an RH test to assess moisture deeper within the slab before applying any coatings.
What to Do After Testing
Once testing is complete, compare your results to the specifications provided by the coating manufacturer. It’s critical that your findings align with the manufacturer’s requirements – any discrepancies could void warranties and negatively impact the coating’s performance.
Checking Manufacturer Requirements
Each coating system has specific moisture tolerance levels, usually expressed as either a Relative Humidity (RH) percentage or a Moisture Vapor Emission Rate (MVER) standards. To ensure compliance, consult the technical data sheet for your chosen coating and compare your test results to the maximum allowable limits. For instance, the Penntek Evolution system from Croc Coatings has clearly defined RH thresholds that must be met to maintain its lifetime warranty.
Although moisture testing adds a few hours to the process, skipping it could result in a failed floor that takes days to replace and costs thousands of dollars. Professional installers always verify these numbers before applying a coating. For example, if your RH test shows 85% but the manufacturer’s limit is 75%, the moisture issue must be resolved before moving forward. Once non-compliant readings are confirmed, the next step is moisture mitigation.
Fixing High Moisture Problems
When moisture levels exceed acceptable limits, corrective measures are necessary. Excessive moisture vapor transmission (MVT) can cause bubbling and softening of coatings as water condenses on the surface.
To address MVT, consider using specialized moisture vapor control systems or enhancing ventilation and dehumidification, depending on the situation. These systems are especially common in environments like hospitals, food processing facilities, and manufacturing warehouses, where downtime is costly and must be minimized.
If surface condensation is the issue, focus on assessing the dew point and ambient humidity levels. Condensation on the slab can lead to coating failure. In some cases, running a dehumidifier for a few days and improving air circulation can lower moisture to acceptable levels. For new slabs, regular testing during the drying phase is recommended before scheduling the coating installation. After taking these corrective actions, always re-test the moisture levels to confirm they meet the necessary standards before proceeding with the installation.
Conclusion
Checking concrete floors for moisture is a critical step to protect your flooring investment. Whether you opt for a straightforward plastic sheet test or a more advanced RH probe, catching moisture issues early can save you thousands of dollars in repairs and prevent problems like bubbling, peeling, or mold growth. As flooring expert Mizuki Hisaka explains:
"Testing concrete moisture levels before installing flooring protects your investment, as hidden moisture can cause warping, mold, bubbling, and cracks in your new floors".
Each testing method serves its purpose. Surface tests, such as moisture meters and calcium chloride kits, are great for quick evaluations, while internal RH testing offers the precision needed for more demanding installations. Always stick to your coating manufacturer’s moisture guidelines – exceeding those limits not only voids warranties but also jeopardizes the floor’s durability.
Once your test results align with the manufacturer’s specifications, you can move forward with confidence. For those in North Idaho and Eastern Washington, professional installation is key to ensuring both accurate moisture testing and proper application. Companies like Croc Coatings use the Penntek Evolution system, which is four times stronger than epoxy, and include moisture testing in their one-day installation process. Their lifetime warranty hinges on meeting strict moisture requirements, verified by their certified team before applying any coating.
If DIY tests reveal dampness or condensation, it’s wise to consult a professional. Experts in waterproofing can address the root causes by installing moisture vapor control systems, improving ventilation, or adding specialized barriers. Considering the average flooring project costs around $3,160, spending a few hundred dollars on professional testing and mitigation is a smart move.
FAQs
Which moisture test should I use for my coating project?
The best way to test for moisture depends on what you need and how precise the results must be. A moisture meter offers a fast, non-invasive way to get an initial reading, making it great for quick assessments. If you need more detailed results – especially for applications like coatings – a calcium chloride test is a reliable choice. This method measures how much moisture vapor is emitted, helping confirm if your concrete floor is ready for coating.
How many test locations do I need across my concrete floor?
When determining the number of test locations for your concrete slab, it all comes down to the slab’s size and variability. For smaller to medium-sized slabs, industry standards suggest testing moisture levels at 3 to 5 points. However, for larger or more intricate slabs, you may need to test at additional spots to catch any inconsistencies and ensure precise results. The main objective? To get a comprehensive picture of how moisture is distributed across the entire slab.
Can I coat concrete if my moisture readings are too high?
If the moisture readings are too high, it’s best to hold off on coating the concrete until the levels drop to an acceptable range, usually below 4–4.5%. High moisture levels can lead to problems like poor adhesion, bubbling, or even delamination, which can result in expensive repairs. Taking the time to lower the moisture levels first helps ensure a long-lasting and effective coating application.