Epoxy flooring is popular for its durability and polished look, but choosing between DIY and professional installation depends on your budget, skill level, and desired lifespan. Here’s the key takeaway:
- DIY Costs: $250–$1,000 for a 400 sq ft garage. Lifespan: 2–5 years. Involves acid etching vs. grinding considerations, thinner coatings (2–5 mils), and high failure rates (up to 90% in humid areas). Prep work is time-consuming and requires tools like diamond grinders.
- Professional Costs: $2,000–$6,000 for the same space. Lifespan: 10–30 years. Includes diamond grinding, thicker coatings (15–30+ mils), and warranties (5–15 years). Offers better durability and faster installation (often 1 day).
Quick Comparison:
| Factor | DIY | Professional |
|---|---|---|
| Cost | $250–$1,000 | $2,000–$6,000 |
| Lifespan | 2–5 years | 10–30 years |
| Coating Thickness | 2–5 mils | 15–30+ mils |
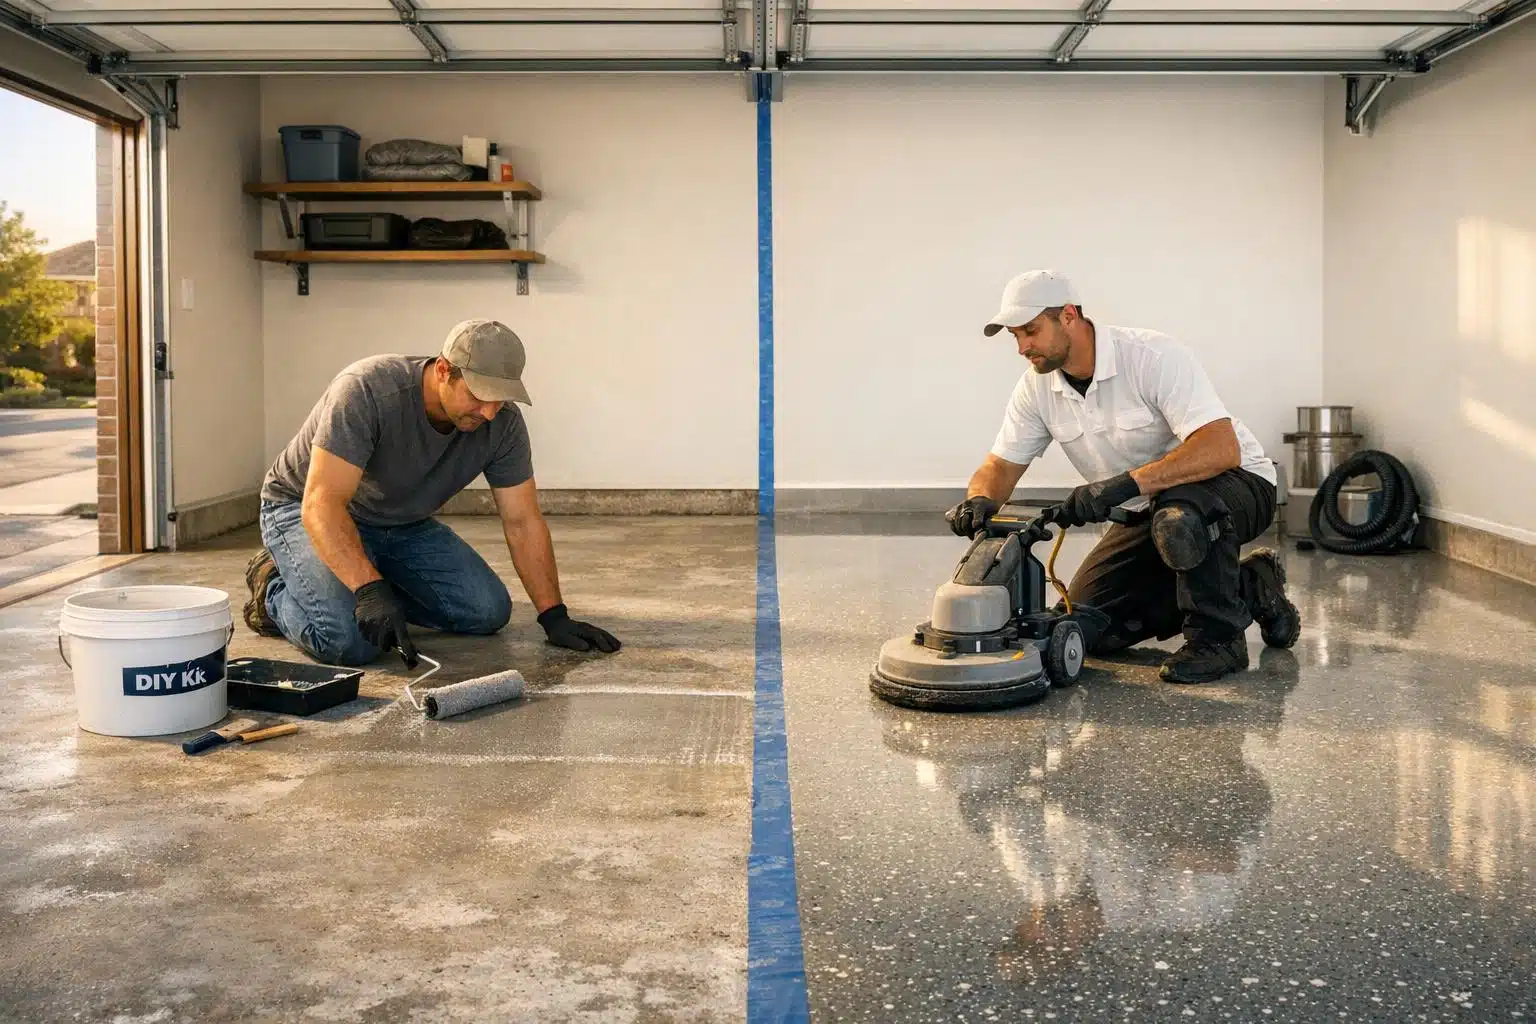
| Preparation | Acid etching | Diamond grinding |
| Failure Rate | High (30–90%) | Low |
| Warranty | None | 5–15 years |
| Installation Time | 2–4 days (DIY labor) | 1 day |
DIY may save money upfront but risks peeling, shorter lifespan, and costly repairs. Professional installation offers long-term durability, superior results, and peace of mind.

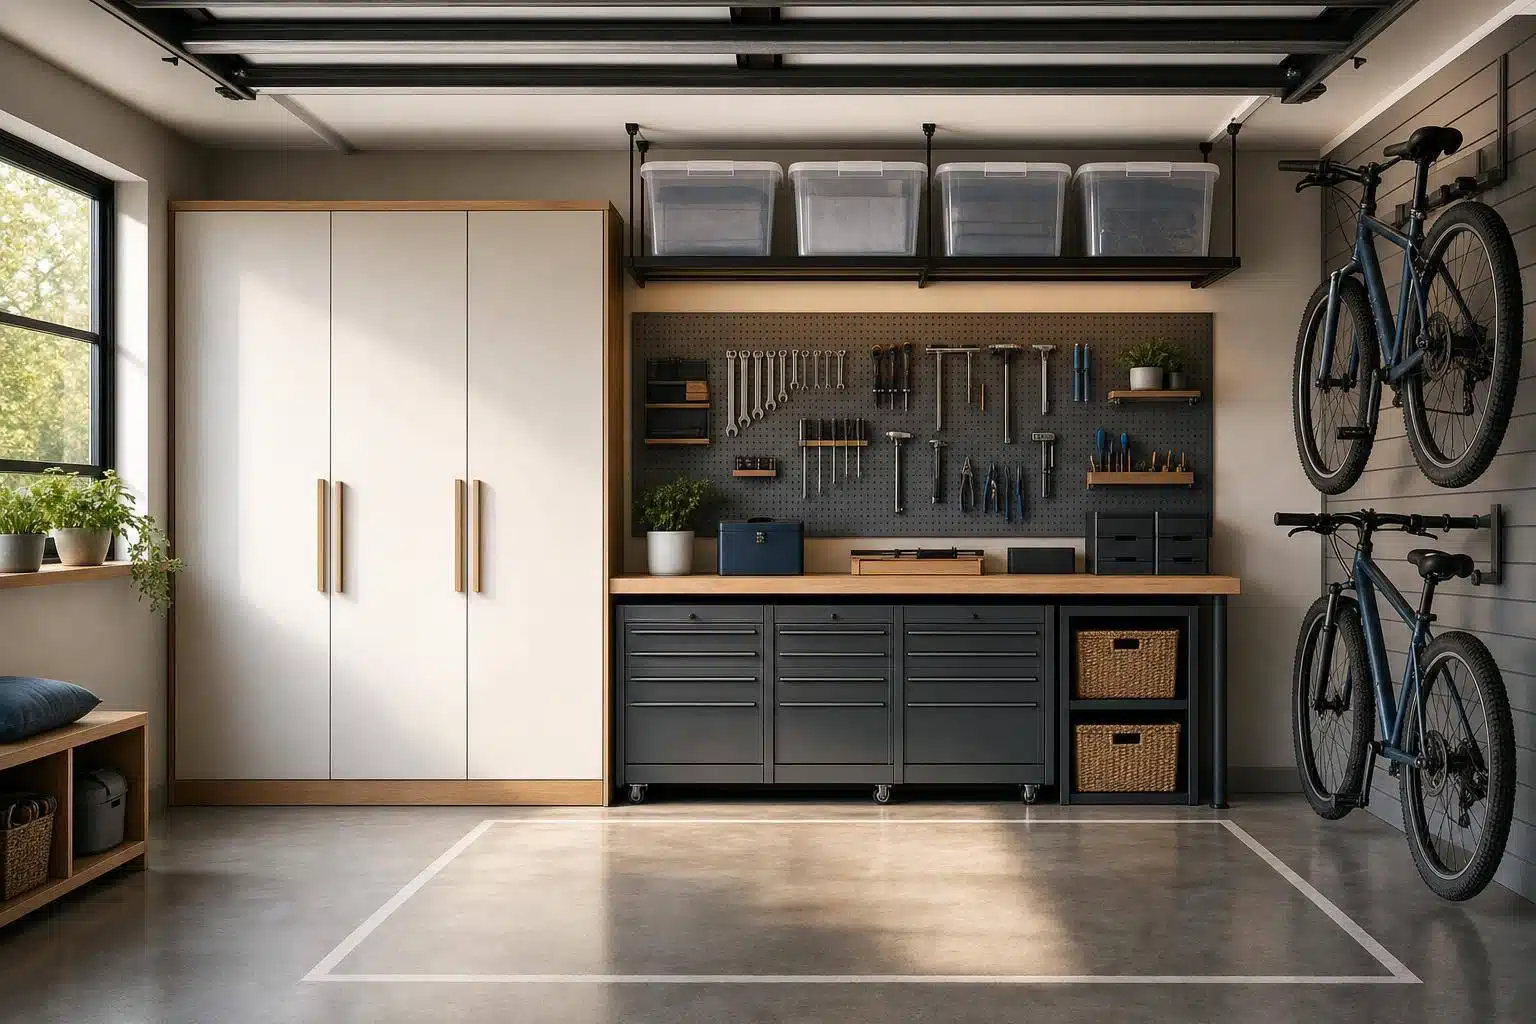
DIY vs Professional Epoxy Flooring Cost Comparison for 400 sq ft Garage
DIY Epoxy Flooring: Costs and What to Expect
Material and Tool Costs
For a standard 400 sq ft two-car garage, a DIY epoxy kit typically costs between $150 and $350. These kits are usually water-based, making them thinner and less durable compared to the 10–20 mils thickness of professional-grade 100% solids epoxy. With DIY kits, you’re working with a thinner layer of 2–4 mils.
In addition to the kit, you’ll need tools like rollers, brushes, mixing buckets, tape, and safety gear, which can add another $50–$150. Then there are the unexpected costs that often creep up. For example, if your concrete has cracks, patching materials can cost anywhere from $25 to $250. Oil stains? You’ll need degreasing products, which range from $30 to $100.
One major expense to consider is surface preparation. While most kits include an acid etching solution, professionals suggest renting a diamond grinder for better adhesion – this rental can cost about $200 per day. If your concrete slab has moisture issues, you might need a mitigation primer, which runs $2–$4 per square foot, potentially pushing your DIY budget closer to what you’d pay for professional installation.
Epoxy floor specialist Mark Powers emphasizes the importance of proper preparation: "The concrete surface where you plan on adding epoxy must be at least 60 days old or unsealed for the epoxy to properly adhere." If water beads on the surface instead of soaking in, you’ll have to strip the sealer first, which adds another $1–$3 per square foot. These extra expenses and the time involved can make a DIY project less cost-effective than it initially seems.
Time and Skill Requirements
The financial cost isn’t the only factor – laying down epoxy flooring also requires a significant time commitment and a good amount of skill. Completing the project will take around 12–20 hours spread across 2–4 days. Surface preparation alone, which includes inspecting for cracks, cleaning oil stains, repairing damage, and etching or grinding the concrete, takes up the bulk of the work – expect 8–12 hours just for this step. The actual application process takes an additional 4–8 hours, followed by waiting periods: 24 hours for drying, 72 hours before foot traffic, and a full 7 days before parking a vehicle.
The skill level required often catches homeowners off guard. You’ll need to mix chemicals precisely, operate rental equipment like a diamond grinder, and follow strict temperature and humidity guidelines. Epoxy cures best between 55°F and 75°F, and high humidity levels (above 50%–75%) can cause issues like blushing or a hazy surface. These challenges are part of why many homeowners ultimately turn to professionals for a more durable and hassle-free result.
sbb-itb-a0e5ae3
Professional Epoxy Installation: Costs and What You Get
Labor and Service Costs
Getting a professional to install epoxy flooring in a 400–500 sq ft two-car garage typically costs between $1,500 and $5,000, with the national average landing around $2,800 in 2026. This marks an increase of 17.7% from the $2,378 average back in 2022. On a per-square-foot basis, the cost generally ranges from $3 to $12, depending on the type of finish and coating material you select.
Labor costs alone fall between $1 and $7 per square foot, while materials for a two-car garage can range from $600 to $2,000. The type of finish significantly affects the overall price:
- Solid color finishes: $3–$7 per sq ft
- Decorative chip or flake finishes: $5–$10 per sq ft
- Metallic epoxy finishes: $7–$15 per sq ft
Additional services can also increase the final bill. For instance:
- Concrete crack repairs: $25–$250
- Old coating removal: $1–$4 per sq ft
- Moisture mitigation primers: $2–$4 per sq ft
Proper moisture testing is a critical step before installation to ensure the best results.
To save money, consider getting 3–5 itemized quotes from different installers. Prices for the same project can vary by thousands of dollars. You could also save $100–$200 by clearing out the garage yourself before the crew arrives.
While these costs may seem like an investment, the quality and durability provided by professional services are well worth it.
What Professionals Provide
Professional epoxy installers bring more than just labor – they deliver expertise, efficiency, and high-quality results. One key advantage is the use of industrial-grade diamond grinders, which cost over $15,000. These tools create a superior Concrete Surface Profile (CSP) for excellent bonding, a method far more effective than the acid etching included in most DIY kits.
Additionally, professional-grade 100% solids epoxy coatings are much thicker, measuring 15–25 mils, compared to the 2–4 mils found in DIY water-based kits. This thickness boosts chemical resistance and allows the flooring to endure temperatures up to 500°F, preventing issues like "hot tire pickup", where heat from tires softens lower-quality finishes.
Professional services often include warranties lasting 5 to 15 years, covering adhesion and delamination – something DIY kits simply cannot compete with. Many contractors now also apply polyaspartic or polyurea topcoats, which are UV-stable, ensuring the floor maintains its gloss and resists yellowing for over a decade. These advanced systems allow for one-day installations, with the floor ready for use in just 2–6 hours, compared to the 2–4 days required for DIY projects.
For example, Croc Coatings offers their proprietary Penntek Evolution industrial coating system, which is 4x stronger than traditional epoxy. Their process includes a one-day installation and a lifetime warranty, providing unmatched durability and peace of mind. This system is designed to handle the demands of garage floors, patios, pool decks, basements, and industrial spaces across North Idaho and Eastern Washington, including Spokane and Tri-Cities, WA.
Cost Comparison: DIY vs. Professional
Comparison Table
When it comes to epoxy flooring for a standard 400 sq ft two-car garage, the upfront costs between DIY and professional installation vary widely. DIY projects typically cost between $250 and $1,000, while professional installations range from $2,000 to $6,000. However, while DIY may seem more affordable initially, long-term expenses can tip the scales.
Here’s a breakdown of the key cost components for both options:
| Item | DIY Cost (400 sq ft) | Professional Cost (400 sq ft) | Notes |
|---|---|---|---|
| Surface Prep | $20 – $200 | Included in total | DIY often uses acid etching, while professionals use diamond grinding for better results |
| Materials | $150 – $500 | $600 – $2,000 | DIY kits typically include water-based epoxy (3–5 mils thick), whereas professionals use 100% solids epoxy (15–25 mils thick) |
| Labor | $0 (DIY labor) | $1,200 – $2,000 | Professional labor covers cleaning, preparation, and applying multiple coats |
| Tools/Supplies | $50 – $150 | Included | DIYers need rollers, brushes, tape, safety gear, and mixing tools |
| Warranties | None (only product warranties) | 5 – 15+ Years | Professional warranties often cover adhesion and peeling |
| Total Upfront | $250 – $1,000 | $2,000 – $6,000 | DIY is cheaper upfront, but professional results last longer |
The cost components highlight a critical difference: surface preparation. DIY methods, like acid etching, often fall short in creating the proper surface profile, which can lead to peeling or poor adhesion. Professionals use industrial diamond grinders to achieve a Concrete Surface Profile (CSP 2 to 3), ensuring the epoxy bonds effectively.
If a DIY project fails, the cost of removing the failed coating can add up quickly – ranging from $400 to $1,200 ($1–$3 per square foot) – before reapplying the epoxy. These added expenses can cancel out any initial savings.
PRO vs. DIY Epoxy Garage Floor Kits :: Whats the difference?
Long-Term Costs and Durability
When comparing DIY and professional installations, the long-term costs and durability of each option can make a significant difference.
Maintenance and Repairs
The ongoing maintenance of epoxy floors highlights the gap between DIY and professional installations. DIY epoxy floors often need reapplication every few years to maintain their look and protective qualities. On the other hand, professionally installed systems usually require nothing more than routine cleaning and can last anywhere from 10 to 30 years.
If a DIY coating fails, the entire surface must be stripped using diamond grinding before reapplication, which can add 15%–25% to the cost of a new professional installation. These repeated removal and reapplication expenses can quickly outweigh any initial savings from going the DIY route.
DIY water-based epoxy formulas are also more prone to permanent damage from oil and chemicals. In contrast, professional-grade coatings are designed to resist such staining. Additionally, professional polyaspartic topcoats can handle temperatures exceeding 200°F, preventing issues like hot tire pickup. This problem, where heat from tires causes thin epoxy layers to soften and peel, is a common failure in DIY applications.
"The ‘cheap’ option ends up costing 24–48% more than doing it right the first time. And you’ve spent 2–4 years looking at a failing floor in the meantime." – Ascent Epoxy Team
Expected Lifespan
DIY epoxy floors typically last between 1 and 5 years, meaning multiple reapplications will likely be needed over a 15-year period. In contrast, professional systems are built to last 10 to 30 years with minimal maintenance.
This difference in longevity largely comes down to coating thickness and preparation. DIY coatings are usually 2 to 5 mils thick – comparable to just 2–3 sheets of paper. Professional systems, however, are much thicker, ranging from 10 to 30+ mils. This added thickness provides far better resistance to impacts, chemicals, and wear.
Additionally, about 70% of DIY epoxy coatings fail within two years, with failure rates climbing to 90% in humid areas like Florida. The main issue is poor surface preparation. DIY kits often rely on acid etching, which creates a weaker bond, while professionals use diamond grinding to establish a much more durable mechanical bond.
Over a 10-year period, the costs of repeated DIY applications – including materials, removal, and repairs – can add up to $2,500 to $7,000 or more. In contrast, a professional installation typically costs between $1,500 and $5,000 upfront and requires little to no additional spending for at least a decade. These differences in durability and cost make professional installations a better long-term investment.
Why Choose Croc Coatings‘ Penntek Evolution System

DIY epoxy often falls short due to uneven preparation, fragile coatings, and limited durability. Croc Coatings’ Penntek Evolution system eliminates these common pitfalls with a professional-grade solution. Serving areas like North Idaho and Eastern Washington, including Spokane and the Tri-Cities, WA, Croc Coatings offers an industrial coating system designed to outlast and outperform traditional epoxy flooring.
The Penntek Evolution system uses a multi-layer approach: a polyurea base coat, colored vinyl chips, and a polyaspartic topcoat. This combination results in a coating that’s 4× stronger than standard epoxy and resistant to impacts that can crack weaker alternatives. While traditional epoxy begins to fail at 140°F, the polyaspartic topcoat holds up well above 200°F, preventing issues like hot tire pickup that often plague DIY installations.
Here’s a closer look at why Penntek Evolution stands out.
Penntek Evolution vs. DIY Epoxy
The differences between DIY epoxy and the Penntek Evolution system go far beyond strength:
| Factor | DIY Epoxy | Penntek Evolution (Croc Coatings) |
|---|---|---|
| Strength | Fragile; prone to cracking | 4× stronger; impact‑resistant |
| Lifespan | 2–5 years | 20+ years |
| Installation Time | 2–4 days (12–25 hours of labor) | One‑day installation |
| Warranty | Limited to product replacement | Lifetime UV stability warranty; 15‑year peeling warranty |
| Thickness | 3–5 mils | 15–30+ mils |
| Surface Prep | Acid etching (inconsistent results) | Diamond grinding for a secure mechanical bond |
These features translate to fewer repairs and lower long-term costs. As Desmond Landry, Owner of Grove Street Painting, puts it:
"DIY kits offer only product replacement – not labor, not removal costs, nothing that actually helps when the floor fails."
Additional Benefits of Croc Coatings
The Penntek Evolution system doesn’t just deliver durability – it offers benefits that DIY kits simply can’t match. The coating is UV-stable, resisting yellowing and chalking even in direct sunlight. Its antibacterial, slip-resistant "orange peel" texture makes it safer for wet garage floors, reducing the risk of accidents and lowering maintenance costs.
With a one-day installation, you can park your car as soon as the next day. For a two-car garage (roughly 500 sq ft), installation costs range from $4,750 to $5,250 ($9–$12 per sq ft). While the upfront cost is higher than a DIY kit, it eliminates the risk of failure and the expense of professional removal – often $675 to $1,125 – if a DIY job doesn’t hold up.
Croc Coatings also offers custom garage cabinets and eco-friendly materials with lower VOC levels than traditional solvent-based epoxies, making this system a healthier option for indoor spaces. Their certified installers handle every detail, from moisture testing to diamond grinding, preventing moisture-related failures ensuring a durable bond that DIY acid etching just can’t achieve.
This system proves that investing in professional installation can save money and headaches in the long run.
Conclusion: Choosing the Right Option
Deciding on epoxy flooring comes down to weighing epoxy garage floor pros and cons like initial costs and long-term durability. DIY epoxy kits, which typically range from $50 to $300, might work for low-traffic areas or short-term fixes – like sprucing up a property before selling. But for spaces like garages that endure daily vehicle use, spills, and temperature swings, DIY solutions often fall short. Their thinner coatings and inconsistent acid-etching can lead to premature wear and tear.
Professional installation, on the other hand, costs between $2,000 and $5,500 and provides a durable, high-performance floor designed to last 15–20 years or more with proper upkeep. The thicker coatings and expert preparation ensure a finish that outperforms any DIY application, making it a smart choice for high-traffic areas.
For example, Croc Coatings offers the Penntek Evolution system, which is 4× stronger than traditional epoxy. Installed in just one day, it costs approximately $4,750 to $5,250 for a 500 sq ft garage. This system includes a polyaspartic topcoat that resists high heat, solving the "hot tire pickup" issue common with thinner DIY coatings. Plus, it comes with lifetime UV stability and a 15-year peeling warranty, giving you peace of mind.
If long-term performance and a premium finish are your priorities, professional installation is the way to go. Croc Coatings serves North Idaho and Eastern Washington – covering areas like Spokane and the Tri-Cities – with certified installers who handle every detail, from surface prep to final application. This ensures your floor not only looks great but also stands up to years of heavy use.
Why risk the hassle of a DIY project? Contact Croc Coatings at croccoatings.com for a personalized quote and take the first step toward transforming your space.
FAQs
Is my concrete suitable for epoxy?
For epoxy to adhere properly, your concrete must be well-prepared, clean, and free of any cracks or moisture. Proper surface preparation is key to achieving strong adhesion and ensuring the epoxy lasts over time.
Do I need diamond grinding or is acid etching enough?
When deciding between preparation methods, it often comes down to the condition of your concrete and the type of coating you’re using. Acid etching works best for smooth, clean surfaces that only need a light texture, making it a popular choice for DIY projects. On the other hand, diamond grinding is ideal for achieving a stronger, more durable bond, especially with professional-grade coatings. This method removes surface contaminants while creating a rougher texture, ensuring better adhesion. For long-lasting results, diamond grinding is usually the more reliable option.
When does hiring a pro cost less than DIY?
Hiring a professional for epoxy flooring might actually save you money in the long run compared to doing it yourself. While DIY kits for a two-car garage can range from $50 to $500, they often only last 2 to 5 years before needing a reapplication. On the other hand, professional installations, which typically cost between $2,500 and $5,000, can last 10 to 20 years. This makes professional work a more cost-effective choice over time, especially if you’re looking for a finish that’s built to endure.
Related Blog Posts
- Polyaspartic vs Epoxy: Cost Breakdown
- 5 Cost Factors: Polyaspartic vs Epoxy Coatings
- Residential vs. Commercial Concrete Coating Costs
- 5 Factors Affecting Concrete Coating Costs
table {border-collapse: collapse;text-align: left;width: 100%;margin: 20px 0;}thead tr {background-color: #ddd;}tr:nth-child(even) {background-color: #f5f5f5;}td,th {text-align: left;padding: 12px;border: none;}table th,table td {border: 1px solid #999;padding: 8px;color: #202020;}