If I were comparing bids, I would not judge the job by hourly rate alone. In concrete coatings, labor is often 50% to 70% of the bill, but the bigger cost drivers are prep quality, job speed, waste, and failure risk.
Here’s the short version:
- Pro crews charge more up front
- Apprentice-heavy crews often bid lower
- But low bids may skip prep, moisture checks, crack repair, or leveling
- Poor installs can fail at rates of 30% to 50%, while pro installs are often under 5%
- A pro garage floor may cost about $2,500 to $5,000
- A cheap install can turn into $6 to $12 per sq. ft. in removal and recoat costs later
- Over 20 years, a floor that looks cheaper on day one can cost far more
If you want the lowest total cost, I’d look at these points first:
- Crew mix: Who is leading the install, and who is doing support work?
- Prep work: Is the slab being properly ground, patched, leveled, and moisture-tested?
- Timeline: Will the floor be done in 1 day or drag into 2–4 days?
- Waste and finish: Will the crew control batch timing and coverage?
- Repair risk: What happens if the coating peels, bubbles, or delaminates?
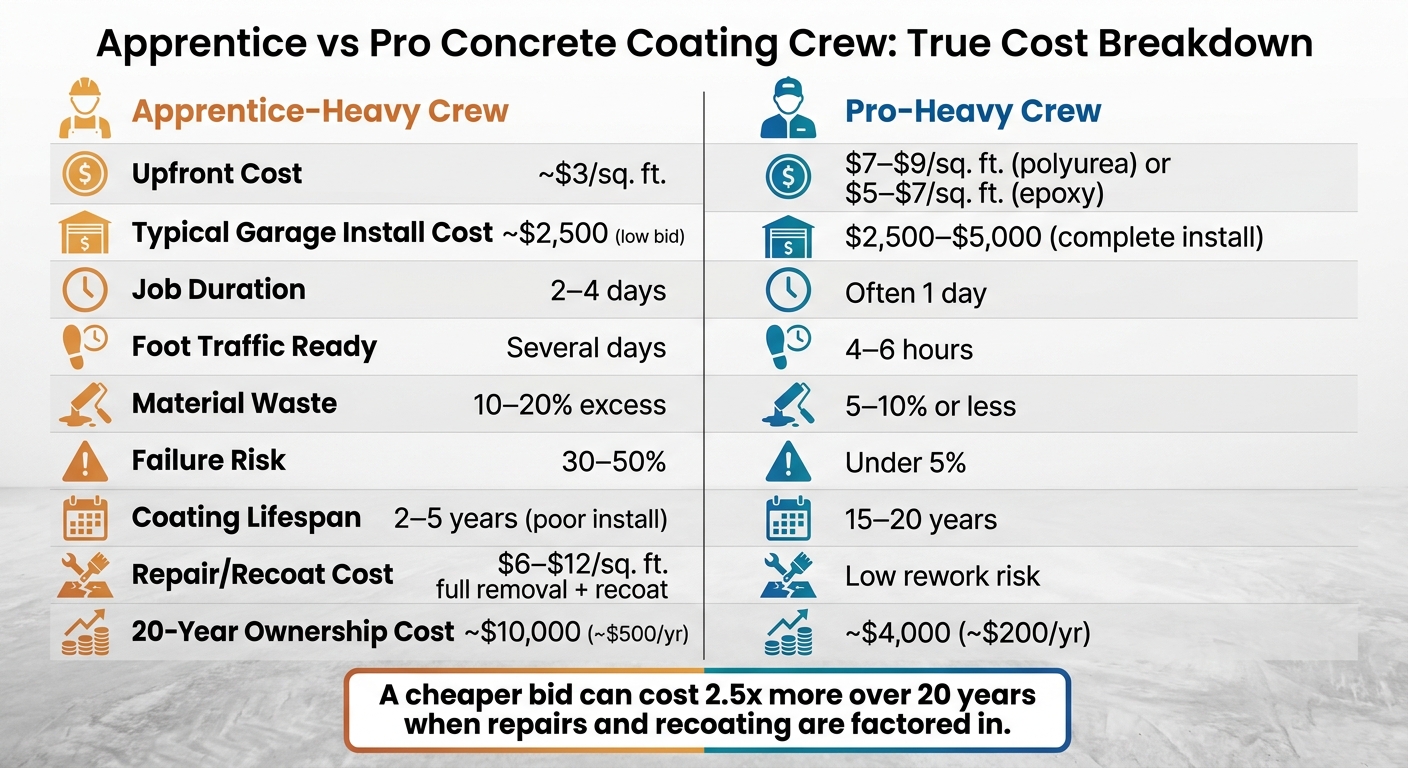
Apprentice vs Pro Concrete Coating Crew: True Cost Breakdown
I Got My Garage Floor Professionally Coated… Here’s What It Cost!
sbb-itb-a0e5ae3
Quick Comparison
| Factor | Apprentice-Heavy Crew | Pro-Heavy Crew |
|---|---|---|
| Upfront rate | Lower | Higher |
| Prep quality | Often cut or uneven | More complete |
| Job length | 2–4 days | Often 1 day |
| Material waste | 10%–20% more | Often 5%–10% or less |
| Failure risk | 30%–50% | Usually under 5% |
| Repair exposure | Higher | Lower |
| Long-term cost | Often higher | Often lower |
My takeaway: if you only compare the bid price, you can miss the part that matters most – what the floor will cost you after install, repairs, downtime, and recoating are added in.
Apprentice vs pro labor rates and installed cost per square foot
Hourly rates, crew mix, and what clients are billed for
Most estimates show a blended crew rate, not each person’s hourly wage. And that makes sense. What matters more is how many hours the crew burns through once the job starts.
Pro-heavy crews usually bill more because they bring seasoned lead techs, tighter work habits, and the right gear for prep and application. That higher rate can sting at first glance, but a lower labor share often points to cut prep work, not better efficiency.
| Crew Type | Billed Rate | Installed-Cost Impact |
|---|---|---|
| Pro-Heavy Crew | Higher | Lower long-term cost; fewer rework hours |
| Apprentice-Heavy Crew | Lower | Higher risk of added billable hours and repairs |
A cheap hourly rate doesn’t do much for you if the crew needs extra time to get the floor done. That’s where many low bids start to fall apart.
How labor changes the installed cost of a garage, patio, or shop floor
In Coeur d’Alene and Spokane, pro polyurea and epoxy installs usually land around $7 to $9 per sq. ft. and $5 to $7 per sq. ft., respectively. For a standard 2-car garage, a pro install often ends up in the $2,500 to $5,000 range. Commercial and industrial shop floors can climb to $7 to $15 per sq. ft.
An apprentice-heavy bid may come in closer to $3 per sq. ft., which sounds like a steal. But that price often leaves out prep steps that matter. Proper crack filling and floor leveling can add $500 to $1,000 to a quote. If that work gets skipped at the start, it often comes back later as repairs, patching, or a full redo.
Put simply, a low per-square-foot price usually means prep was cut.
The next piece is speed. Crews with more experience tend to finish faster, and that can trim the total labor bill even when the posted rate is higher.
Jobsite pace, downtime, and productivity by crew experience
Why experienced crews finish more work in less time
A lower labor rate only helps if the crew moves fast enough to keep total hours under control. If the job drags, the savings can disappear in a hurry.
Speed usually comes down to one thing: doing each step in the right order without dead time between phases.
A pro crew lines up every stage – diamond grinding, crack repair, mixing, broadcast, and topcoat – so the work keeps moving. That matters a lot with polyaspartic coatings because they set fast. These quick-cure coatings require precise handling to avoid application errors. Once mixing starts, the crew has a short window to apply the material cleanly. Experienced installers can handle that pace without leaving roller marks or creating a gummy surface that has to be stripped and redone.
That kind of flow can shrink a standard garage install to one day. An apprentice-heavy crew, especially one using slower-curing materials or fixing application mistakes, can stretch that same job to 2–4 days.
| Metric | Apprentice-Heavy Crew | Pro-Heavy Crew |
|---|---|---|
| Daily Productivity | Variable; often limited by manual prep | 400–864+ sq. ft. per day |
| Typical Project Duration | 2–4 days | 1 day (polyaspartic systems) |
| Foot Traffic Ready | Several days post-application | 4–6 hours post-application |
That time gap matters most when the space needs to get back in service fast.
How schedule delays add indirect cost for owners
For homeowners, an extra day or two on the schedule means the garage stays off-limits longer. No parking. No workshop access. No easy way to get to stored items.
For a business, the hit can be even harder. Every extra day a shop floor or commercial space stays offline can mean lost revenue. If the space is down for three days instead of one, operations take the hit even if the quote looked cheaper at the start.
Faster crews also tend to waste less material and avoid rework. That’s another place where labor skill changes the math.
Material waste, finish consistency, and repair risk by skill level
How inexperience leads to waste and uneven results
Speed is only part of the story. Skill also changes how much product gets burned through and how the floor looks when the job is done.
Material waste is one of those costs people don’t always see at first. An experienced crew will measure mix ratios carefully and size each batch around the product’s working time. Less experienced crews tend to lose more material by over-mixing or letting product sit too long, which is a big problem with fast-curing systems that may stay workable for only 15 to 45 minutes. Industry estimates say inexperienced crews can create 10–20% more material waste than seasoned teams, while pros often hold waste to 5–10% or less.
The finish can slip too. Uneven roller pressure, sloppy back-rolling, or inconsistent squeegee speed often leaves lap lines, thin spots, and patchy gloss. Decorative flake is even less forgiving. When chips are broadcast until the slab is fully covered, the spread has to stay even from one end of the floor to the other. If it doesn’t, you get heavy clusters in one area and sparse coverage in another, which hurts both the look of the floor and its long-term wear resistance.
What repair costs look like after a poor install
This is where the cost gap usually gets painful.
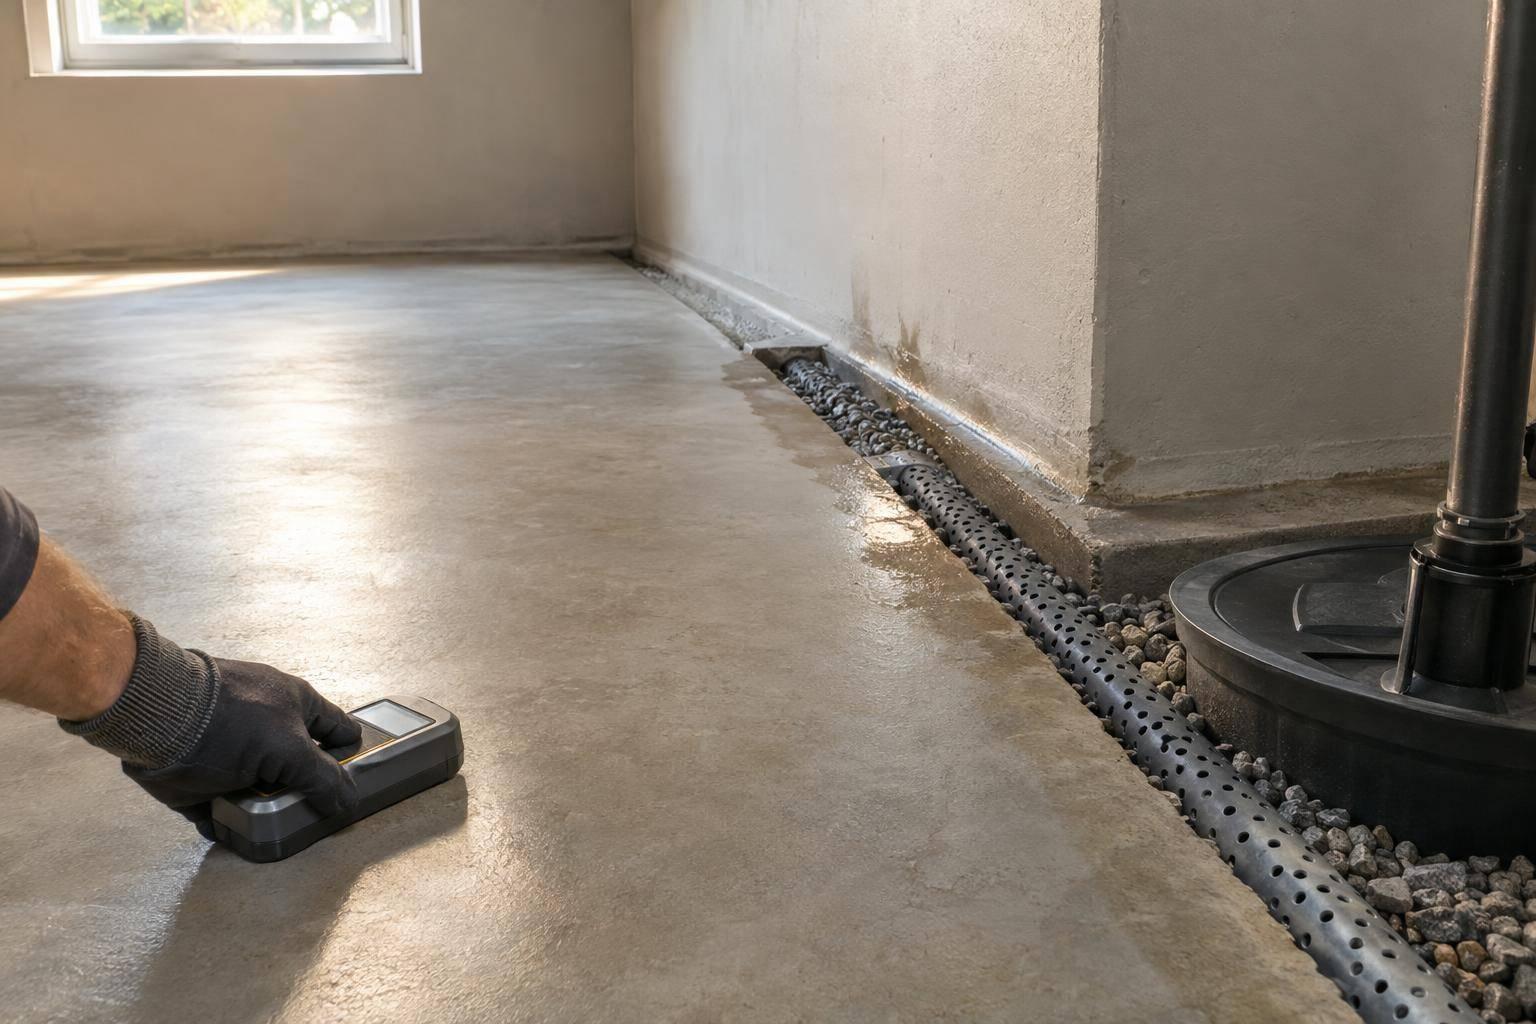
When a coating fails, the fix isn’t just a touch-up. In many cases, the process starts with removal, then surface prep, repair, and recoating. Localized spot repairs usually cost $3–$6 per sq. ft., and many jobs come with minimum mobilization charges of $300–$500. A full removal and recoat generally falls in the $6–$12 per sq. ft. range. If the slab also needs moisture mitigation, that can add another $1–$2.50 per sq. ft..
The life span gap is just as stark. Professionally installed polyaspartic systems can last 15 to 20 years when they’re applied the right way. Poorly applied coatings may fail in 2 to 5 years, or even sooner.
Here’s how that usually plays out on-site:
| Factor | Apprentice-Heavy Crew | Pro-Led Crew |
|---|---|---|
| Waste Level | 10–20% more material waste from mis-mixing and poor coverage | 5–10% or less with precise ratios and staged batches |
| Finish Consistency | Uneven flake distribution, visible lines, thin spots | Uniform texture, color, and edge work across the slab |
| Repair Risk | High – peeling, bubbling, and delamination are more likely | Lower – better prep, testing, and application control reduce rework |
| Repair Cost Exposure | $6–$12 per sq. ft. for full removal and recoat, plus possible moisture mitigation | Lower risk of costly rework when the install is done right |
A small bump in labor cost upfront is often a much better deal than paying for removal and recoating later.
Bottom line: when paying more for pro labor saves money overall
When you factor in speed, material waste, and the risk of repairs, the labor rate stops being the main thing that matters. Pro crews cost more per hour, but they usually finish faster, prep the surface better, and avoid the kind of mistakes that lead to extra repairs. That often means a lower total bill over time.
Over 20 years, a professionally installed polyaspartic system at about $4,000 upfront comes out to around $200 per year. A low-skill install at $2,500 that needs three recoats during that same period can add up to $10,000, or about $500 per year.
That gap shows up in total cost, not the hourly rate.
| Comparison Factor | Low-Skill Install | Professional Certified Crew |
|---|---|---|
| Upfront Labor Cost | Lower hourly/sq. ft. rate | Higher hourly/sq. ft. rate |
| 20-Year Ownership Cost | High – frequent repairs and recoats | Low – 15–20 year service life |
Key takeaways for homeowners and small business owners
For homeowners and small business owners, that’s the test that matters most: lower upfront cost versus lower ownership cost over time.
Before you sign anything, ask a few direct questions:
- How long has the crew been installing that specific system?
- What surface prep method do they use?
- What happens if the floor fails?
A cheap bid can look good at first. But once you add removal, recoating, and downtime, it can end up costing a lot more.
FAQs
How do I spot cut corners in a low bid?
Treat too-good-to-be-true pricing as a red flag. Low quotes can look tempting, but they often hide missing work or cheap materials.
Check the scope before you compare bids. Ask whether the quote includes surface prep, moisture testing, and a written breakdown for materials, labor, and prep. If that detail isn’t there, you’re not looking at the full picture.
A few warning signs tend to show up again and again:
- Missing prep steps
- Unusually low labor costs
- Vague “standard” products
- Unclear warranty coverage
Those are common signals that corners may be getting cut.
When is paying more for pro labor worth it?
Paying more for professional labor is often worth it if you care about long-term value, durability, and peace of mind instead of just the lowest upfront cost.
Yes, pros usually charge more. But that higher price often covers the things that matter most: proper surface prep, industrial-grade equipment, and a tighter install process. Those steps help the coating bond better and cut down on problems like peeling or cracking later on.
This tends to make the most sense in:
- High-traffic areas
- Damaged concrete
- Tough site conditions
With a system like Penntek Evolution from Croc Coatings, you can also get faster installation and a lifetime residential warranty.
What warranty should I ask for on a coating job?
Ask for a warranty that covers both labor and materials for common issues like peeling, cracking, and fading. That matters more than many homeowners think. A warranty that only covers the product can still leave you paying out of pocket for removal and reinstallation.
It’s also smart to ask what can void the warranty. Pay close attention to moisture-related problems, since water behind the surface is one of the most common reasons claims get denied.
For residential projects, many professional installers offer lifetime warranties. Before you move ahead, confirm that the warranty is backed by the installer’s certified expertise, not just the manufacturer’s product terms.