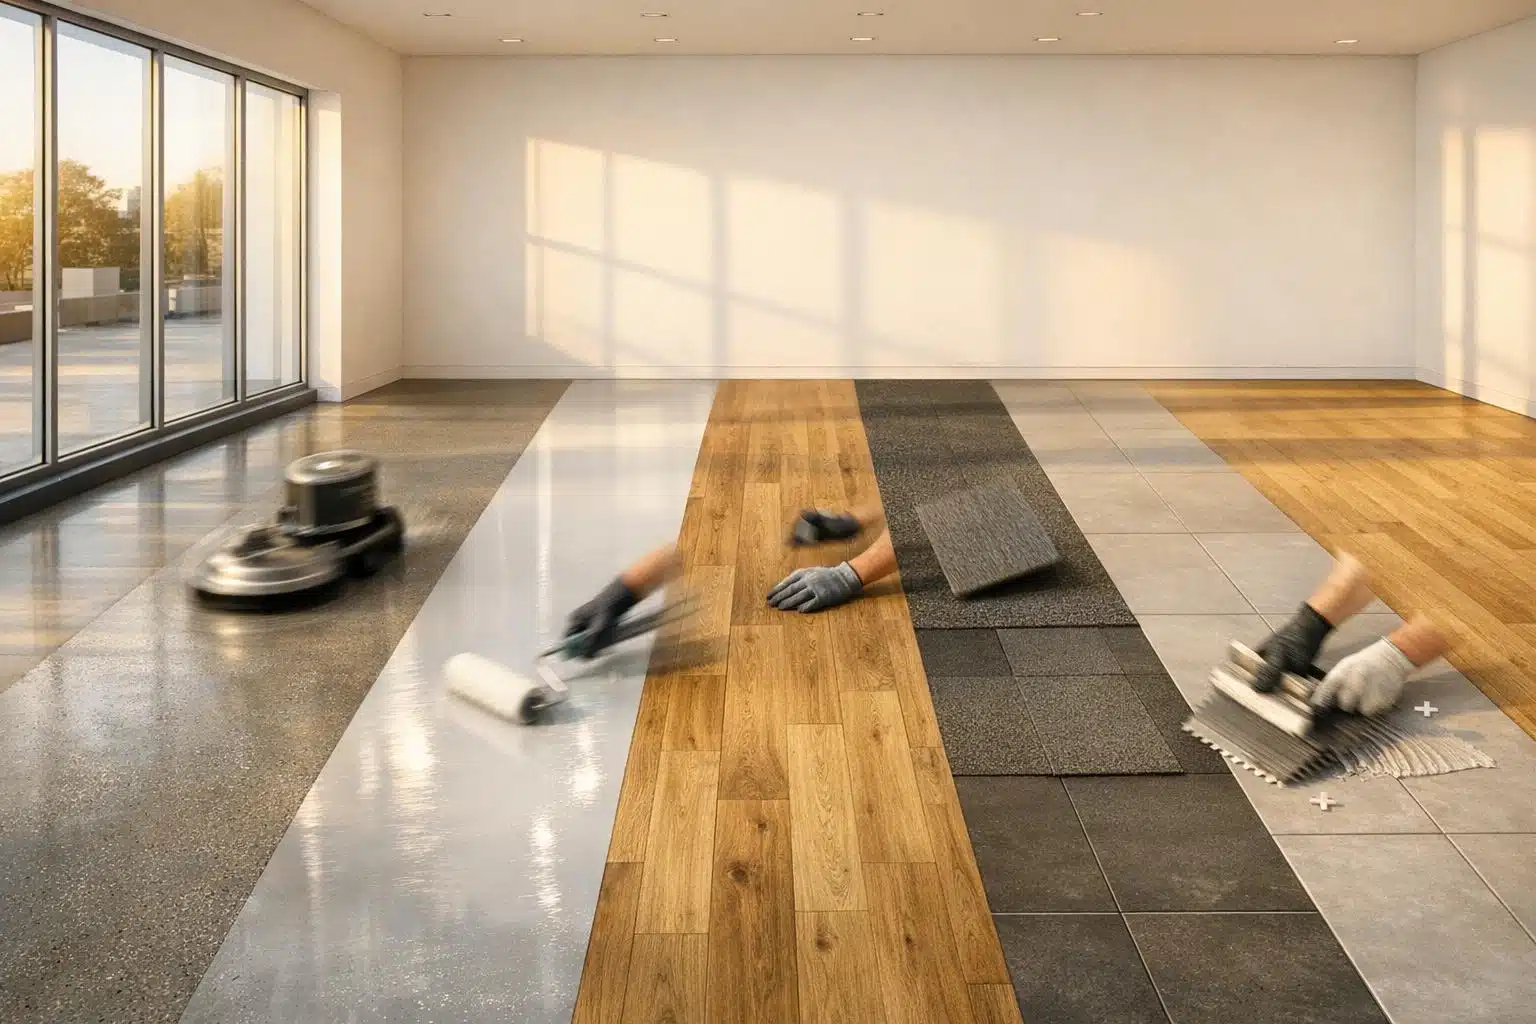
Want a showroom floor that installs fast and lasts long? Here’s what you need to know:
Choosing the right flooring for your automotive showroom isn’t just about looks – it’s about how quickly you can get back to business. Long installation times mean lost revenue. Here’s a breakdown of the top five flooring options based on installation speed, durability, and maintenance:
- Polyurea Coatings: Fastest option – ready in 1 day. Extremely durable and resistant to wear, perfect for heavy vehicle traffic. These systems also reduce floor maintenance significantly over time.
- Epoxy Coatings: Takes 7–10 days. Durable but slower to install and less strong than polyurea.
- Polished Concrete: Moderate installation time of 3–5 days. Sleek and durable but requires professional equipment.
- Interlocking PVC Tiles: 1–2 days. Easy to install and replace but less durable for heavy vehicles.
- Luxury Vinyl Plank (LVP): 2–3 days plus acclimation. Affordable with a wood-like appearance but requires extra prep time.
Quick Comparison:
| Flooring Type | Install Time | Durability | Maintenance | Best For |
|---|---|---|---|---|
| Polyurea Coatings | 1 day | 4x stronger than epoxy | Easy | High-traffic, heavy vehicle areas |
| Epoxy Coatings | 7–10 days | Durable, UV-resistant | Moderate | Cost-conscious showrooms |
| Polished Concrete | 3–5 days | Long-lasting | Low | Large spaces, sleek aesthetics |
| Interlocking PVC Tiles | 1–2 days | Moderate | Easy | Temporary setups, quick installs |
| Luxury Vinyl Plank (LVP) | 2–3 days + 48–72 hrs acclimation | Moderate | Moderate | Budget-friendly, wood-like look |
For speed and strength, polyurea coatings are unbeatable. If time isn’t your main concern, polished concrete or epoxy offer solid alternatives. Choose based on your showroom’s needs, balancing downtime, durability, and budget.

Showroom Flooring Options: Installation Time and Durability Comparison
1. Polyurea Coatings
Installation Time
Polyurea coatings stand out for their quick application process. Thanks to their fast-curing properties, an entire showroom floor can be coated and ready in just one day, significantly reducing downtime. For showrooms that operate on tight schedules, this means work can be done over the weekend, allowing normal operations to resume by Monday.
Croc Coatings‘ exclusive Penntek Evolution system is a great example of this efficiency, offering same-day installation to keep disruptions to a minimum.
Durability and Maintenance
Speed is just one part of the equation – polyurea coatings are built to last. Specifically designed for automotive showrooms, these systems are four times tougher than traditional epoxy, standing up to the wear and tear of tools, heavy vehicle traffic, and the constant repositioning of cars on showroom floors. They also resist hot tire pick-up, which means fewer tire marks even when vehicles are moved shortly after application.
Keeping these floors in top shape is simple. Regular sweeping and the occasional damp mop are all that’s needed. On top of that, polyurea coatings are antibacterial and antimicrobial, making them a hygienic choice. Their chemical resistance ensures they hold up against oil spills, gasoline, and commonly used cleaning products.
Aesthetic Appeal for Showrooms
Polyurea coatings don’t just perform well – they look incredible. Their glossy finish amplifies overhead lighting, making vehicles appear more striking and their paint colors more vivid. Unlike standard epoxy, polyurea – particularly in polyaspartic formulations – offers superior UV stability compared to epoxy, so it won’t yellow or fade even with sunlight pouring through large showroom windows.
Customization options are another highlight. Whether you want decorative vinyl chips, metallic pigments, or solid colors, polyurea systems can be tailored to match your brand’s style. The seamless surface eliminates grout lines, creating a sleek and modern aesthetic that keeps the spotlight on your vehicles. Plus, the crystal-clear topcoat ensures the floor maintains its fresh, polished look even after heavy use.
sbb-itb-a0e5ae3
2. Epoxy Coatings
Installation Time
Epoxy coatings take longer to install compared to polyurea systems. For automotive showrooms, the entire process usually spans 7–10 days or more, depending on the size of the space and the complexity of the project. Here’s how the timeline typically breaks down:
- Surface preparation: 1–2 days, especially if crack repairs or leveling are required.
- Primer coat drying: 6–12 hours.
- Base and topcoat curing: 12–24 hours each.
- Final curing: 24–72 hours before vehicles can be moved back in.
"For larger commercial or industrial projects, the process can extend to 7–10 days or more, depending on the size of the area and complexity of the installation." – HD Custom Concrete Finishes
Temperature plays a key role in curing. The ideal range is 55°F to 80°F. If temperatures fall outside this range, the curing process could slow down or the epoxy may not set properly. While the extended timeline may seem like a drawback, the end result is a flooring system designed to handle tough conditions.
Durability and Maintenance
Once fully cured, epoxy creates a tough, non-porous surface that’s perfect for automotive showrooms. It resists scratches from foot traffic, holds up under the weight of vehicles, and can handle dropped tools or chemical spills without damage. Maintenance is simple – daily sweeping and occasional mopping with standard cleaners is enough to keep it looking sharp.
However, one potential drawback is that standard epoxy can yellow in areas exposed to heavy direct sunlight. To address this, UV-resistant formulations are available to maintain the flooring’s appearance over time.
Aesthetic Appeal for Showrooms
Epoxy flooring delivers a sleek, high-gloss finish that elevates the look of any showroom. It enhances vehicle displays by reflecting light and making colors stand out. Customization options are nearly endless, including:
- Solid colors and metallic finishes.
- Decorative flakes or quartz blends.
- Custom branding graphics for a personalized touch.
For added safety, slip-resistant textures can also be integrated, making the floor both stylish and functional. The seamless, polished appearance creates a modern backdrop that highlights the vehicles on display.
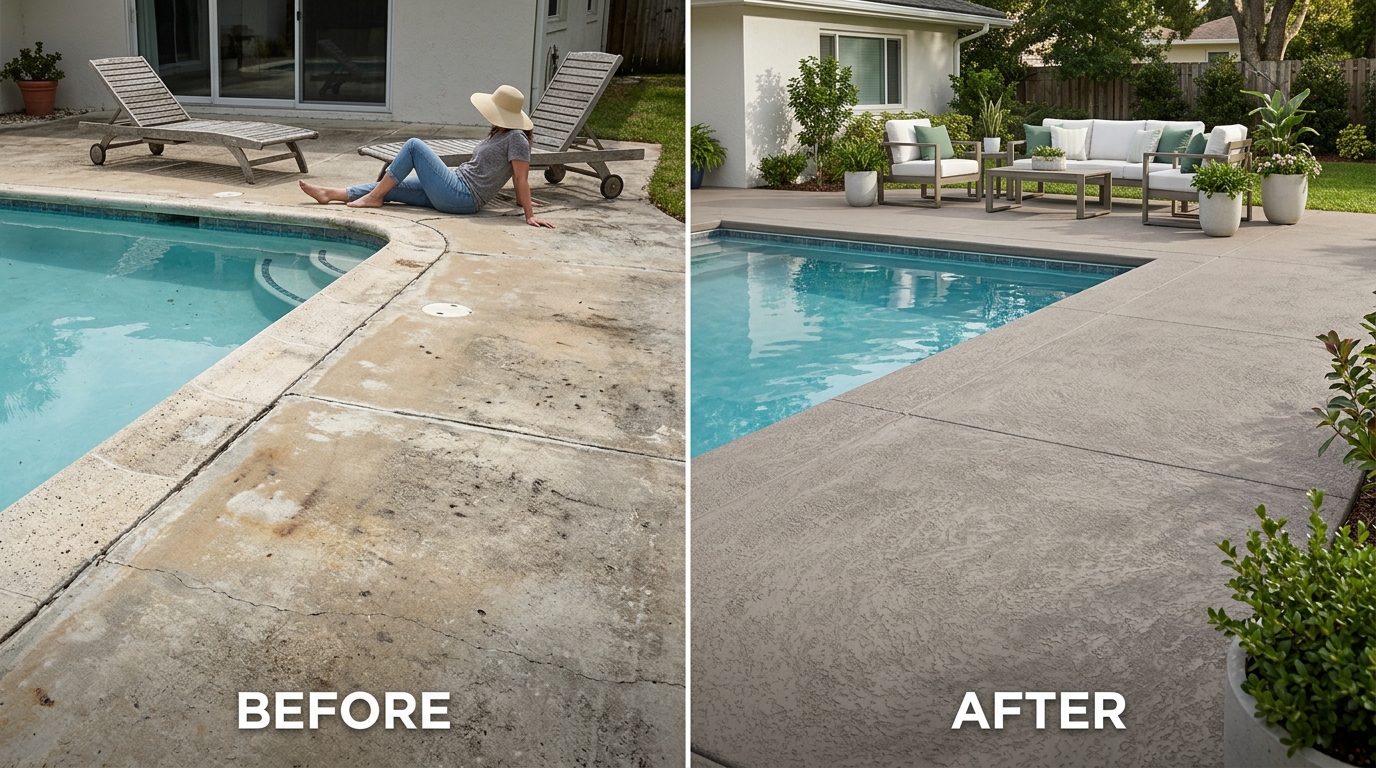
3. Polished Concrete
Installation Time
Polished concrete strikes a balance when it comes to installation speed. For showrooms ranging from 5,000 to 10,000 square feet, the process usually takes 3 to 5 days. The installation involves five steps: surface preparation (0.5–1 day), initial grinding (1 day), densification (0.5 day), polishing (1–3 days), and an optional staining or protective guard application (0.5–1 day). The finish you choose can greatly affect the timeline – a matte finish might require only three to four grinding passes, while a high-gloss, mirror-like finish could take up to eight stages. Additional time may be needed if repairs or old coating removal is required.
"Businesses can’t afford unnecessary downtime – so knowing how long it takes to complete a polished concrete floor is key to keeping operations running smoothly".
To reduce disruptions, consider scheduling the work during off-hours or slower periods. Make sure to clear the showroom of vehicles and equipment before the process begins. Once installed, polished concrete offers a durable surface with a sleek, contemporary appearance.
Durability and Maintenance
Polished concrete, once densified and sealed, becomes a highly durable surface capable of withstanding heavy vehicle traffic and tire marks. With proper care, it can last a lifetime. Daily dust mopping with a microfiber mop removes abrasive particles, while weekly wet mopping with a pH-neutral cleaner maintains its appearance. However, polished concrete is not immune to chemical damage – automotive fluids and oils can stain the surface if not cleaned up promptly. For busy showroom floors, applying a penetrating sealer is a smart way to provide additional protection against stains. Unlike coated floors, polished concrete doesn’t naturally resist chemicals unless treated specifically for that purpose. Adding high-quality entrance mats and using felt or rubber protectors on furniture legs can also help prevent scratches and wear.
Aesthetic Appeal for Showrooms
Polished concrete floors enhance the visual appeal of showrooms by reflecting both natural and artificial light, making vehicles on display appear brighter and more eye-catching. As one expert puts it:
"The floor, in particular, serves as both a backdrop and a stage for the vehicles on display".
The seamless design of polished concrete creates a clean, modern aesthetic, free from grout lines or seams. Showrooms can also customize these floors to match their branding, with options like varying gloss levels (from matte to high-shine), decorative stains, dyes, or aggregates. Custom logos or graphics can be added at costs ranging from $300 to over $2,000. While polished concrete can become slippery when wet, anti-slip treatments or traction-enhancing solutions can be applied during the finishing process.
Cost Efficiency
Polished concrete offers a cost-effective solution for large spaces. For areas over 5,000 square feet, pricing typically falls between $3 and $6 per square foot, while smaller spaces may cost $8 to $15+ per square foot. High-gloss finishes are generally priced at $6 to $15 per square foot, and adding concrete dye can increase the cost by $1 to $3 per square foot. Although the upfront cost can be higher than some other flooring options, the minimal maintenance and long lifespan make polished concrete a smart investment with long-term savings.
4. Interlocking PVC Tiles
Installation Time
Interlocking PVC tiles are designed for quick and simple installation, thanks to their snap-together loop-to-peg system. No adhesives or curing agents are needed – just align the tiles and press them into place. For a tighter fit, a small mallet can be used. However, the speed of installation can vary depending on the layout of your showroom. Spaces with obstacles like car lifts, columns, or furniture may require additional cutting. Installers can either cut tiles row-by-row during installation or save all cutting for the final stage. It’s recommended to let the tiles acclimate for 12–24 hours before making the final cuts.
Begin the installation at the main vehicle entrance to align the tiles with the traffic flow. Position the loops so they point toward the back wall and the opposite side wall from your starting point, ensuring a smooth process as you snap tiles into place. Leave at least a 1/2-inch gap between the tiles and any permanent structures, such as walls or lifts, to allow for expansion. For smooth surfaces like epoxy floors, using double-sided tape or a rubber underlayment can help prevent tile movement. Along with their quick setup, these tiles offer durability and low-maintenance benefits.
Durability and Maintenance
Solid-core PVC tiles are built to handle heavy loads, supporting up to 10,000 pounds at a single point. This makes them a great choice for showrooms displaying large SUVs or trucks. The material is non-absorbent and waterproof, providing resistance to mold, mildew, bacteria, and automotive chemicals like gas or oil. Many manufacturers also offer warranties lasting 5 to 10 years.
Keeping these tiles clean is easy. Spills stay on the surface, and perforated versions allow debris and water to pass through. The flexibility of PVC adds impact resistance and helps absorb sound. For showrooms with a lot of sunlight, UV-stabilized versions are available to prevent fading and material breakdown.
Aesthetic Appeal for Showrooms
Interlocking PVC tiles are available in a variety of colors and textures, including options like "coin top" and "shield tread." These textures not only enhance grip but also allow for creative patterns or zoning within the showroom. Thicker tiles, about 1 inch in depth, can be paired with ramped borders to reduce tripping risks and provide a polished look. Their easy installation and removability make them ideal for temporary setups, such as trade shows.
Cost Efficiency
When it comes to affordability, interlocking PVC tiles are a practical choice. Material, labor, and supply costs range from $5.94 to $8.96 per square foot. For a 235-square-foot space, this translates to a total cost of $3,754.77 to $5,520.74. Opting for DIY installation on a level surface can help cut labor costs. However, if your concrete floor needs extra preparation – like grinding, leveling, or adding vapor barriers for concrete floors – expenses may increase. While premium tiles come with a higher initial price, their durability minimizes issues like cracking, curling, or fading, saving you from costly repairs or replacements down the road. With warranties spanning 5 to 10 years, interlocking PVC tiles are a practical option for showrooms that need a fast, durable, and low-maintenance flooring solution.
5. Luxury Vinyl Plank
Installation Time
Installing luxury vinyl plank (LVP) begins with a 45-minute consultation to confirm subfloor preparation and material specifications. During this session, installers present a detailed proposal that outlines the project scope and estimated timeline. The actual time required for installation depends on your showroom’s size and the complexity of its layout.
Once the installation is complete, you’ll need to wait 24 hours before allowing heavy traffic (unlike the faster polyurea curing vs epoxy times) or placing furniture on the floor. Skilled installation ensures the flooring is set up correctly, reducing the risk of common issues. This efficient process not only saves time but also ensures the durability and polished appearance of your LVP.
Durability and Maintenance
To keep LVP looking its best, regular maintenance is essential. Daily sweeping or vacuuming with a soft-floor attachment helps prevent dirt, sand, and grit from scratching the surface. For deeper cleaning, use a damp mop with a no-rinse cleaner and warm water, avoiding excessive water or harsh, soap-based detergents that could damage the protective layer.
For heavy showroom displays, use non-staining floor protectors like glass or hard plastic caps under furniture legs, and attach felt pads to items that are frequently moved. Avoid dragging heavy displays across the floor – lift and carry them or use furniture sliders instead. To prevent fading from sunlight exposure, consider adding blinds or UV-protective window films. A professional deep cleaning every six months helps remove stubborn build-up that regular cleaning might miss.
Aesthetic Appeal for Showrooms
LVP offers the look of natural hardwood – such as Oak, Hickory, Walnut, and Maple – at a much lower cost. Popular choices for professional spaces include Cairo Oak, Calypso Oak, Red River Hickory, and Ebony Gray. Large-format planks, like 9" x 73" or 7" x 48", provide seamless coverage for expansive showrooms. Additionally, commercial-grade finishes like "Enhanced" or "LifeSeal" protect the flooring from scuffs and spills, making it ideal for high-traffic areas like automotive showrooms.
Cost Efficiency
Commercial-grade LVP options, such as COREtec Pro and Shaw Floorte Pro, are specifically designed to handle heavy foot traffic and weight demands. Wholesale pricing allows showroom owners to purchase materials in bulk without requiring a contractor account, reducing upfront costs. LVP is sold in boxes covering areas like 18.67 SF, 26.47 SF, 28.84 SF, or up to 38.03 SF, making it simple to order the exact amount needed. Flooring with rigid core technologies like SPC (Stone Plastic Composite) and WPC (Wood Plastic Composite) enhances structural stability, cutting down on long-term repair and replacement expenses. With over 5,000 options available through wholesale suppliers, you can find flooring that fits your budget while maintaining a professional and polished look.
Top 4 Commercial Flooring Options (What Actually Holds Up)
Installation Time Comparison
When selecting flooring for an automotive showroom, installation time plays a big role in reducing business downtime. The table below compares five flooring options based on installation time, complexity, preparation needs, advantages, and drawbacks.
| Flooring Type | Installation Time (per 1,000 sq ft) | Complexity Level | Required Prep Work | Main Advantages | Main Disadvantages |
|---|---|---|---|---|---|
| Polyurea Coatings | 1 day | High (requires specialized equipment) | Subfloor repair, surface grinding, moisture testing | Fastest cure time, 4x stronger than epoxy, one-day installation | Requires specialized spray equipment ($15,000–$50,000) and trained crews |
| Epoxy Coatings | 2–3 days | Moderate | Subfloor repair, degreasing, acid etching | DIY-friendly, cost-effective, simple application with rollers or brushes | Longer cure time, less durable than polyurea |
| Polished Concrete | 3–5 days | High | Extensive grinding, crack repair, densifier application | Low maintenance, industrial aesthetic | Multi-step process requires professional equipment |
| Interlocking PVC Tiles | 1–2 days | Low | Minimal subfloor leveling, cleaning | No adhesives, reversible installation | Visible seams, lower durability for heavy vehicles |
| Luxury Vinyl Plank | 2–3 days (plus 48–72 hours acclimation) | Moderate | Subfloor leveling, 2–3 day acclimation period | Realistic wood appearance, cost-effective | Requires acclimation time |
Minimizing installation time is especially crucial for busy automotive showrooms. Among the options, polyurea coatings stand out for their speed and durability. Despite requiring specialized spray equipment and trained crews – due to their fast curing process (curing in seconds) – installation can be completed in just one day. This means your showroom can be back in business the next morning, an advantage unmatched by other options like luxury vinyl plank, which requires a 48–72-hour acclimation period before installation even begins.
Epoxy coatings, while slower than polyurea, offer a balance of moderate complexity and ease of application. Using basic tools like rollers or brushes, epoxy coatings can be installed in 2–3 days, though they require more curing time and are less durable than polyurea.
Polished concrete, on the other hand, involves a more time-intensive process – 3–5 days on average – due to the multi-step grinding and densifying required. While it delivers a sleek, low-maintenance finish, the extended timeline might not suit showrooms needing quick turnarounds.
For heavy-vehicle showrooms, polyurea coatings are an efficient choice. Their superior strength and rapid installation minimize downtime while ensuring durability.
A great example is Croc Coatings’ proprietary Penntek Evolution system, which showcases the benefits of polyurea with a one-day installation process. These coatings are not only fast but also 4x stronger than epoxy, making them a smart choice for high-traffic, high-demand spaces like automotive showrooms.
Conclusion
Selecting the right flooring for your automotive showroom requires balancing factors like installation time, durability, and budget. Among the options, polyurea coatings’ long-term cost benefits stand out for their quick installation – completed in just one day – making them perfect for showrooms that need to minimize downtime. With strength that’s four times greater than epoxy, polyurea coatings can easily withstand heavy vehicle traffic. This is largely due to the superior impact resistance of polyurea vs. epoxy, which prevents cracking under pressure. Products like Croc Coatings’ Penntek Evolution deliver this durability alongside warranties that include lifetime coverage for residential use and a 5-year guarantee for commercial settings, ensuring long-term reliability.
That said, your specific showroom needs will determine the best fit. Epoxy coatings offer a more affordable option with a moderate installation timeline, while polished concrete provides a sleek, high-end look but requires more time to complete.
Installation complexity is another factor to consider. Polyurea coatings require specialized equipment and trained professionals, but this ensures the project stays on track and minimizes revenue loss from extended closures. The size of your showroom, subfloor condition, and whether the installation can be phased or requires a full shutdown will also impact your timeline.
To keep downtime to a minimum, consider scheduling installations during weekends or off-hours. Additionally, having your subfloor inspected beforehand and opting for materials with fast-drying finishes can help speed up the process, allowing your showroom to quickly resume operations.
FAQs
Can my showroom stay partially open during installation?
Yes, your showroom can remain partially operational during installation, depending on the type of flooring being installed. Polyurea flooring is a popular choice because it can often be installed in just one day, causing minimal disruption. This quick turnaround makes it easier to maintain some level of business activity. However, materials like epoxy or urethane cement may require more curing time, which could lead to temporary closures. Be sure to discuss timelines and safety requirements with your flooring provider to plan accordingly.
What subfloor issues can delay installation the most?
Before starting a flooring installation, certain subfloor issues could potentially delay the process. While the search results don’t pinpoint specific problems, there are a few common culprits to watch for:
- Uneven surfaces: A subfloor that’s not level can cause complications, especially with materials like hardwood or laminate that require a smooth base.
- Moisture problems: Excess moisture in the subfloor can lead to warping or damage over time, making it essential to address before laying new flooring.
- Structural damage: Any cracks, rot, or weak spots in the subfloor need to be repaired to ensure a stable foundation.
The specific preparation required will depend on the type of flooring being installed, but tackling these issues early can save time and effort down the line.
Which option handles hot tire pickup and chemical spills best?
Polyurea flooring stands out as an excellent choice for dealing with hot tire pickup and chemical spills. Its durability and resistance make it a reliable option for spaces that frequently face these challenges.