Don’t coat over rust-stained concrete. If rust is still in the slab – or the metal or moisture causing it is still there – the coating can peel, blister, stain through, and fall outside warranty terms.
Here’s the short version:
- Rust stains are a warning sign, not just a color problem
- The source matters: rebar, drain parts, metal furniture, salts, fertilizer, leaks, and water at entries are common causes
- Cleaning alone may not be enough if the stain keeps coming back
- The slab must be clean, dry, and sound before patching, profiling, or coating
- Up to 80% of coating failures tie back to poor surface prep
- Removal method depends on stain depth:
- scrub and clean for light transfer
- oxalic-acid treatment for common surface rust
- poultice for deeper stains
- grinding or shot blasting when the concrete face is damaged
If I see rust near a crack, drain, wall edge, or garage entry, I’d treat it as a clue that something below or nearby still needs repair. Removing the stain is only part of the job. Stopping the source is what gives the coating a fair shot to bond and last.
| Issue | What it can mean | What to do first |
|---|---|---|
| Small rust rings | Metal touching damp concrete | Remove source and clean stain |
| Streaks by drains | Corroded drain parts or water flow | Repair hardware and clean slab |
| Rust along cracks/joints | Steel near surface or slab damage | Check condition, remove weak material |
| Stains that return | Active moisture or corrosion | Fix source before coating |
| Rough or etched areas after cleaning | Surface may need more prep | Rinse, dry, then recheck |
That’s the core idea: remove the rust, fix what caused it, and confirm the slab is dry and clean before coating starts.
Rust Remover Challenge: What Removes Rust Stains Off Concrete?
sbb-itb-a0e5ae3
What Happens When Rust Stains Are Left Under a Coating
Coating over rust stains doesn’t fix the problem. It just seals it under the film.
Once a coating is applied over contaminated concrete, the stain – and the source behind it – can keep causing trouble below the surface. The usual chain looks like this: bond failure first, visible staining next, and hidden corrosion after that.
Adhesion Loss, Peeling, and Blistering
A coating is meant to bond to concrete, not rust.
So when rust residue, moisture, and sometimes salts are still sitting on the slab, the coating ends up sticking to contamination instead of clean concrete. That’s where weak spots form. And when traffic hits the floor, those weak spots tend to fail first.
The damage often begins in a small, easy-to-miss area:
- a lifted edge near a drain
- a chip along an older rust-stained patch
- a bubble in the coating film
Once the bond breaks in one place, moisture and contaminants can move under the coating and push the damage farther out. Blistering is one of the clearest warning signs. A hollow blister or rusty liquid release points to corrosion under the coating.
Once the bond gives way, the damage can spread under the film.
Discoloration, Stain Bleed-Through, and Underfilm Corrosion
Even if the rust is hidden at first, the source may still bleed through.
If the cause of the rust – like corroding rebar, a rusting drain housing, or embedded iron particles – is still active, moisture and oxygen can keep feeding corrosion under the coating. Over time, rust halos, spots, or streaks may show through or around the film, especially on lighter-colored floors.
This is corrosion under the coating. It can spread before the film cracks, domes, or pulls away. Near joints, drains, and shallow rebar, expanding corrosion can even crack the concrete itself.
How Rust Stains Affect Warranty Coverage and Coating Life
Rust stains matter for another reason too: warranty coverage.
Most warranties leave out failures linked to rust, moisture, or other substrate contamination. If a floor peels, blisters, or shows rust bleed-through, that usually gets treated as a surface prep issue – not a product defect.
Proper rust removal before coating is about more than looks. It helps protect adhesion, supports longer coating life, and lowers the odds that a later failure gets left out of warranty coverage.
That’s why pros check the slab for the source of the rust before moving ahead with surface prep.
How Pros Inspect Rust-Contaminated Concrete Before Coating
Before rust removal starts, pros figure out what caused the stain and where it came from. That call shapes the next prep step. A light surface stain and active corrosion under the slab surface are not the same problem.
Reading Stain Patterns and Nearby Slab Damage
Stain shape gives away a lot. A circular halo under a metal shelf foot usually points to direct, long-term contact between metal and a damp slab. Streaks that run toward a floor drain or door threshold tend to follow water movement, which often means moisture keeps coming back, not that there was just one spill.
Pros don’t stop at the stain itself. They inspect the concrete around it too. Spalling, hairline cracks, or damp edges near rust spots can mean corrosion has already started below the surface. That changes the prep plan.
Finding the Source Before Surface Prep Continues
Spotting the stain is the first step. Figuring out why it showed up is what matters most.
Common sources include:
- Metal patio furniture
- Corroding drain hardware
- Fertilizer residue
- De-icing salts
- Leaking appliances
- Exposed rebar or other steel close to the surface
Pros also check for repeat moisture from snowmelt, irrigation overspray, or poor drainage. If water keeps hitting the same area, rust usually comes back too.
One simple field test is to lightly wet the stained spot and watch it. If the stain gets darker, spreads, or comes back after drying, the rust source is still active. A slab with active bleed-through is not ready for coating until that source is fixed. Pros also make sure to test concrete moisture before coating.
Inspection Checklist: What Pros Evaluate Before Approving a Slab
The table below shows how professionals connect visible clues to likely causes and the prep work needed before coating prep can move ahead.
| Visible Stain Pattern | Likely Source | Prep Response |
|---|---|---|
| Small round halos at furniture feet | Metal chair legs, shelving, or equipment with uncoated metal bases | Remove items; clean with rust remover; protect metal feet before reinstalling |
| Rust streaks running toward a drain | Corroding drain assembly or cast-iron plumbing | Repair or replace corroded hardware; clean and reprofile surrounding concrete |
| Linear rust along a crack or joint | Embedded rebar or iron-bearing aggregate near the surface | Assess structural condition; remove loose material; patch and retest |
| Broad staining near a garage door or entry | Fertilizer overspray, de-icing salts, or irrigation runoff | Deep clean and correct drainage or overspray |
| Rust spots that return after cleaning | Active corrosion or ongoing moisture intrusion | Fix the moisture source, treat the stain, and retest |
Once the source is clear, the next move is picking the right rust-removal method based on stain depth and cause.
Rust Stain Removal Methods Used in Coating Prep
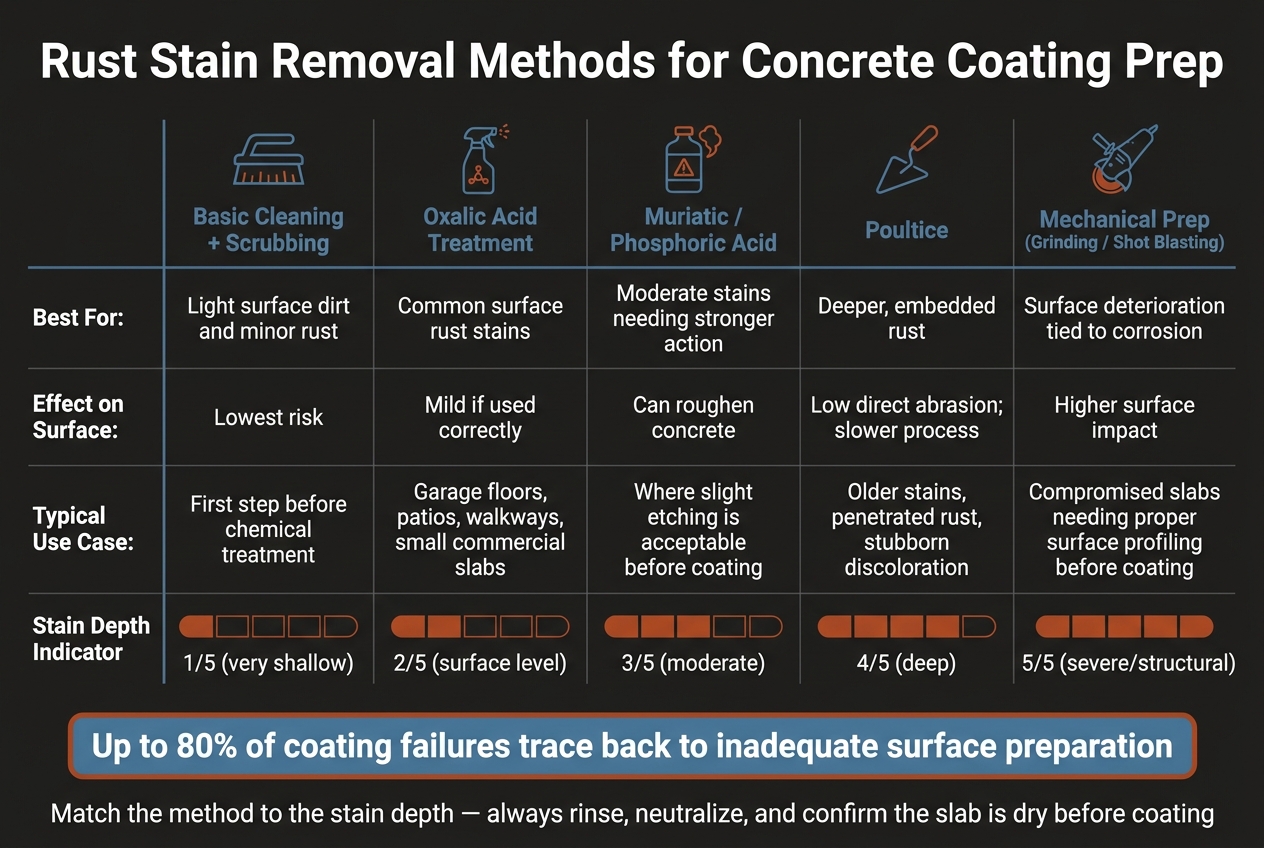
Rust Stain Removal Methods for Concrete Coating Prep
Match the removal method to the depth of the stain. A light transfer mark is one thing. Rust that has worked its way into the slab is another.
The method you choose depends on what you’re dealing with:
- Surface transfer
- Embedded staining
- Active corrosion
Surface Cleaning, Chemical Treatments, and Deeper Removal Options
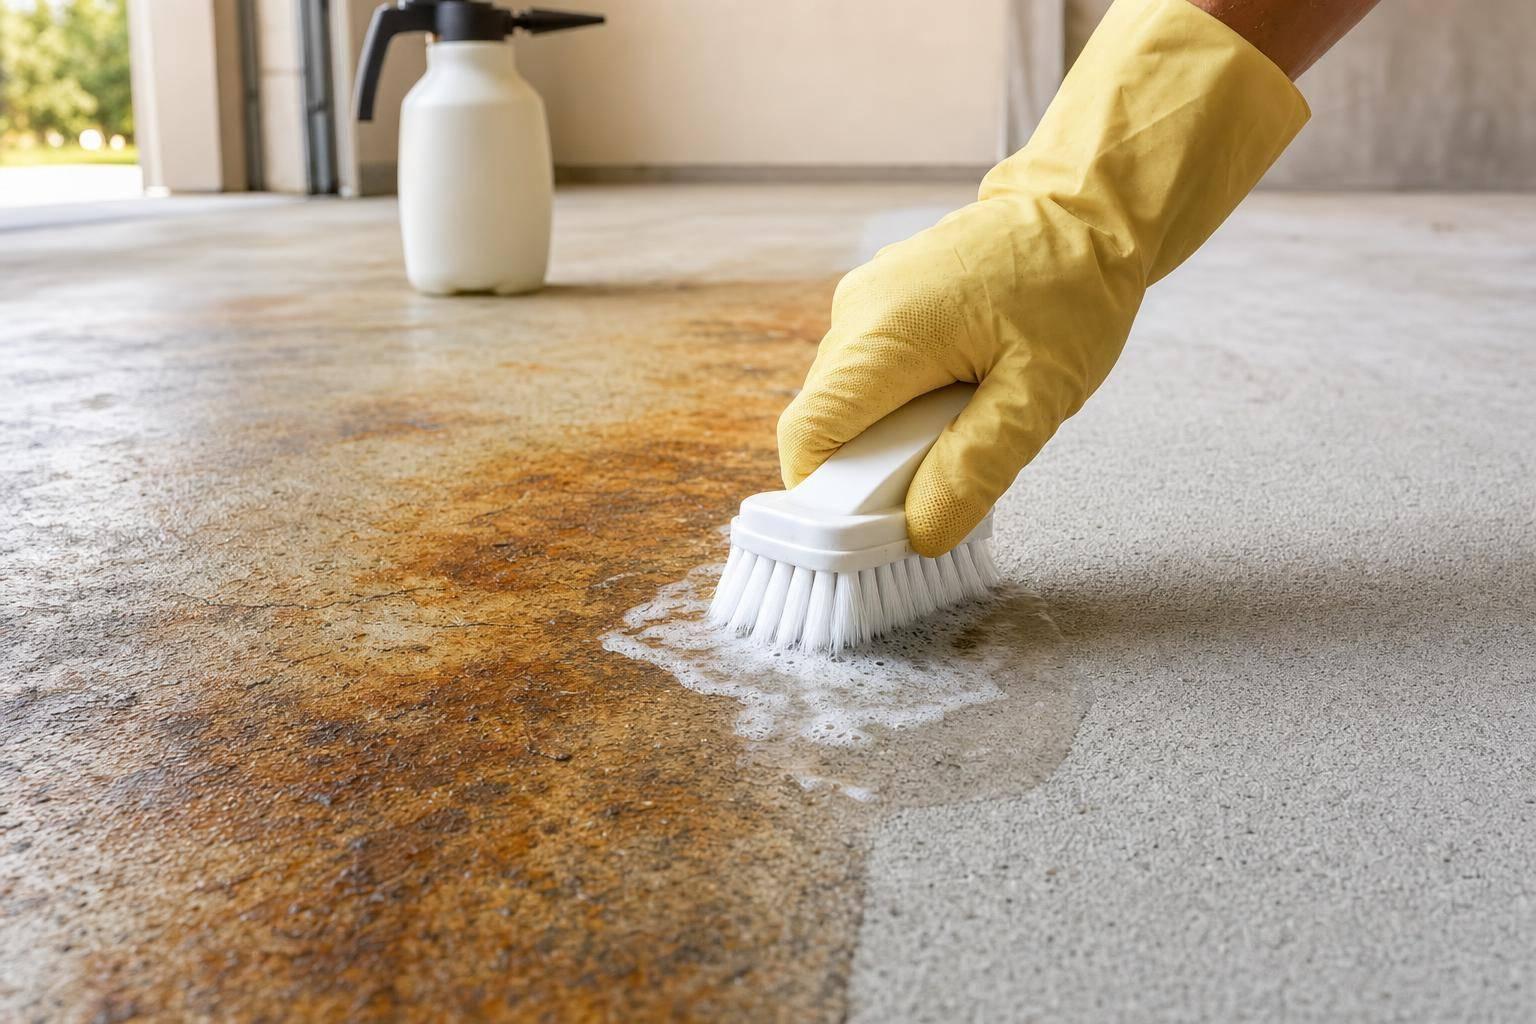
Start with the basics: sweep, degrease, and scrub with a stiff nonmetal brush before using any chemical treatment. That first pass clears away loose residue and makes it easier to see whether the rust is just sitting on the surface or has soaked into the concrete.
For common surface rust, oxalic-acid-based treatments are a standard option in technical guidance. The GSA procedure calls for 1 lb of oxalic acid per 1 gallon of water, followed by a 2- to 3-hour dwell time, then scrubbing and a thorough rinse. This method works well on garage floors, patios, and small commercial slabs where the rust is mostly discoloration instead of deep contamination.
When the stain is deeper, a poultice usually does more than repeated scrubbing. Apply a thick paste or absorbent compound and leave it in place for several days so it can pull the contamination out as it dries. It’s a slower process, but it can remove staining that chemical washing only lightens.
Use grinding or shot blasting when corrosion has started to damage the concrete surface itself. Go carefully here. If you overgrind, you can alter the concrete surface profile and leave texture that shows through the coating.
Rinsing, Drying, and Confirming the Concrete Is Ready
Rust removal doesn’t end when the stain is gone. Leftover chemicals can weaken adhesion or leave salts behind that keep the concrete unstable. Rinse the slab fully and neutralize it if the product instructions call for it. Then let the surface dry all the way.
Before patching, profiling, or coating, check again for:
- Remaining discoloration
- Roughness
- Contamination
That recheck matters just as much as the cleaning step.
Once the slab is clean, dry, and free of residue, it’s ready for patching and coating.
Rust Stain Removal Methods: A Side-by-Side Comparison
The table below shows which method fits each type of stain.
| Method | Best For | Effect on Surface | Typical Use Case |
|---|---|---|---|
| Basic cleaning + scrubbing | Light surface dirt and minor rust | Lowest risk | First step before chemical treatment |
| Oxalic-acid treatment | Common surface rust stains | Mild if used correctly | Garage floors, patios, walkways, small commercial slabs |
| Muriatic/phosphoric acid | Moderate stains needing stronger action | Can roughen concrete | Where slight etching is acceptable before coating |
| Poultice | Deeper, embedded rust | Low direct abrasion; slower process | Older stains, penetrated rust, stubborn discoloration |
| Mechanical prep (grinding/shot blasting) | Surface deterioration tied to corrosion | Higher surface impact | Compromised slabs needing proper surface profiling before coating |
The goal isn’t just to remove the stain. It’s to leave behind a stable surface the coating can bond to.
Why Clean Concrete Leads to a Longer-Lasting Coating
Once the slab is clean and dry, the coating bonds to the concrete itself, not to the dirt, rust, or residue sitting on top of it. That matters more than most people think. Poor surface prep – not the coating – causes most early failures. Industry data shows that up to 80% of all coating failures trace back to inadequate surface preparation.
After rust and other contaminants are removed, the coating can grip sound concrete and stand up better to hot-tire pickup, abrasion, and seasonal moisture stress. Put simply, clean concrete leaves fewer weak spots where failure can start.
Rust left under a coating doesn’t just sit there quietly. It can move upward over time and show up as halos, spots, or uneven color.
This same prep standard also affects warranty coverage. Coating warranties, including the lifetime residential warranty offered by Croc Coatings, depend on installation over properly prepared, clean, and dry substrates. A coating is only as good as the surface it sticks to.
Remove the rust. Fix the source. Follow a pre-installation checklist to prep the slab. That’s what helps the coating last longer and keeps warranty coverage in place. Coatings installed over properly prepared concrete can deliver years of reliable service, while coatings applied over contaminated surfaces may fail years earlier than they should. Clean concrete gives the coating its best shot to bond well, hold up, and stay covered.
FAQs
Can rust stains come back after cleaning?
Yes. Rust stains can come back after cleaning when they stem from internal sources, like corroding rebar inside the slab.
Brown or orange discoloration near cracks often points to active corrosion within the concrete, not just a stain sitting on the surface. If the stain keeps showing up or never fully goes away, fix the root problem before coating. If you don’t, it can affect the coating’s integrity and how long it lasts.
How do I know if rust is only on the surface?
It usually takes more than a quick visual check. A stain on the surface might seem minor, but brown or orange discoloration near cracks can point to corroding rebar under the slab.
That’s the tricky part: rust marks are often just the tip of the iceberg. To see what’s happening below the surface, pros may use non-destructive testing like ground-penetrating radar. This helps them check for hidden moisture, voids, or the depth of the reinforcing bar.
If you spot rust near cracks, have a professional inspect the slab before applying a coating.
Will rust stains void a concrete coating warranty?
Yes. If rust stains and the issues behind them aren’t dealt with the right way, they can put the coating project – and the warranty – at risk.
Rust stains can be a sign of internal rebar corrosion. And if surface prep is skipped or done poorly, the coating may not bond as it should. That can lead to adhesion failure, peeling, or delamination.
It also helps to document the prep and cleaning work. That record matters if you ever need to support a claim under Croc Coatings’ lifetime residential warranty.