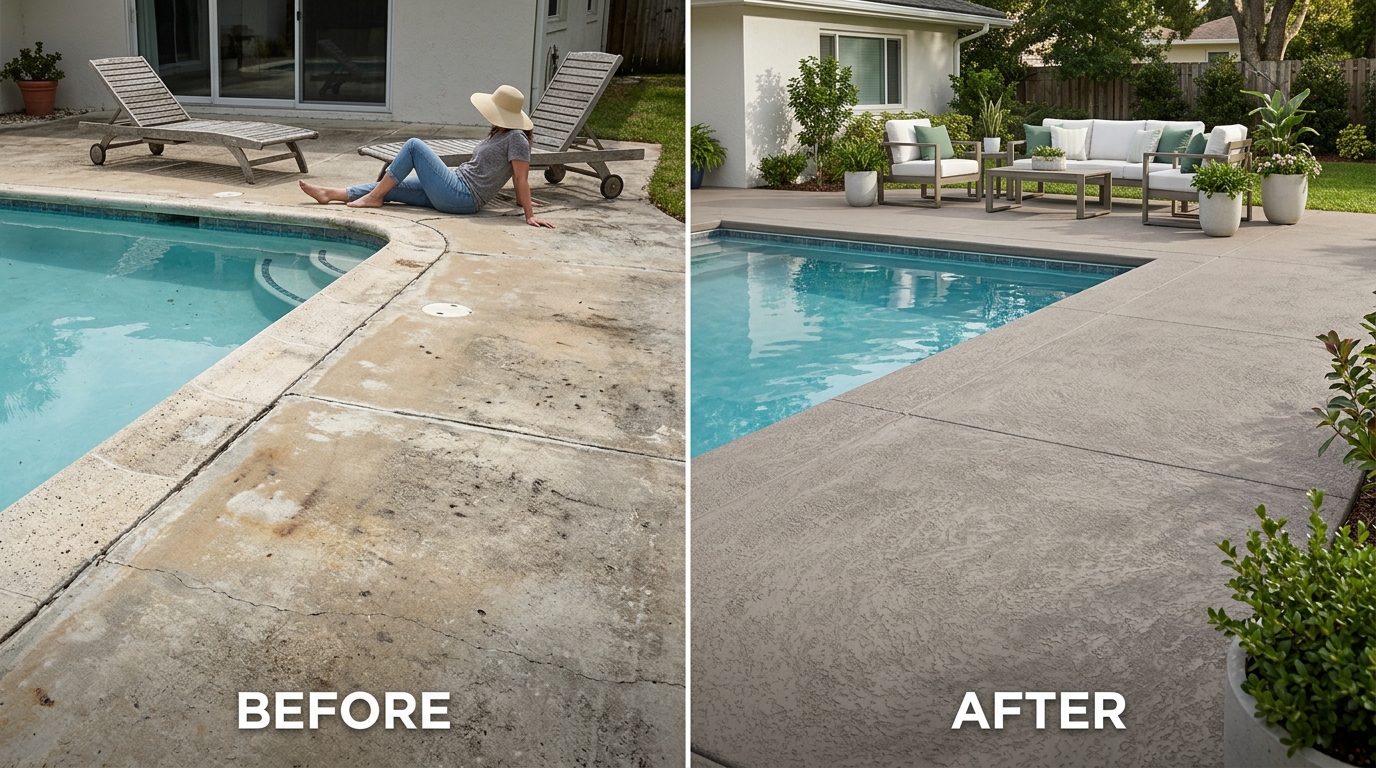
To ensure new coatings properly adhere to concrete, removing old residues like glue, epoxy, or paint is non-negotiable. Skipping this step can lead to poor adhesion, uneven finishes, and concrete coating failures. You have two main options: chemical strippers or mechanical tools, each suited for different project needs.
Key Takeaways:
- Chemical Strippers:
- Best for small areas or delicate surfaces.
- Types include solvent-based, biochemical, and acid-based solutions.
- Cost: $0.20–$0.50 per sq. ft.
- Slower process but gentle on concrete.
- Mechanical Tools:
- Ideal for large areas or thick coatings.
- Includes grinders, shot blasters, and scrapers.
- Cost: $0.50–$2.00 per sq. ft.
- Faster but creates dust and noise.
- Safety: Proper PPE is essential for both methods. Chemical fumes and silica dust can pose health risks without precautions.
Choosing the right method depends on the project size, coating thickness, and surface condition. Below, we dive into the details of each approach to help you decide.
How To Remove Concrete Sealer (Strip And Re-Seal Old White Acrylic Sealer)
sbb-itb-a0e5ae3
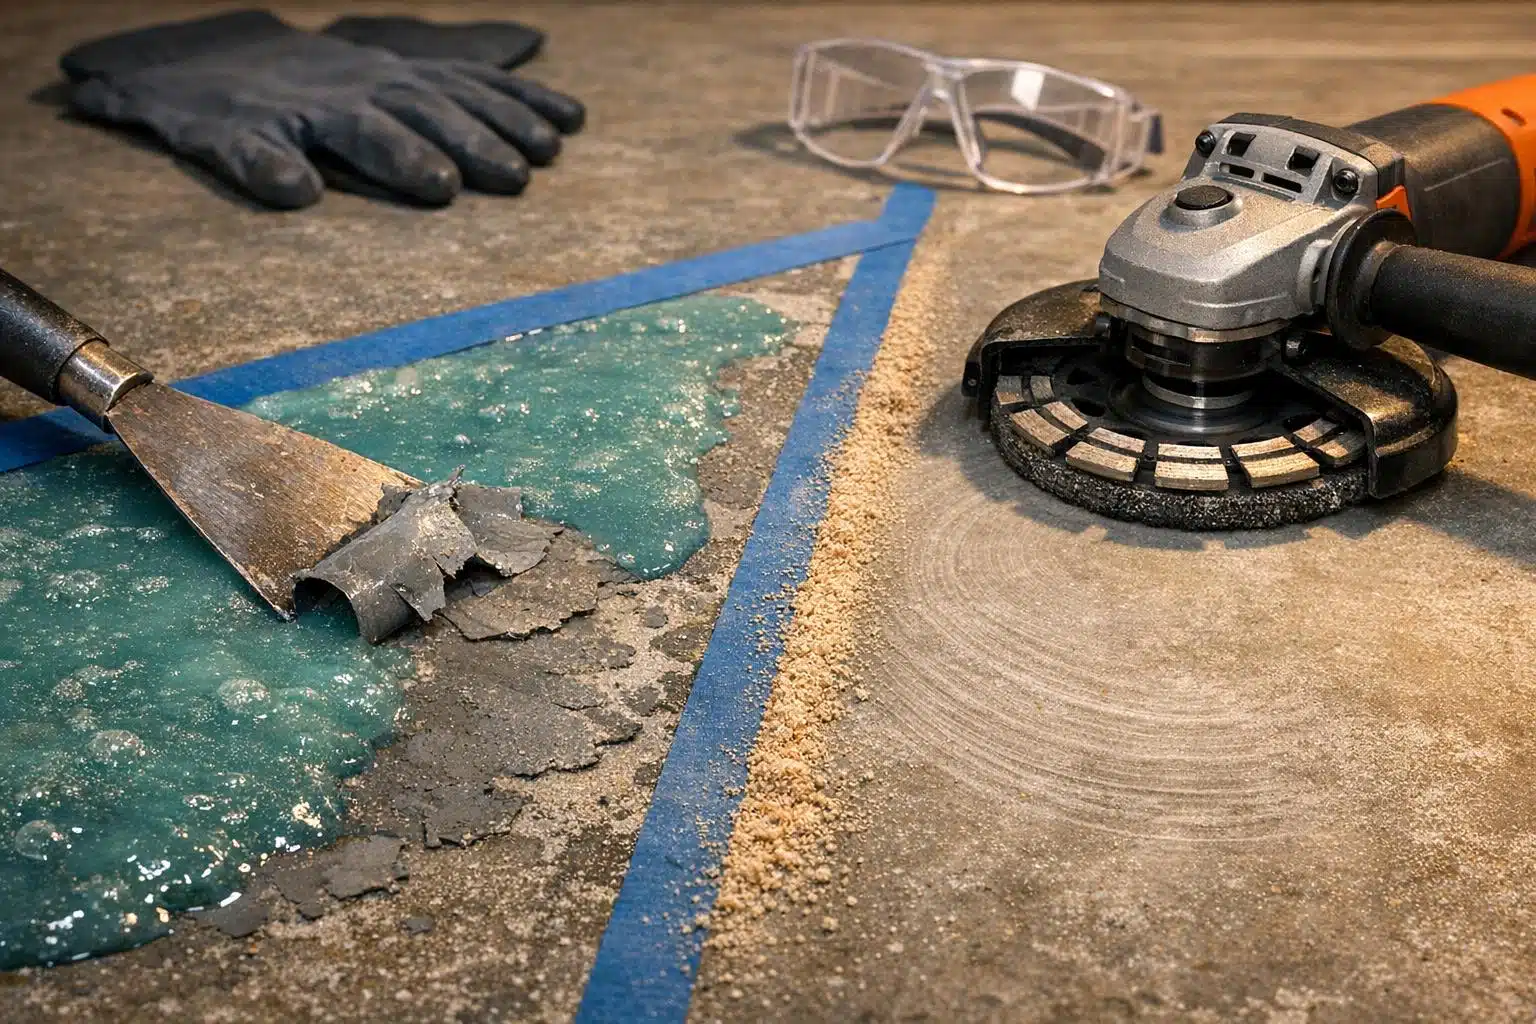
Chemical Strippers for Coating Removal
When it comes to preparing concrete surfaces for new coatings, achieving a clean, well-prepared surface is crucial. Chemical strippers offer a reliable solution, especially when mechanical methods fall short. These products work by breaking the bond between coatings and the concrete surface. The main types include:
- Solvent-based strippers: These contain chemicals like xylene and acetone, making them effective for removing thick coatings such as epoxies and polyurethanes.
- Biochemical strippers: These use compounds like N-methylpyrrolidone, which are safer but require longer dwell times, typically 12–24 hours.
- Acid-based solutions: Muriatic or phosphoric acid works well for light residues but won’t tackle cured acrylics, polyurethanes, or epoxies effectively.
The key to success with chemical strippers lies in keeping them wet during application. As Robyn Buck, a contributor at ShunTool, explains, "Chemical strippers only work when they are ‘active’ or wet. Most strippers come in a gel or paste form to help slow evaporation and keep the stripper active for longer periods". Most seal strippers need 15 to 60 minutes to work on standard coatings, while thicker layers may need more time. Costs range from $0.20 to $0.50 per square foot, with products like Aqua Mix Sealer and Coating Remover priced at $37–$39 and Armor CR100 Epoxy/Urethane Remover costing about $85 per gallon.
Benefits of Chemical Strippers
Chemical strippers shine in situations where mechanical tools can’t perform. They can reach tight corners, edges, and other tricky areas that grinders or shot blasters might miss. Gels and pastes are particularly useful for vertical surfaces like walls and pillars, as they cling without dripping. They’re also effective on tough coatings like polyurethanes and epoxies, which are often resistant to mechanical methods.
Another major advantage is their gentle approach to the concrete substrate. Unlike grinding or blasting, chemical strippers don’t chip or etch the surface. They also generate minimal dust and operate quietly, making them a good choice for use in occupied buildings or noise-sensitive areas. For thin coatings, they can be faster and more economical than setting up mechanical equipment.
How to Apply Chemical Strippers Safely
Before applying a chemical stripper, clean the surface thoroughly with trisodium phosphate (TSP) or by pressure washing to remove dirt and grease. Let the surface dry completely. Protect nearby items with plastic sheeting to avoid damage from runoff. It’s always a good idea to test the stripper on a small, hidden area first to determine the appropriate dwell time and check for any discoloration.
- Application: Use a pump sprayer for liquid strippers (avoid metal containers, as they can react with the chemicals). For gels or pastes, spread them evenly with a notched trowel or squeegee at about 1/8 inch thickness. Work in manageable sections, around 100–200 square feet at a time. Cover the area with plastic sheeting to prevent evaporation and maintain chemical activity.
- Removal: After the dwell time, scrub the surface with a stiff-bristle brush or floor machine to loosen the residue. Follow up with a pressure washer set to 2,000–4,500 PSI.
Safety first: Always wear chemical-resistant gloves, safety goggles, and a respirator equipped with organic vapor cartridges. After stripping, neutralize the surface – use vinegar and water for alkaline strippers or baking soda and water for acidic ones. Allow the concrete to dry for 24 to 48 hours before applying a new coating. Dispose of all waste, including sludge and runoff, in accordance with local regulations.
When used correctly, chemical strippers integrate seamlessly into the broader process of concrete surface preparation. They offer versatility and precision, making them an indispensable tool for coating removal.
Mechanical Tools for Coating Removal
When chemical strippers aren’t a viable option – or when tackling large industrial projects – mechanical tools step in as the preferred solution. These tools physically remove coating residue by grinding, blasting, or scraping it away. They’re particularly effective for removing thick coatings like epoxy, mastic, and urethane. Mechanical methods work quickly on large surfaces and leave the concrete ready for immediate reapplication, making them ideal for industrial-scale jobs where chemical methods fall short.
Concrete Grinders and Diamond Tools
Concrete grinders are equipped with rotating heads and diamond-based tooling to grind or scrape away stubborn residues. These tools are excellent for removing hard coatings and can also polish the surface for a smooth finish. The key to success lies in choosing the right attachment for the job:
- Polycrystalline Diamond (PCD) tooling: Perfect for tough coatings like urethane, mastic, and epoxy. PCD tooling avoids the clogging issues common with standard diamond segments.
- Carbide scrapers: Effective for sticky or hard coatings such as waterproof membranes and pool deck coatings.
- Metal-bonded diamonds: Best for removing brittle adhesives.
Grinders generally produce a Concrete Surface Profile (CSP) of 1–3, with some reaching CSP 4. This range is ideal for preparing surfaces for thin-mil coatings, vinyl composite tile (VCT), carpet, or rubber flooring. Commercial flooring contractor Randy Wheelis shared his experience:
"Whenever I used my planetary grinder to prepare the concrete surface I was always left with a beautiful ‘blank canvas’ that I was ready to work with".
Replacement tooling, such as diamond or PCD segments compatible with popular brands like Husqvarna, EDCO, or Lavina, starts at around $105.87 per unit. However, the cost of diamond technology and frequent replacements makes grinding a pricier option compared to other mechanical methods.
Shot Blasters for Surface Profiling
Shot blasters use high-speed steel beads to remove thin coatings and paints while simultaneously profiling the concrete surface. They are faster than grinders for large areas and thin coatings. According to Bartell Global:
"Removal of thin glue or epoxy paint is best done with Shot Blasting because Grinder segments can get the coating stuck on them making them less efficient".
Shot blasting creates a deeper surface profile (higher CSP) than grinding, which is crucial for the proper bonding of thick coatings, overlays, and parking deck membranes. In fact, many coating manufacturers require shot blasting to maintain warranties, as it ensures better adhesion than grinding in some industrial scenarios. This method is also more cost-effective due to the lower price of steel shot compared to diamond segments. That said, shot blasting can leave visible streaks and may cause micro-fractures in the concrete. Despite these drawbacks, it’s an essential method for achieving the necessary surface profile for coating applications.
Pressure Washers for Initial Cleaning
Before using grinders or shot blasters, it is essential to inspect concrete before coating and use pressure washers for initial cleanup. With water pressure ranging from 3,000 to 4,000 PSI, they effectively remove loose debris, oil stains, and surface contaminants. When paired with degreasers, pressure washers can tackle even the most stubborn oil spots that might interfere with coating removal or adhesion.
While pressure washing is a low-cost and efficient method for removing loose debris, it introduces moisture into the concrete, requiring sufficient drying time before further work can continue. It’s best used as a preparatory step rather than a standalone solution. For bulk residue, a long-handled, sharp scraper can reduce wear on mechanical equipment. Together, these mechanical methods ensure a thorough preparation of concrete surfaces, complementing chemical approaches for a complete solution.
Chemical vs. Mechanical Removal Methods

Chemical vs Mechanical Concrete Coating Removal Methods Comparison
The choice between chemical and mechanical removal methods depends on several factors, including project size, coating thickness, and the condition of the surface. Chemical strippers work by breaking down the molecular bonds in coatings, making them a great option for thin sealers or smaller areas where preserving the concrete surface is crucial. On the other hand, mechanical methods rely on physical force – grinding, blasting, or scraping – to remove coatings. This makes them well-suited for thicker materials like epoxy or heavy adhesives, especially in large commercial spaces. These approaches also differ in speed and application techniques.
Speed and Efficiency
Chemical strippers require time to work, with dwell times ranging from 15 minutes to 24 hours, depending on the product and the coating’s thickness. Mechanical methods, however, provide immediate results but involve significant physical labor and often require heavy equipment. As Robyn Buck from ShunTool explains:
"The mechanical method involves physically grinding, sanding, or blasting away the sealer… The chemical method, which is more common, involves using a chemical stripper to destroy the coating".
Cost Considerations
Cost can vary greatly between the two methods. Chemical stripping typically costs between $0.20 and $0.50 per square foot, while mechanical methods range from $0.50 to $2.00 per square foot. Mechanical tools not only remove coatings but can also create the necessary surface profile for new applications, sometimes removing up to an inch of concrete in one pass. Chemical methods, on the other hand, leave a smooth finish but require neutralization – often with baking soda or vinegar – before recoating.
Safety and Risks
Safety is another critical factor. Chemical stripping can release toxic fumes and produce hazardous waste, necessitating proper ventilation and protective gear to avoid skin burns or more severe health risks like liver damage. Mechanical methods, while free of chemical hazards, generate significant noise and silica dust, which requires dust control measures like HEPA vacuum systems or water sprays to protect workers. Conducting a patch test is always recommended to fine-tune the chosen method.
Comparison Table: Chemical vs. Mechanical Methods
| Feature | Chemical Stripping | Mechanical Stripping |
|---|---|---|
| Best For | Small areas, thin sealers, sensitive environments | Large areas, thick epoxy, heavy adhesives |
| Cost | $0.20–$0.50 per sq. ft. | $0.50–$2.00 per sq. ft. |
| Speed | Slow (15 minutes to 24 hours dwell time) | Fast (immediate removal) |
| Surface Finish | Smooth to lightly textured | Rough to heavily profiled (ICRI standards) |
| Removal Depth | Thin surface layers only | Up to several inches |
| Primary Risks | Chemical burns, toxic fumes, hazardous runoff | Silica dust, noise, vibration |
| Equipment Needed | Sprayers, rollers, scrapers, brushes | Grinders, shot blasters, scarifiers |
Understanding these differences is crucial for selecting the right method for your project, balancing efficiency, cost, and safety.
Surface Preparation and Safety Requirements
Before starting any residue removal, it’s essential to understand the type of material you’re dealing with and the necessary safety precautions. Proper preparation and adherence to safety guidelines will ensure the process goes smoothly and effectively.
Identifying Coating Types and Surface Condition
The first step is to identify the type of residue – whether it’s concrete, mortar, grout, or a floor coating like mastic, glue, adhesive, thin-set, paint, or epoxy. Freshly poured concrete (less than 24 hours old) is usually easier to remove compared to fully cured material. Measure the thickness of the residue to determine whether chemical dissolvers are sufficient for thinner layers or if heavier mechanical tools are needed for thicker buildups.
It’s equally important to assess the underlying surface to avoid causing damage. For example, if the plan is to polish the concrete floor afterward, be cautious with aggressive mechanical tools, as they may not be suitable for surfaces intended for polishing. Additionally, check for contaminants like oil or grease, which can interfere with removal or future coatings. Always test a small area first and ensure the surface is dry before proceeding with any treatments. Once you’ve evaluated the surface and residue, focus on implementing the right safety measures.
Required Safety Equipment
Proper personal protective equipment (PPE) is essential, especially when working with chemical strippers, acids, or handling silica dust from mechanical removal. This includes chemical-resistant gloves, goggles, and respirators. Ensure you work in a well-ventilated area, preferably outdoors, particularly when using products that emit strong fumes.
If you’re using hydrochloric acid, remember to always add acid to water – not the other way around – to avoid dangerous reactions. Keep a baking soda solution on hand to neutralize any accidental acid spills immediately. For mechanical methods, a vacuum system equipped with HEPA filters is critical to reduce airborne silica dust and comply with OSHA standards. Finally, review the Safety Data Sheet (SDS) for any chemical product before starting to fully understand its hazards and the necessary precautions.
Conclusion
Chemical strippers are ideal for removing thin layers, sealers, and organic coatings, while mechanical methods – like diamond grinders and shot blasters – are better suited for tackling thick epoxy, mastic, or heavy buildup. As Mike Carmody puts it:
"Concrete dissolving solution does not melt concrete. It weakens it, so removal requires less effort".
When deciding between these methods, it’s crucial to weigh speed and safety. Mechanical tools deliver quick results but produce hazardous silica dust, which requires HEPA vacuums to comply with OSHA regulations. On the other hand, chemical methods need proper ventilation and protective gear to guard against toxic fumes and skin exposure.
The success of your removal process hinges on choosing the right method for your specific situation. Factors like coating thickness, the condition of the concrete, the surface profile needed for new applications, and the availability of safety equipment all play a role. Keep in mind that residue on concrete less than 24 hours old is easier to remove than material that has fully cured. These details highlight the need for careful planning and informed decision-making.
Always test a small area first to ensure the method is effective and won’t damage the surface. If using acids, remember to add the acid to water (not the other way around) and have a baking soda solution ready for neutralization. Whether you opt for chemical or mechanical techniques, thorough preparation and strict adherence to safety guidelines will help you achieve effective removal while preserving your concrete surface for future applications.
FAQs
How do I tell what coating is on my concrete?
To figure out what type of coating is on your concrete, you can try a few simple methods:
- Water beading: Pour some water on the surface. If it beads up, there’s likely a coating or sealant present.
- Sheen or color variations: Check the surface for any noticeable shine or uneven color, which could indicate a coating.
- Residue: Look for signs like a powdery haze or a milky film – these can suggest the presence of a curing compound or specific coating.
These clues can help you identify if your concrete has been treated.
Will stripping or grinding damage my concrete surface?
Stripping or grinding can harm concrete if not executed properly. But with the right tools and correct techniques, these methods can safely eliminate residue without damaging the surface. Be sure to follow all safety guidelines and assess the condition of the concrete beforehand to reduce potential risks.
How clean does concrete need to be before recoating?
Before applying a new coating, concrete needs to be thoroughly cleaned and free of any surface contaminants. This includes removing dirt, grease, oil, or any remnants of old coatings. Ensuring the surface is structurally sound and properly prepared is key to helping the new coating adhere well and maintain durability over time.