If you want a floor coating to last, the install process matters as much as the coating itself. From moisture checks and concrete grinding to crack repair, chip spread, topcoat timing, safety gear, and warranty paperwork, dealer training is what helps a crew do the job right.
Here’s the short version in plain English:
- Prep comes first: Most coating problems start with poor surface prep, not the coating.
- Crews learn in two parts: classroom work first, then hands-on slab practice.
- Training covers each install step: grinding, repair, basecoat, chip broadcast, scraping, vacuuming, and topcoat.
- Timing matters: at 70°F, floors are often tack-free in 45–120 minutes, ready for foot traffic in 4–6 hours, and ready for vehicles in about 24 hours.
- Safety is part of the system: crews use HEPA dust control, respirators, gloves, eye protection, and work-zone barriers.
- Owners get two big things: more even results and stronger warranty support when work is done to Penntek specs.
In other words: training helps cut down on peeling, uneven finish, dust issues, delays, and denied warranty claims. If I were hiring a coating crew, that’s what I’d want to know first.
Penntek Training Video
sbb-itb-a0e5ae3
How Penntek Trains Dealers and Crews
Penntek trains dealer owners and crew members through a structured, multi-day program built in two phases: classroom instruction and supervised hands-on practice. The idea is straightforward: learn the system first, then install it the right way.
Classroom Instruction: Product Knowledge and Job Planning
In the classroom, crews learn the chemistry behind Penntek’s polyurea and polyaspartic systems. That includes how these materials cure and why they hold up well under UV exposure, impact, and movement. Trainers also cover coverage rates, with a basecoat usually running about 150–200 sq ft per gallon depending on the concrete profile, plus pot life and the way temperature and humidity can change working time.
Instructors walk crews through the full installation sequence using visuals and written standards. That matters because each step affects the one that comes next. If the prep is off, the coating work suffers. If timing is off, the finish can suffer too. Once crews understand the process in the classroom, they move on to slab work and apply those same standards in supervised practice.
Hands-On Practice with Installation Tools and Techniques
After the classroom phase, crews move into supervised lab work on actual or mock slabs. They train with grinders, HEPA vacuums, mixers, rollers, squeegees, and edge tools. Trainers show how each tool should be used, then crews have to meet Penntek standards for surface profile, film thickness, and even coverage.
The hands-on phase runs through the full install sequence from bare concrete to the finished topcoat:
- grinding
- crack repair
- basecoat application
- chip broadcast
- chip scraping
- final topcoat rolling
Trainers review the work at each stage and call for corrections when a step is rushed or skipped. That repetition helps crews build consistent habits, which supports uniform results and warranty-backed work.
What Training Covers During Floor Prep and Installation
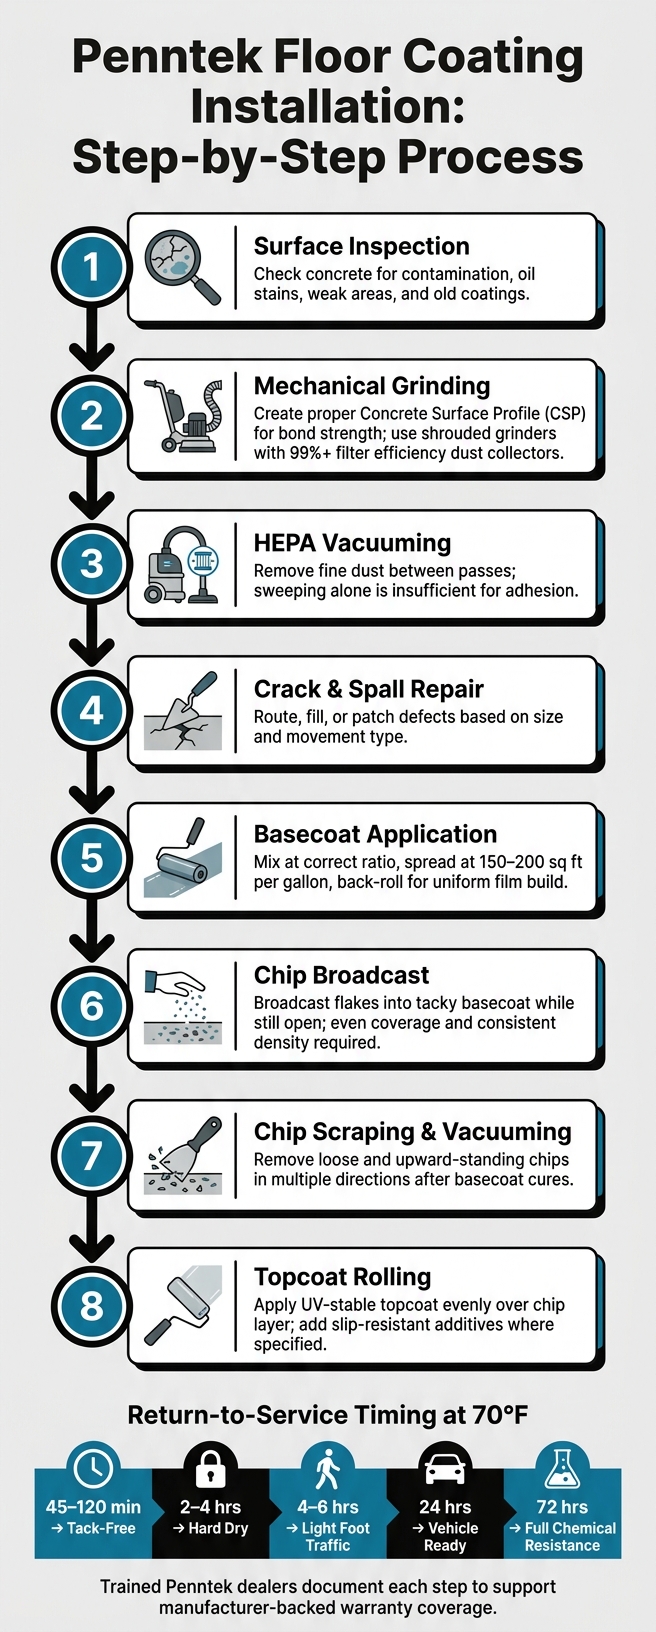
Penntek Floor Coating Installation Process: Step-by-Step Training Breakdown
Once crews leave the classroom and start working on the slab, the job turns into a series of checkpoints. Each step has to be done in the right order, and each one affects how the floor looks, bonds, and holds up over time.
Surface Prep and Crack Repair for a Strong Bond
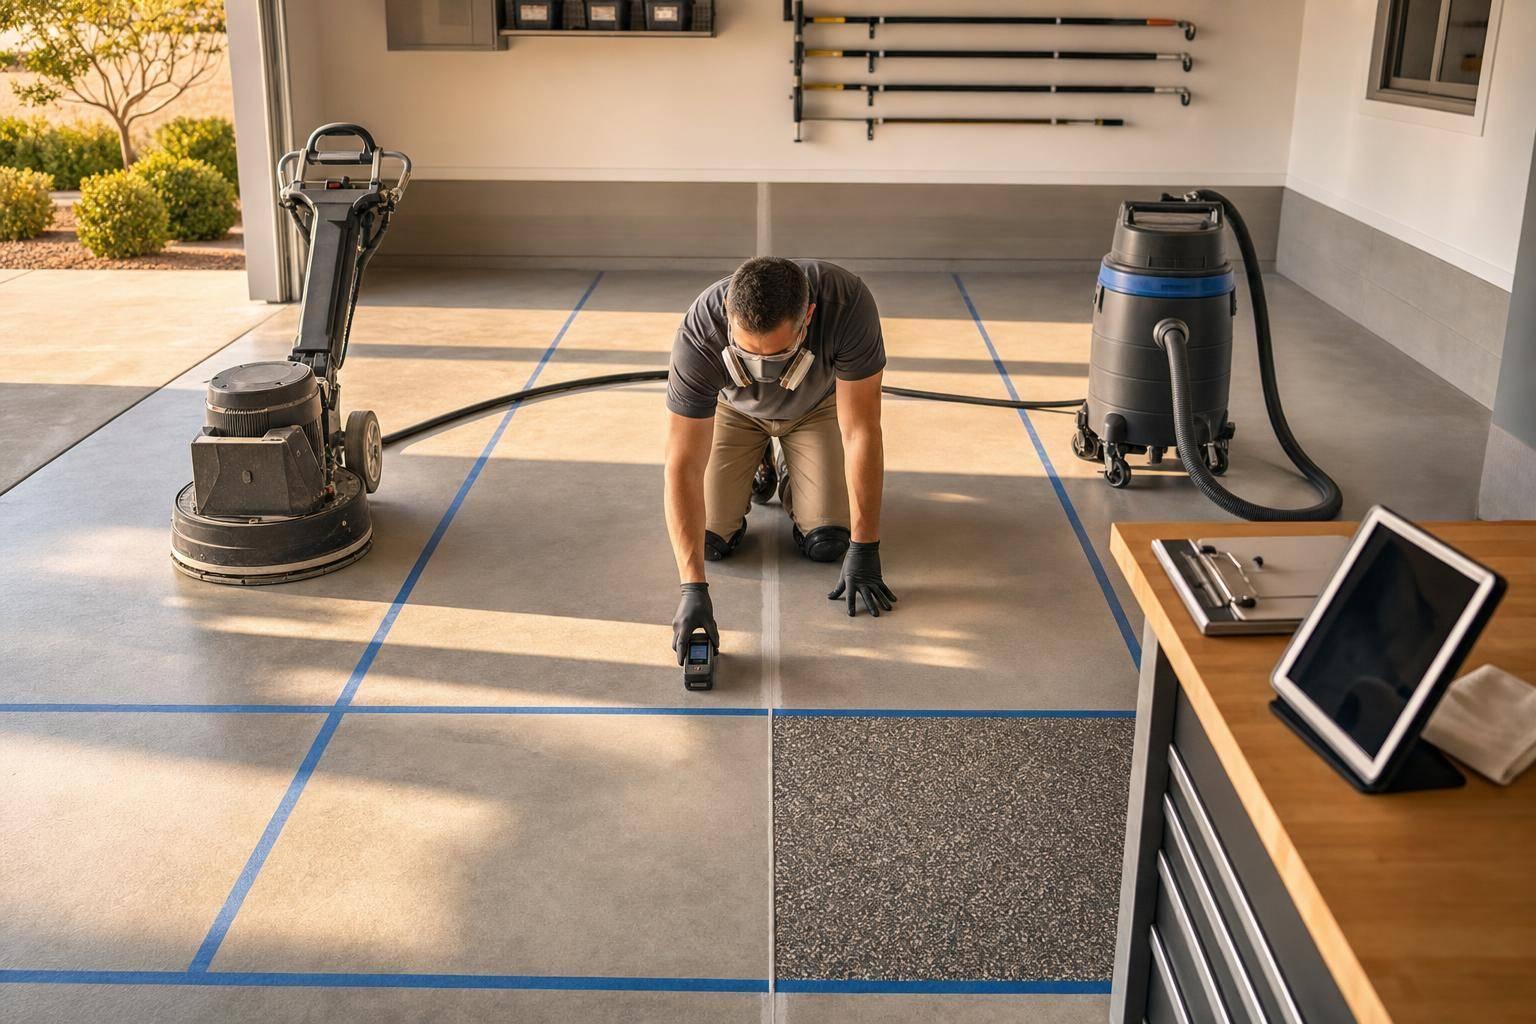
A trained crew starts by checking the concrete for contamination, oil stains, weak areas, and old coatings. Then comes grinding to create the proper Concrete Surface Profile (CSP) for bond strength. That profile helps the basecoat stick to solid concrete and keeps the final finish even from edge to edge.
Dust control matters just as much as grinding itself. Crews use shrouded grinders connected to dust collectors rated at 99%+ filter efficiency, then follow with HEPA vacuuming between passes. Sweeping alone won’t do the job. Fine dust left behind can get in the way of adhesion, which is why clean prep is a big part of making a warranty-backed system perform the way it should.
Cracks and spalls are repaired after prep. Trained crews know the difference between hairline cracks and structural movement cracks, then route, fill, or patch each defect based on its size and movement. Done right, this step helps limit moisture intrusion, keeps cracks from telegraphing through the finished floor, and supports better long-term wear under vehicle traffic and seasonal expansion and contraction. It also helps cut down on callbacks.
With the slab properly profiled and repaired, the crew can move on to coating placement.
Basecoat, Chip Broadcast, and Topcoat Application
The basecoat needs the right mix ratio and spread rate, then crews back-roll it to get a uniform film build across the full slab. That back-rolling step helps remove dry spots, lap marks, and roller ridges. Crews also stage batches with care because temperature and humidity can change working time.
Chips are broadcast while the basecoat is still tacky. After the basecoat cures, crews scrape and vacuum excess chips in multiple directions so loose or upward-standing flakes don’t stay behind before the topcoat is applied. The UV-stable topcoat is then rolled out evenly to lock in the chips and help guard against abrasion and stains. Slip-resistant additives can be added where specified. The end result is a tougher floor with a more even finish.
Comparison Table: Basecoat, Chip Broadcast, and Topcoat Checkpoints
| Step | Key Task | Typical Timing | Quality Check | Common Installation Mistake |
|---|---|---|---|---|
| Basecoat | Mix at correct ratio, spread evenly, back-roll | After prep is complete | Uniform film build, no dry spots or lap marks | Under-application or skipping back-rolling |
| Chip Broadcast | Broadcast flakes into tacky basecoat | While basecoat is still open/tacky | Even coverage, consistent density | Broadcasting after the basecoat starts to cure |
| Chip Scraping & Vacuuming | Remove loose and standing chips | After basecoat has cured | No upward-standing flakes, smooth chip layer | Scraping in only one direction or leaving debris |
| Topcoat | Roll UV-stable coat evenly over chip layer | After chip cleanup is complete | Consistent coverage, no thin spots or roller lines | Poor mixing, uneven rolling, or insufficient coverage |
Cure Timing, Safety, and Quality Control on the Jobsite
After surface prep and coating, the focus shifts to three things that matter on every job: cure timing, site safety, and the final handoff.
Cure Windows, Weather Conditions, and Return-to-Service Timing
Once the topcoat goes down, the clock starts.
At 70°F, Penntek polyurea systems are usually:
- tack-free in 45–120 minutes
- hard dry in 2–4 hours
- ready for light foot traffic in 4–6 hours
- ready for vehicles in about 24 hours
In cooler or more humid conditions, return-to-service often moves to 36–48 hours. Full chemical resistance usually takes about 72 hours.
That timing isn’t just a detail on a spec sheet. It affects when someone can walk through the space, drive on it, or get back to work. Crews adjust application pace and cure timing based on jobsite conditions, then give owners a plain-English timeline for what happens next. Before the area reopens, crews check for even coverage and consistent chip spread.
PPE, Ventilation, Dust Control, and Work-Zone Safety
Safety on a Penntek jobsite protects the crew and everyone else in the building while the work is happening.
Training covers the PPE needed for each phase, including eye protection, chemical-resistant gloves, and the correct respirator. Crews also use HEPA dust collection and local exhaust ventilation to limit dust and vapor exposure. A clean, controlled work area helps protect workers and keeps the finish in good shape while it cures.
Work-zone control matters just as much. Crews block access with tape, cones, barriers, and signage until the floor is safe to enter again. In active small-business spaces, they also work with managers to reroute foot traffic and close off sections for a short time when needed.
Comparison Table: Following Training Standards vs. Skipping Them
Training standards are easiest to spot in two places: the finished floor and the amount of downtime tied to the job.
| Outcome | Following Training Standards | Skipping Training Standards |
|---|---|---|
| Floor Life | Longer service life, fewer callbacks, less premature wear | Shorter service life, higher risk of peeling and early wear |
| Appearance Consistency | Even gloss, uniform chip coverage, cleaner finish | Uneven texture, thin spots, or visible lap marks |
| Safety Risk | Lower; PPE, HEPA dust control, ventilation, and barriers in place | Higher; more dust, slip, and wet-coating contact risk |
| Downtime | Predictable return-to-service timing | Unpredictable; repairs or re-coats can extend time out of service |
| Warranty Support | Full manufacturer-backed support when procedures are documented | Claims may be denied if procedures weren’t followed |
Croc Coatings documents each step to support its lifetime residential warranty on Penntek Evolution floors.
What Owners Get from Trained Installation and Warranty-Backed Work
Longer Floor Life and More Consistent Results
Once the installation is done, most owners care about one thing: How will this floor hold up day after day?
That’s where training starts to matter in a very practical way. When crews are trained on surface prep, repair work, and cure timing, they’re much more likely to install the system the right way from the start. And that has a direct effect on floor life.
Put simply, correct installation helps the floor resist cracking, peeling, and wear for a longer period in daily use. It also leads to more consistent results from one project to the next, which is a big deal if you don’t want surprises after the job is finished.
Warranty Support and What Trained Penntek Dealers Bring to Local Projects
That consistency also matters for another reason: warranty coverage depends on the work being done to spec.
Penntek requires certified installation for manufacturer-backed residential warranty coverage, which covers common finish and material defects. For owners, that means the floor isn’t just installed correctly. It’s also backed the way it should be.
When a trained Penntek dealer handles a local project, the owner gets more than the coating itself. They get installation that lines up with Penntek’s requirements, which helps protect warranty support if a covered issue comes up.
FAQs
How can I tell if a crew is properly trained?
Look for a crew that follows a documented, standard process. A well-trained team should keep formal records of jobsite conditions during installation, including air temperature, slab temperature, and humidity.
They should also write down key checks, like moisture testing and water drop tests. And they should give you a written repair map that shows exactly how they plan to deal with cracks or joints.
What jobsite conditions can delay floor curing?
Several jobsite conditions can slow curing or lead to problems:
- Temperatures outside the usual 40°F to 90°F application range
- High humidity or slab temperatures below the dew point, which can lead to condensation
- Excess moisture in the concrete, especially in newer slabs or slabs that fail moisture testing
- Poor surface prep, such as oil, grease, or old sealers
Even one of these issues can throw things off. For example, if moisture gets trapped in the slab or condensation forms on the surface, the coating may not cure the way it should. And if the floor hasn’t been cleaned or prepped well, adhesion can suffer from the start.
What paperwork supports the warranty?
Register the installation within 30 days after the job is finished.
Keep a signed walk-through record with the approval packet. That record should include:
- Pre-installation photos
- Repair notes
- Moisture readings
- Environmental logs
- Confirmation of the installed finish
You should also keep the original contract. It needs to show the scope of work, material specifications, and full warranty terms.
These records help confirm that the installation was done correctly and that quality checks were completed if performance questions come up later.