Most floor coating failures start before the crew opens the first bucket. If I want a Penntek floor to last, I need to check the slab for moisture, cracks, oil, old coatings, hardness, and repair needs before installation day.
Here’s the short version: a pre-install review helps me decide if the slab is ready, what prep work is needed, and whether the one-day install can stay on schedule. If I skip that step, I risk peeling, blistering, weak bond, rough finish, and early wear. The basic checks are simple:
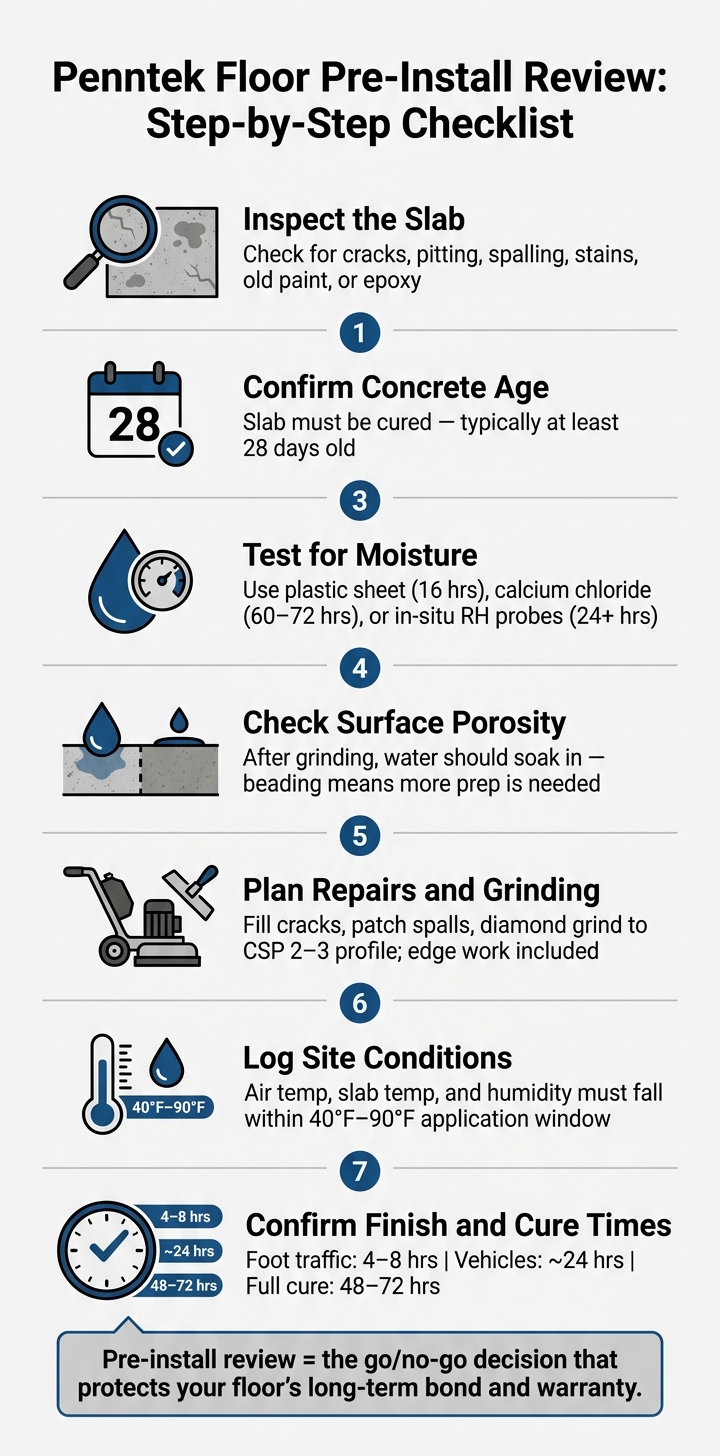
- Inspect the slab for cracks, pitting, spalling, stains, and old paint or epoxy
- Confirm the concrete is cured, often at least 28 days
- Test for moisture with methods like plastic sheet, calcium chloride, or in-slab RH probes
- Check porosity after grinding with a water drop test
- Plan repairs and grinding before install day
- Log site conditions like slab temperature, air temperature, and humidity
- Confirm finish choice and cure times, such as 4–8 hours for foot traffic and about 24 hours for vehicles
A few numbers matter right away. Penntek installation is commonly done within a 40°F to 90°F application range, and moisture test timing can run from 16 hours to 72+ hours, depending on the method. That means the floor is not judged by looks alone.
If I had to sum it up in one line, it’s this: the pre-install review decides whether the concrete can hold the coating for the long haul.
Penntek Floor Pre-Install Review: Step-by-Step Checklist
PennTek Concrete Coatings Process

sbb-itb-a0e5ae3
Slab Inspection and Jobsite Documentation
Start with a full visual walk-through and mark every defect. The goal is simple: find anything that could weaken adhesion or cut the floor’s service life short.
Checking Cracks, Spalling, Pitting, and Old Coatings
Mark cracks as either shrinkage cracks or movement cracks. That matters because each one calls for a different fix.
Spalling and pitting show up a lot on older garage slabs, especially in North Idaho and Eastern Washington, where deicing salts can wear down the surface over time. Any paint, sealer, or old epoxy also needs to be flagged for removal. Penntek bonds to bare, mechanically profiled concrete – not to hidden layers sitting on top.
| Defect Type | Impact on Coating Performance | Required Repair Before Approval |
|---|---|---|
| Shrinkage or movement cracks | Telegraphing or coating failure along crack path | Grind open, clean, fill with polyurea or flexible joint material, regrind |
| Shallow spalling | Weak surface, poor adhesion | Grind to sound concrete; patch with polymer-modified mortar |
| Deep spalling | High failure risk; loss of slab integrity | Partial slab replacement or structural repair before coating |
| Pitting (light to severe) | Uneven finish; trapped air; delamination risk | Mechanical prep; fill and sand smooth; multiple passes if severe |
| Old paint, sealer, or epoxy | Poor adhesion; peeling; unknown compatibility | Full removal via grinding or shot-blasting to bare concrete |
Only defects that can be fixed within the approved prep scope move ahead. After the defects are mapped, the next job is judging slab strength and checking for contamination.
Reviewing Concrete Age, Hardness, and Contamination
Visible damage shows what needs repair. Slab condition shows how the floor needs to be prepped.
The slab must be fully cured – usually at least 28 days old. New concrete can still release moisture, and it may also hold curing compounds or sealers that block adhesion. If the slab is too new, the install gets pushed back until it passes moisture testing.
Hardness also changes the prep plan. Soft concrete comes off fast, so installers use lighter tooling to avoid gouging the slab. Hard, power-troweled concrete is the opposite story. It needs heavier planetary grinders and harder-bond diamond tooling to reach the surface profile Penntek needs for a solid bond. Installers usually judge hardness through scratch tests or by watching how the slab reacts during the first grinding pass.
Contamination is the other big issue. Oil and grease in garage slabs often lead to local bond failures, including bubbles, fisheyes, and peeling. A simple water-bead test helps spot trouble: if water beads up instead of soaking in, the concrete pores are blocked. In colder areas like North Idaho and Eastern Washington, deicing salts can also add to pitting and deeper slab damage. Those floors may need high-pressure washing, scrubbing, and mechanical grinding before profiling starts. Surface blockers have to be removed first.
Recording Conditions for Approval and Warranty Support
Once the inspection is done, record the findings right away in the project file.
Installers log the air temperature, slab temperature, and humidity at the time of inspection. They also confirm that conditions fit Penntek’s approved application window, which is typically 40°F to 90°F, with the slab temperature kept above the dew point so condensation doesn’t form.
Photos should be taken before prep begins, after repairs are finished, and after mechanical profiling. Written repair notes should list each defect, the repair needed, and the tools and materials required. Every finding becomes part of the approval record, and that packet supports both job approval and warranty documentation.
Moisture Testing and Surface Prep Planning
Once the slab inspection is done and the defects are mapped, moisture testing turns that map into a clear approval call and a prep plan.
Moisture and Porosity Tests That Guide Go or No-Go Decisions
Use the inspection map to pick the right moisture test and define the prep scope.
Each test answers a different question. And the result tells the installer whether the slab is approved, approved with remediation, or needs to be delayed.
The plastic sheet test (ASTM D4263) is the fastest field check. A little moisture under the plastic can be normal. But if you see beads of water, the slab needs follow-up testing with numbers before work moves ahead.
Calcium chloride testing (ASTM F1869) measures the moisture vapor emission rate, or MVER, in lbs/1,000 sq ft/24 hours. That gives the crew a number they can compare against the coating system’s limits.
In-situ relative humidity (RH) probes (ASTM F2170) measure moisture inside the slab, which surface tests can miss. That’s why this method is often preferred for new construction and thicker slabs.
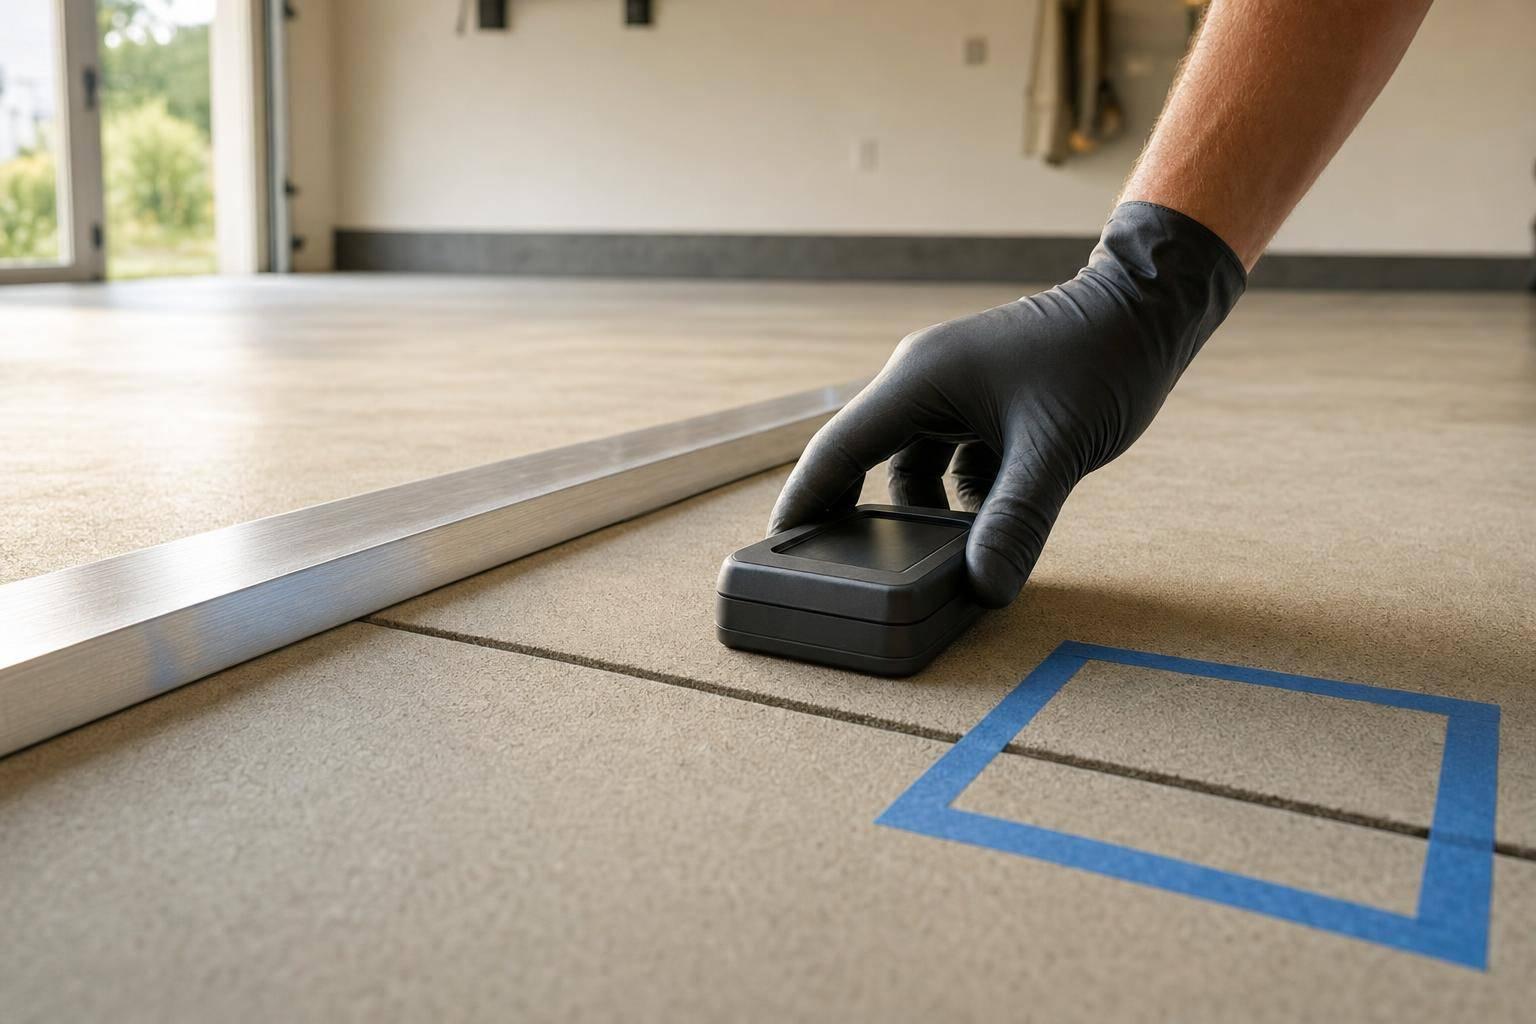
A water drop test checks whether grinding has opened the surface pores. After grinding, a few drops of water should soak in fast. If the water beads up, the surface still isn’t open enough, and more prep is needed before the base coat can bond the way it should.
| Test Method | What It Tells the Installer | Test Duration |
|---|---|---|
| Plastic Sheet (ASTM D4263) | Whether surface moisture is present | 16 hours |
| Calcium Chloride (ASTM F1869) | Vapor emission rate against coating limits | 60–72 hours |
| In-Situ RH Probes (ASTM F2170) | Internal slab moisture at depth | 24+ hours after equilibration |
| Water Drop Test | Whether the surface profile is open after grinding | 5–10 minutes |
Repair Notes and Mechanical Prep Requirements
Test results and inspection findings should be turned into a written repair map that drives the grinding scope. Each crack, spalled area, pit, pop-out, joint, and old patch or coating needs a note with its location, size, and required fix. Not all defects are the same. Active structural cracks need a different repair path than static shrinkage cracks. Joints also need their own plan so the coating system doesn’t lock the slab in places where movement is expected.
Diamond grinding is the main mechanical prep step. The goal is to open the surface on sound concrete, usually to a CSP 2 or CSP 3 profile. That lets the polyurea base coat penetrate and bond instead of sitting on top of laitance, leftover sealer, oil, or dense surface paste. Field grinding matters, of course, but edge work matters just as much. If walls, corners, or drains are missed, those areas can turn into weak spots later.
After grinding, a water drop test checks whether the slab is open enough. If water still beads, the crew needs more grinding passes or chemical treatment before the project can be cleared for coating.
Prep Task List: Tools, Materials, and Time
The prep plan should break the work into specific tasks so the crew can stage equipment, estimate labor, and spot issues that may push the schedule. Moisture remediation and heavy patching can add hours that homeowners don’t always see coming.
| Prep Task | Required Tools / Materials | Est. Labor (per 100 sq ft) | Impact on Readiness |
|---|---|---|---|
| Degreasing / Cleaning | Concrete degreaser, stiff brush, pressure washer | 20–30 minutes | Removes surface oils blocking adhesion |
| Diamond Grinding | Planetary grinder, 30/40-grit diamond tooling | 1–1.5 hours | Opens pores; creates required surface profile |
| Edge Work | Hand grinder with dust shroud | ~45 minutes | Ensures bond at walls, corners, and drains |
| Crack / Pit / Spall Repair | Penntek CR Mender, sand, trowel | 20–30 minutes | Levels surface for seamless base coat application |
| HEPA Vacuuming | Industrial HEPA vacuum | ~15 minutes | Removes bond-breaking dust from open pores |
All diamond grinders should stay connected to vacuum systems with HEPA filters during the entire prep phase. Once the slab is clean, repaired, and properly profiled, the job is ready for finish selection and scheduling.
Finish Selection, Installation Timeline, and Final Approval
After the slab passes inspection and prep planning, there are three calls left to make: the finish, the install date, and the final sign-off.
Choosing the Right Penntek Finish for the Space
Finish selection should start with how the space will live day to day. That means looking at traffic, moisture, chemicals, vehicle exposure, and sunlight. The finish needs to fit both the slab condition and the way the area will be used.
A garage or shop usually needs heavier flake coverage and better chemical resistance. Patios and pool decks need UV-stable, slip-resistant finishes. Basements and indoor spaces often work best with a smoother surface that’s easier to clean.
Croc Coatings pairs Penntek Evolution with those conditions across North Idaho and Eastern Washington. Penntek Evolution is up to 4x stronger than traditional epoxy, and its built-in flexibility helps it move with the concrete instead of cracking as temperatures shift.
Once the finish is approved, the crew can stage materials and lock in the install day.
What the Installation Schedule Looks Like
The schedule begins only after the slab is cleared for coating. A Penntek Evolution installation is completed in one day.
After the morning prep check confirms the surface profile, repair integrity, and site conditions, the crew applies the base coat and immediately broadcasts flake to rejection. Base coat open time runs 20–45 minutes per section, so the crew works in planned zones to keep the timing tight.
After the base coat and flake broadcast, the team scrapes and vacuums the floor in 1–2 hours for a standard 2- or 3-car garage, then applies the clear topcoat. Return-to-service timing is straightforward:
- Light foot traffic in 4–8 hours
- Vehicles in about 24 hours
- Full cure in 48–72 hours
Final Approval Checklist for Durability and Warranty Coverage
The last step is a signed walk-through tied to the recorded prep and coating details. This final review confirms that the installed system matches the approved scope and supports the warranty record.
| Approval Item | Sign-Off Item | Purpose |
|---|---|---|
| Moisture readings within limits | Slab moisture within manufacturer limits | Confirms the slab met moisture limits |
| Repairs completed and sound | Cracks, spalls, and pits filled and profiled | Documents completed repairs for sign-off |
| Profile and cleanliness verified | Correct mechanical profile, no dust or oil | Records proper prep for warranty support |
| Environmental conditions documented | Air temp, slab temp, and humidity at each coating step | Confirms install stayed within product requirements |
| Finish choice approved | System, color, flake size, and texture confirmed with owner | Records the exact finish installed |
| Return-to-service timing acknowledged | Walk-on and drive-on windows explained and accepted | Protects the curing film from early-use damage |
For Croc Coatings residential installations, this sign-off record supports the lifetime warranty. If a performance question comes up later, the approval record – moisture readings, environmental logs, repair notes, and finish confirmation – gives everyone a clear reference point. Owners should keep a copy of the sign-off record with their property files.
Conclusion: The Pre-Install Steps That Protect the Floor
A Penntek floor’s long-term performance is decided before the first coat goes down. By the time the slab is approved, the review process should have already caught the problems that can wreck a coating job later. That’s the whole point: find slab issues early, not after installation starts.
Moisture testing is one of the biggest go/no-go checks. Hidden vapor transmission can lead to coating failure even when the surface looks fine at first glance. That’s why moisture readings and surface profile have to fall within Penntek’s approved limits before installation begins.
Repairs carry the same weight. Cracks, pits, and spalling need to be fixed before coating because they can weaken bond strength and show through the finish.
Documentation connects the entire process. Inspection notes, moisture results, photos, and repair records create the baseline for quality control and warranty support. On Croc Coatings projects, that paper trail shows the floor passed the pre-install review and gives owners a clear point of reference if questions come up later. It links inspection to installation in a way that’s simple and easy to track.
The pre-install review protects the floor before coating begins.
FAQs
What can delay a one-day Penntek installation?
Although the Penntek Evolution system is built for a one-day installation, that timeline can stretch when the floor needs extra work first.
The most common slowdowns come from heavier surface prep. That includes things like severe cracks, deep oil stains, or old coatings that need to be removed before installation can start. Weather and slab conditions can also get in the way. Extreme temperatures, high humidity, or excess moisture in the concrete may need to be dealt with first so the coating can cure the right way and bond as it should.
How do I know if my concrete is too wet for coating?
Test the slab before coating. If moisture is above the manufacturer’s limit, the coating can blister, peel, or delaminate.
One simple check is the plastic sheet test. Tape a clear plastic sheet to the floor and leave it in place for 18–24 hours. If you see condensation underneath, or the concrete looks darker, that’s a sign moisture may be trapped in the slab.
If you want a more exact reading, use a moisture meter or a relative humidity probe. In most cases, the slab should stay below 4%–4.5% moisture or 75% relative humidity.
What should I do to prepare my garage before install day?
Before your Croc Coatings installation, clear out the entire garage. That means all vehicles, equipment, and stored items need to be out of the way.
The team will take care of the technical prep, including diamond grinding, moisture testing, and crack repair. An empty floor gives them full access, helps the job get started without delays, and supports proper adhesion for your Penntek Evolution system.