When managing floor coating projects in warehouses or logistics facilities, planning is everything. Without proper logistics, you risk delays, safety hazards, and operational disruptions. Here’s how to ensure a smooth process:
- Conduct a Full Site Assessment: Inspect the substrate, traffic patterns, and safety requirements to identify potential challenges early.
- Create a Traffic Management Plan: Schedule work during low-activity periods and plan temporary access routes to minimize disruptions.
- Divide Work into Zones: Prioritize high-traffic areas like loading docks first and phase the project to keep operations running.
- Set Clear Timelines for Preparation: Allow surfaces to cure properly and test for moisture to avoid coating failures.
- Manage Curing Conditions: Monitor temperature and humidity to ensure coatings cure correctly and meet safety standards.
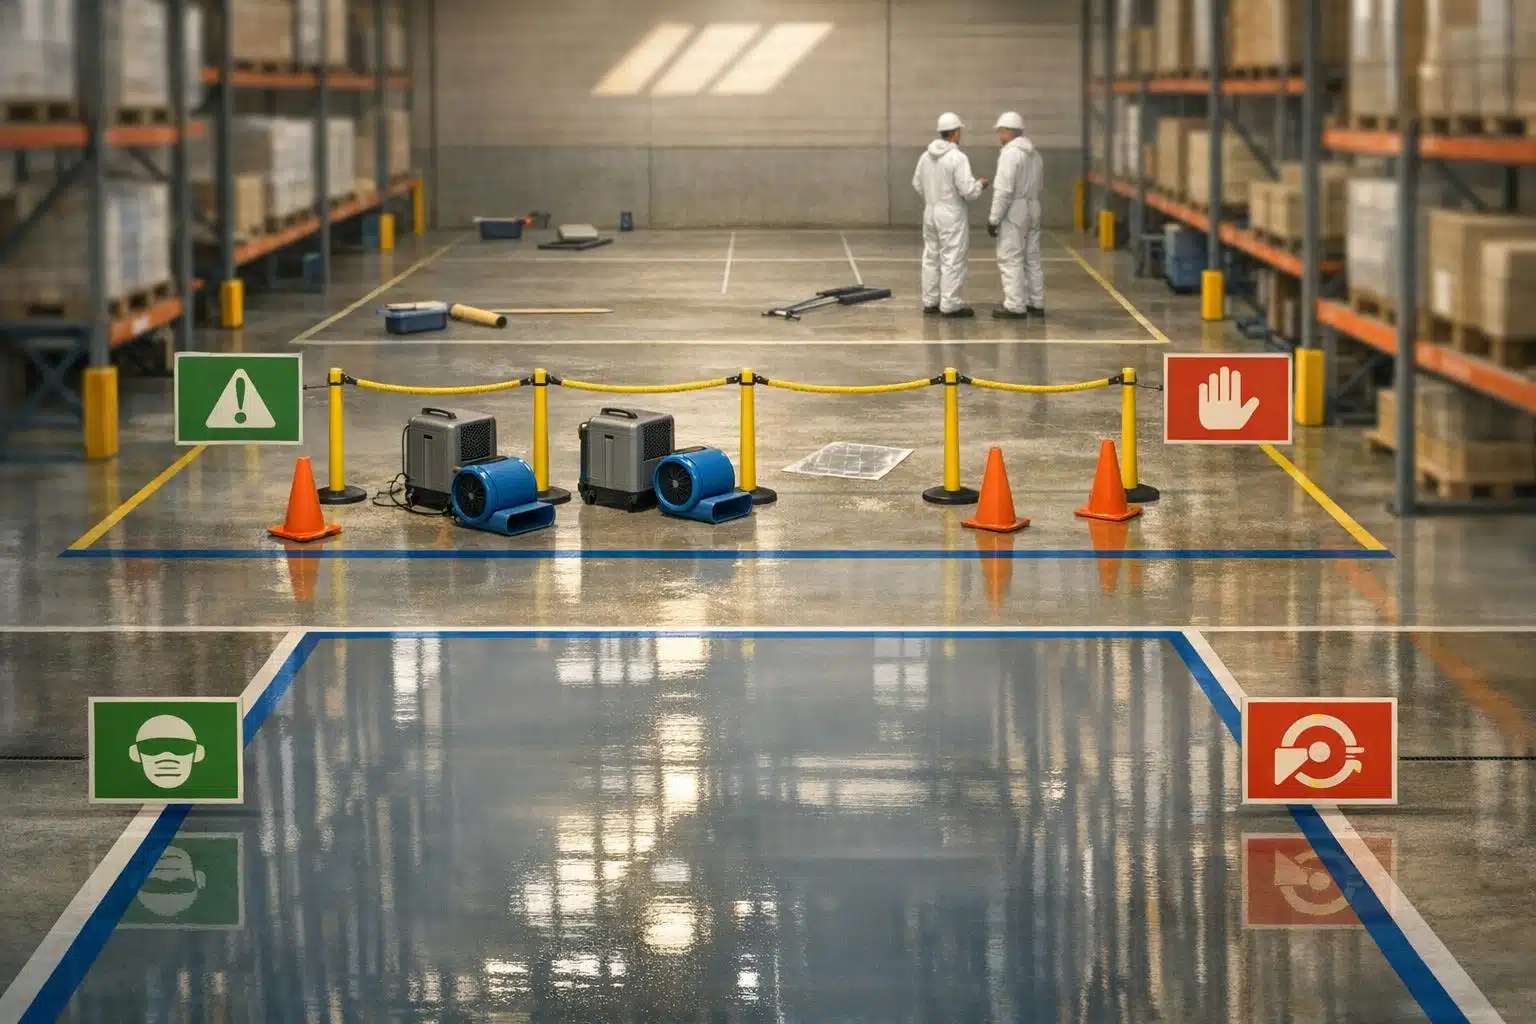
- Use Safety Signage: Clearly mark zones with ANSI-compliant colors to improve traffic flow and reduce risks.
- Plan Isolation Joints: Address cracks and inconsistencies to ensure durable, long-lasting coatings.
Efficient planning ensures minimal downtime while maintaining safety and quality throughout the project.
1. Complete a Full Site Assessment Before Starting
Before diving into a floor coating project, it’s crucial to conduct a detailed site assessment. This step ensures you can manage logistics effectively and avoid surprises down the line. The focus should be on evaluating the condition of the substrate and understanding daily traffic patterns.
Keeping Installation Efficient
Start by inspecting the concrete slab for any cracks, potholes, or surface damage that could slow down installation or compromise the coating’s durability. If there are existing sealants or coatings, identify those that need removal to ensure the new system adheres properly. Catching these issues early helps prevent delays.
Next, look at the traffic and load demands for different areas. For example, forklift-heavy zones require more durable systems, like high-build epoxy coatings, which are typically 20 mils or thicker per coat. On the other hand, areas mainly used by foot traffic might benefit from thinner, faster-curing systems, usually between 4 and 10 mils. Comparing industrial floor coatings to choose the right system for each space keeps disruptions to a minimum and ensures the facility runs smoothly during and after installation.
Reducing Disruptions to Daily Operations
During the assessment, divide the facility into zones based on how each area is used. For instance, loading docks might need coatings that can handle heavy impacts, while battery charging stations demand chemical-resistant surfaces for industrial storage. Aisleways, on the other hand, often call for highly visible markings. By phasing the coating work and prioritizing critical access routes, you can maintain operations without major interruptions. Use ANSI-compliant colors like Safety Yellow, Red, Blue, or Green for walkway striping to ensure clear demarcations.
Meeting Safety Standards and Compliance
This is also the time to pinpoint any specific safety or compliance needs. For example, facilities handling electronics may require Electrostatic Dissipative (ESD) flooring, while food storage areas might need USDA-compliant urethane cement coatings. Additionally, testing how moisture affects concrete and incorporating slip-resistant materials, such as aluminum oxide or quartz, can help prevent coating failures and improve safety in spill-prone areas. Addressing these factors early avoids costly fixes later and ensures compliance with workplace standards.
At Croc Coatings (https://croccoatings.com), these assessments are the backbone of creating customized coating solutions tailored to each facility’s specific needs.
sbb-itb-a0e5ae3
2. Create a Traffic Management and Access Plan
Once you’ve completed your site assessment, the next step is to map out traffic and access routes to ensure operations continue smoothly during the coating process.
Minimizing Traffic Disruption and Maintaining Access
To keep things running with minimal interruptions, develop a traffic management plan that includes temporary routes, high-visibility floor markings, and scheduling work during off-peak hours. For example, coordinate with your team to address high-traffic zones like loading docks or main aisleways during weekends or other low-activity periods. Thin-film epoxy systems – with thicknesses between 4 and 10 mils – can help speed up the process, as they allow for quicker return to service compared to thicker high-build systems, which exceed 20 mils per coat. Selecting rapid cure coating systems based on your timeline can significantly reduce downtime.
Ensuring Safety and Meeting Workplace Standards
Safety is non-negotiable. Use ANSI-compliant signage to clearly mark hazard zones and safe pathways. These standardized signs provide universally recognized visual cues, making it easier for everyone on-site to identify restricted areas and approved routes.
If your facility has specific safety needs, incorporate those into the plan from the beginning. For example:
- In electronics areas, install ESD flooring to control static buildup.
- In moisture-prone zones, use slip-resistant additives like aluminum oxide or quartz to prevent accidents when those areas reopen.
Additionally, address substrate issues like cracks or potholes during the prep phase. Heavy forklift traffic can quickly turn these minor problems into serious safety risks if left unattended.
Managing Time for Preparation and Curing
Your traffic plan should also account for curing intervals between coating applications. Allowing heavy machinery or traffic onto freshly coated surfaces too soon can cause irreversible damage. To avoid this, carefully schedule curing times and include short, daily cleaning sessions between applications. This helps protect the coating while also maintaining air quality. Thoughtful scheduling ensures your facility continues to operate efficiently without compromising safety or quality.
3. Apply Coatings in Phases by Zone Priority
Keeping Operations Running Smoothly
Once you’ve nailed down traffic management, the next step is to organize your floor coating project into manageable zones. By dividing the work into sections – like aisleways, loading docks, and battery storage areas – you can keep your facility running without a full shutdown. This approach ensures that critical areas remain functional while allowing you to tailor coatings to the specific needs of each zone. For example, battery storage areas need coatings that can withstand chemical exposure, such as chemical-resistant coatings.
"The buzzing activity that fills the vast spaces between a warehouse’s walls requires skilled coordination – and, more importantly, high-performance flooring".
Phasing the work also helps crews coordinate around the constant movement of forklifts and heavy machinery, keeping disruptions to a minimum.
Reducing Traffic Interruptions
The type of coating you choose plays a big role in how quickly each section can be reopened. For areas with tight timelines, thin-film epoxy systems (4–10 mils thick) are a great option because they cure faster. On the other hand, high-build epoxy systems (20+ mils thick) are better for zones where you can afford longer curing times. Start with high-priority areas like loading docks and main aisleways to keep essential traffic routes open, and then move on to less critical sections. Safety markings can also be preserved during the process to ensure clear traffic flow. This phased approach naturally aligns with planning the preparation and curing times for each zone.
Managing Prep and Cure Times Effectively
Proper timing is everything when it comes to surface prep and curing. Skipping steps or rushing the process can lead to damage, especially if heavy machinery like forklifts is introduced too soon. Make sure each zone is fully prepped, coated, and cured before reopening it for use. This careful scheduling ensures the durability and longevity of your floor coatings.
4. Set Clear Timelines for Surface Preparation
Time Management for Surface Preparation and Curing
To achieve the best results, concrete surfaces should cure for at least 28 days before coating. This waiting period allows enough time for moisture to escape, ensuring a strong bond with the coating. However, keep in mind that factors like the concrete mix, humidity levels, and temperature can extend this curing time.
Surface preparation is equally important. Use methods like shot blasting or diamond grinding to create a surface that promotes proper adhesion. Make sure to finish this step before performing any moisture tests, as it ensures the accuracy of the test results.
Minimizing Disruption to Traffic and Access
Moisture testing typically takes between 24 and 72 hours for reliable results. Skipping or rushing this step can lead to issues like common coating failures, which result in expensive repairs and delays. Most manufacturers recommend that moisture vapor transmission rates stay below 3 pounds per 1,000 square feet over 24 hours (based on ASTM F1869 standards) before proceeding with installation.
If the standard 28-day cure isn’t feasible, modern moisture-tolerant primers offer a faster alternative. These primers can allow coating applications as early as 7 days after pouring, cutting project timelines by as much as 75% while still meeting warranty requirements. However, it’s crucial to test moisture levels across multiple areas of the slab. Even a single high-moisture spot can create problems that disrupt the entire project.
5. Manage Curing Time and Environmental Conditions
After establishing clear preparation timelines, it’s just as important to manage curing conditions, especially when dealing with varying temperatures and humidity levels.
Operational Efficiency During Installation
Temperature has a significant impact on how quickly coatings cure. For instance, every 18°F drop in temperature slows the curing reaction by half. A coating designed for a 24-hour return-to-service at 70°F might take 48–72 hours to cure at 50°F. When comparing polyaspartic vs epoxy systems, epoxy in particular needs temperatures above 40°F to cure properly.
Thin-film epoxy coatings (4–10 mils) cure more quickly than thicker high-build systems (20+ mils), allowing faster reopening of treated areas. Polyaspartic coatings, on the other hand, are highly efficient, supporting foot traffic within 4–8 hours and reaching full cure in 24–48 hours – even in temperatures as low as 0°F. For applications requiring high chemical resistance, controlled heat during curing can significantly enhance the coating’s durability.
Safety and Compliance with Workplace Standards
High humidity levels – above 85% – can lead to "blushing", which is a waxy layer that interferes with adhesion between coating layers. To avoid this, the substrate surface should remain at least 5°F above the dew point to prevent moisture condensation during application. Additionally, OSHA (29 CFR 1926 Subpart Q) mandates maintaining documented cure logs and product data sheets before equipment can be returned to service or spaces can be occupied.
In areas prone to high moisture or thermal shock, urethane cement systems are a reliable choice. They meet food-grade health and safety standards while maintaining performance under challenging conditions. These factors emphasize the importance of precise environmental control during curing.
Time Management for Surface Preparation and Curing
Static timelines don’t always work for curing. Instead, follow a staged approach: the tack-free stage, light foot traffic clearance (12–24 hours for epoxy), and full chemical cure (5–7 days for epoxy). Proper timing minimizes disruptions and ensures the coating performs well over time. If ambient conditions differ from the manufacturer’s standard temperature of 77°F, adjust service milestones accordingly.
| Milestone | Epoxy (at 70°F) | Polyaspartic (at 70°F) |
|---|---|---|
| Tack-Free | 2–8 hours | 30–60 minutes |
| Light Foot Traffic | 12–24 hours | 4–8 hours |
| Residential Vehicles | 48–72 hours | 24 hours |
| Full Chemical Cure | 5–7 days | 24–48 hours |
| Heavy Load (Forklifts) | 7 days | 48 hours |
Properly managing curing times and environmental conditions not only ensures safety and compliance but also optimizes the performance and longevity of the coating.
6. Use Safety Signage and Communication Systems
Effective safety signage does more than just guide people – it plays a key role in keeping operations smooth and reducing risks on-site. When paired with solid logistics planning, these systems make communication clearer and improve overall efficiency.
Operational Efficiency During Installation
Clear signage isn’t just helpful – it’s crucial. Without it, workplaces can face traffic bottlenecks and increased safety risks.
In a large commercial or industrial space, ‘traffic jams’ aren’t just an annoyance: they are a safety hazard.
Using color-coded markings and safety signage helps prevent accidents involving forklifts, pallet jacks, and pedestrians. Unlike temporary tape that wears out quickly, permanent floor markings are built to last. These markings, combined with high-gloss or satin finishes, enhance light reflectivity, making it easier to spot debris, read labels, and operate machinery safely.
Minimization of Disruption to Traffic and Access
Permanent floor striping is a game-changer. It clearly defines storage areas, aisles, and hazard zones, while additional signage directs both vehicles and pedestrians away from active work areas. These visual tools seamlessly align with broader safety protocols, ensuring smoother operations.
Safety and Compliance with Workplace Standards
Following ANSI and OSHA standards for color-coding ensures universal understanding. For example:
- Safety Yellow marks hazards and caution zones.
- Safety Red signals restricted areas and emergency exits.
- Safety Green/Blue designates pedestrian walkways.
These markings aren’t just about compliance – they actively enhance safety. For instance, high-contrast markings at loading docks and ramps make transitions clearer, and bold outlines separate pedestrian areas from zones with heavy equipment. Sherwin-Williams highlights that resinous floor systems can meet both industry and government regulations, ensuring workplaces stay compliant.
Given that nearly 85% of workers’ compensation claims are linked to slips on slick surfaces, having clear visual indicators is a smart way to manage risks effectively.
| Safety Color | Standard Application | Operational Benefit |
|---|---|---|
| Safety Yellow | Hazards, buffers, and caution zones | Warns operators of potential danger areas |
| Safety Red | Emergency exits, fire equipment, restricted zones | Prevents access to hazardous areas |
| Safety Green/Blue | Designated pedestrian walkways | Keeps foot traffic separate from machinery |
| High-Gloss Finish | General floor surface | Enhances visibility through light reflectivity |
Incorporating permanent safety markings into floor coating systems ensures not only compliance but also smoother day-to-day operations. Croc Coatings offers solutions designed to include durable, integrated safety signage that supports both safety and efficiency.
7. Schedule Isolation Joints to Keep Operations Running
Operational Efficiency During Installation
To keep your operations moving smoothly, it’s important to plan the placement of isolation joints wisely. By phasing installations and using these joints as boundaries, you can limit work to specific zones, ensuring the rest of your facility remains fully operational. This approach ties in perfectly with the zone-based planning mentioned earlier.
Before applying coatings, address any cracks or inconsistencies in the concrete at these joints. This step ensures a seamless, durable surface capable of handling heavy forklift traffic. Skipping this could lead to expensive repairs down the line.
Minimization of Disruption to Traffic and Access
Choosing the right coating system is another way to reduce downtime. Thin-film epoxy systems, which are 4–10 mils thick, allow for quicker turnaround in busy areas compared to thicker high-build systems (20+ mils per coat). If you need a section back in service fast, thin-film options are the way to go.
Pay close attention to curing times for each coat. Allowing traffic on surfaces too soon can weaken the bond and damage the coating. To keep things organized and safe, mark active installation zones clearly with ANSI-standard line striping in colors like Safety Yellow, Red, Blue, or Green. This helps separate work areas from operational traffic lanes, protecting both your crew and your workflow.
Time Management for Surface Preparation and Curing
Rushing surface preparation at isolation joints is a mistake you can’t afford to make. All old sealants or coatings must be completely removed to ensure proper adhesion. After applying the coating, stick to the curing schedule agreed upon with your contractor. During this time, clean up any spills on newly coated areas immediately using neutral pH soaps to avoid damaging the surface. These careful preparation and curing steps work hand in hand with the phased installation strategy outlined earlier.
Comparison Table

Floor Coating Systems Comparison: Epoxy vs Polyurethane vs Polyaspartic
Here’s a quick breakdown of coating systems, comparing their application time, durability, curing needs, and ideal use cases:
| Coating System | Application Time | Durability | Curing Requirements | Best For |
|---|---|---|---|---|
| Standard Epoxy | Requires multiple coats; thin-film (4–10 mils) cures faster than high-build (20+ mils) | Strong, rigid, and capable of withstanding heavy forklift traffic and chemical exposure | Each coat cures separately and is sensitive to moisture | Best suited for warehouses and areas with heavy machinery |
| Polyurethane | Similar timeline to epoxy; professional installation recommended | Flexible, resistant to UV damage, impacts, and thermal shock | Handles temperature changes well, making it great for cold storage | Ideal for spaces with UV exposure and fluctuating temperatures |
| Penntek Evolution (Polyaspartic) | Fast application; traffic-ready within 24 hours | Four times stronger than epoxy, built for high-traffic durability and slip resistance | Rapid curing drastically reduces downtime | Perfect for projects requiring minimal operational delays |
This table highlights how each coating system meets different operational needs. For heavy-duty applications, epoxy excels with its rigidity and strength under heavy loads. Polyurethane, on the other hand, is better for absorbing impacts and handling temperature shifts, making it a great choice for cold storage environments. If speed and durability are your top priorities, Penntek Evolution (Polyaspartic) offers unmatched strength and quick installation, ensuring minimal disruption to your operations. Use an industrial floor durability analyzer to choose the system that best fits your project’s specific demands and timeline.
Conclusion
Efficient logistics planning is the key to transforming floor coating projects into seamless, low-disruption installations. By streamlining processes, businesses can cut down on downtime while improving overall operations.
Take advanced polyaspartic systems, for instance – they can shrink downtime to just 24 hours. Combine that with precise surface preparation using industrial diamond grinding and permanent safety markings, and you’re looking at a solution that reduces the need for future repairs and avoids unnecessary operational delays.
"The floor is more than just a surface to walk on; it is the foundation of operational safety." – Concrete Coatings of the Carolinas
Croc Coatings applies these principles throughout North Idaho and Eastern Washington, covering areas like Spokane and the Tri-Cities. Their exclusive Penntek Evolution industrial coating system provides a finish that’s four times stronger than traditional epoxy. Even better, it’s installed quickly to keep business interruptions to a minimum. With professional-grade surface preparation, comprehensive moisture testing, moisture testing, and a one-day installation process backed by a lifetime warranty, they manage the intricate logistics needed for both commercial and residential projects with ease.
FAQs
How do I choose the right coating system for forklift traffic and fast reopen times?
When choosing a coating system for areas exposed to heavy traffic and substantial loads, look for something built to withstand the challenge – like the Penntek Evolution system from Croc Coatings. This system is engineered to be four times stronger than epoxy, offering exceptional durability along with resistance to impacts and chemicals.
For added convenience, prioritize a coating that cures quickly and can be installed in a short timeframe – ideally within a single day. This minimizes disruptions and ensures the space is back in use fast. Before committing, consult with a professional to verify that the chosen system can handle forklift operations and other demanding conditions without compromising performance.
What moisture and temperature conditions can delay a floor coating project?
Extreme humidity or temperature – whether excessively high or low – can disrupt a floor coating project. These factors directly impact how well the coating adheres and cures. To ensure a smooth installation, it’s crucial to keep both temperature and humidity within controlled ranges.
How can we keep forklifts and pedestrians moving safely during installation?
When installing floor coatings, keeping forklifts and pedestrians safe is all about managing traffic and access effectively. Start by thoroughly preparing the concrete surface – this means repairing any cracks or chips to ensure the coating adheres properly.
Next, carefully plan the flow of traffic in the area. Use clear signage and create designated pathways to guide both vehicles and pedestrians. These measures not only enhance safety but also help prevent accidents and keep operations running smoothly throughout the installation process.